Create a Cloud Storage bucket and a Service Account for Quick Deployment
If you choose to use the quick deployment method to create a CelerData cluster in Google Cloud, you need to upload the Terraform templates to a Cloud Storage bucket that you can access, and create a service account with the Owner role for Infrastructure Manager to launch and manage necessary resources for your cluster.
(Optional) Create a Cloud Storage bucket
You can skip this section if you already have a bucket. Make sure the service account you create in the following step can access this bucket.
-
Sign in to your project in the Google Cloud console.
-
Expand the left-side navigation menu, and choose Cloud Storage > Buckets.
-
Click Create.

-
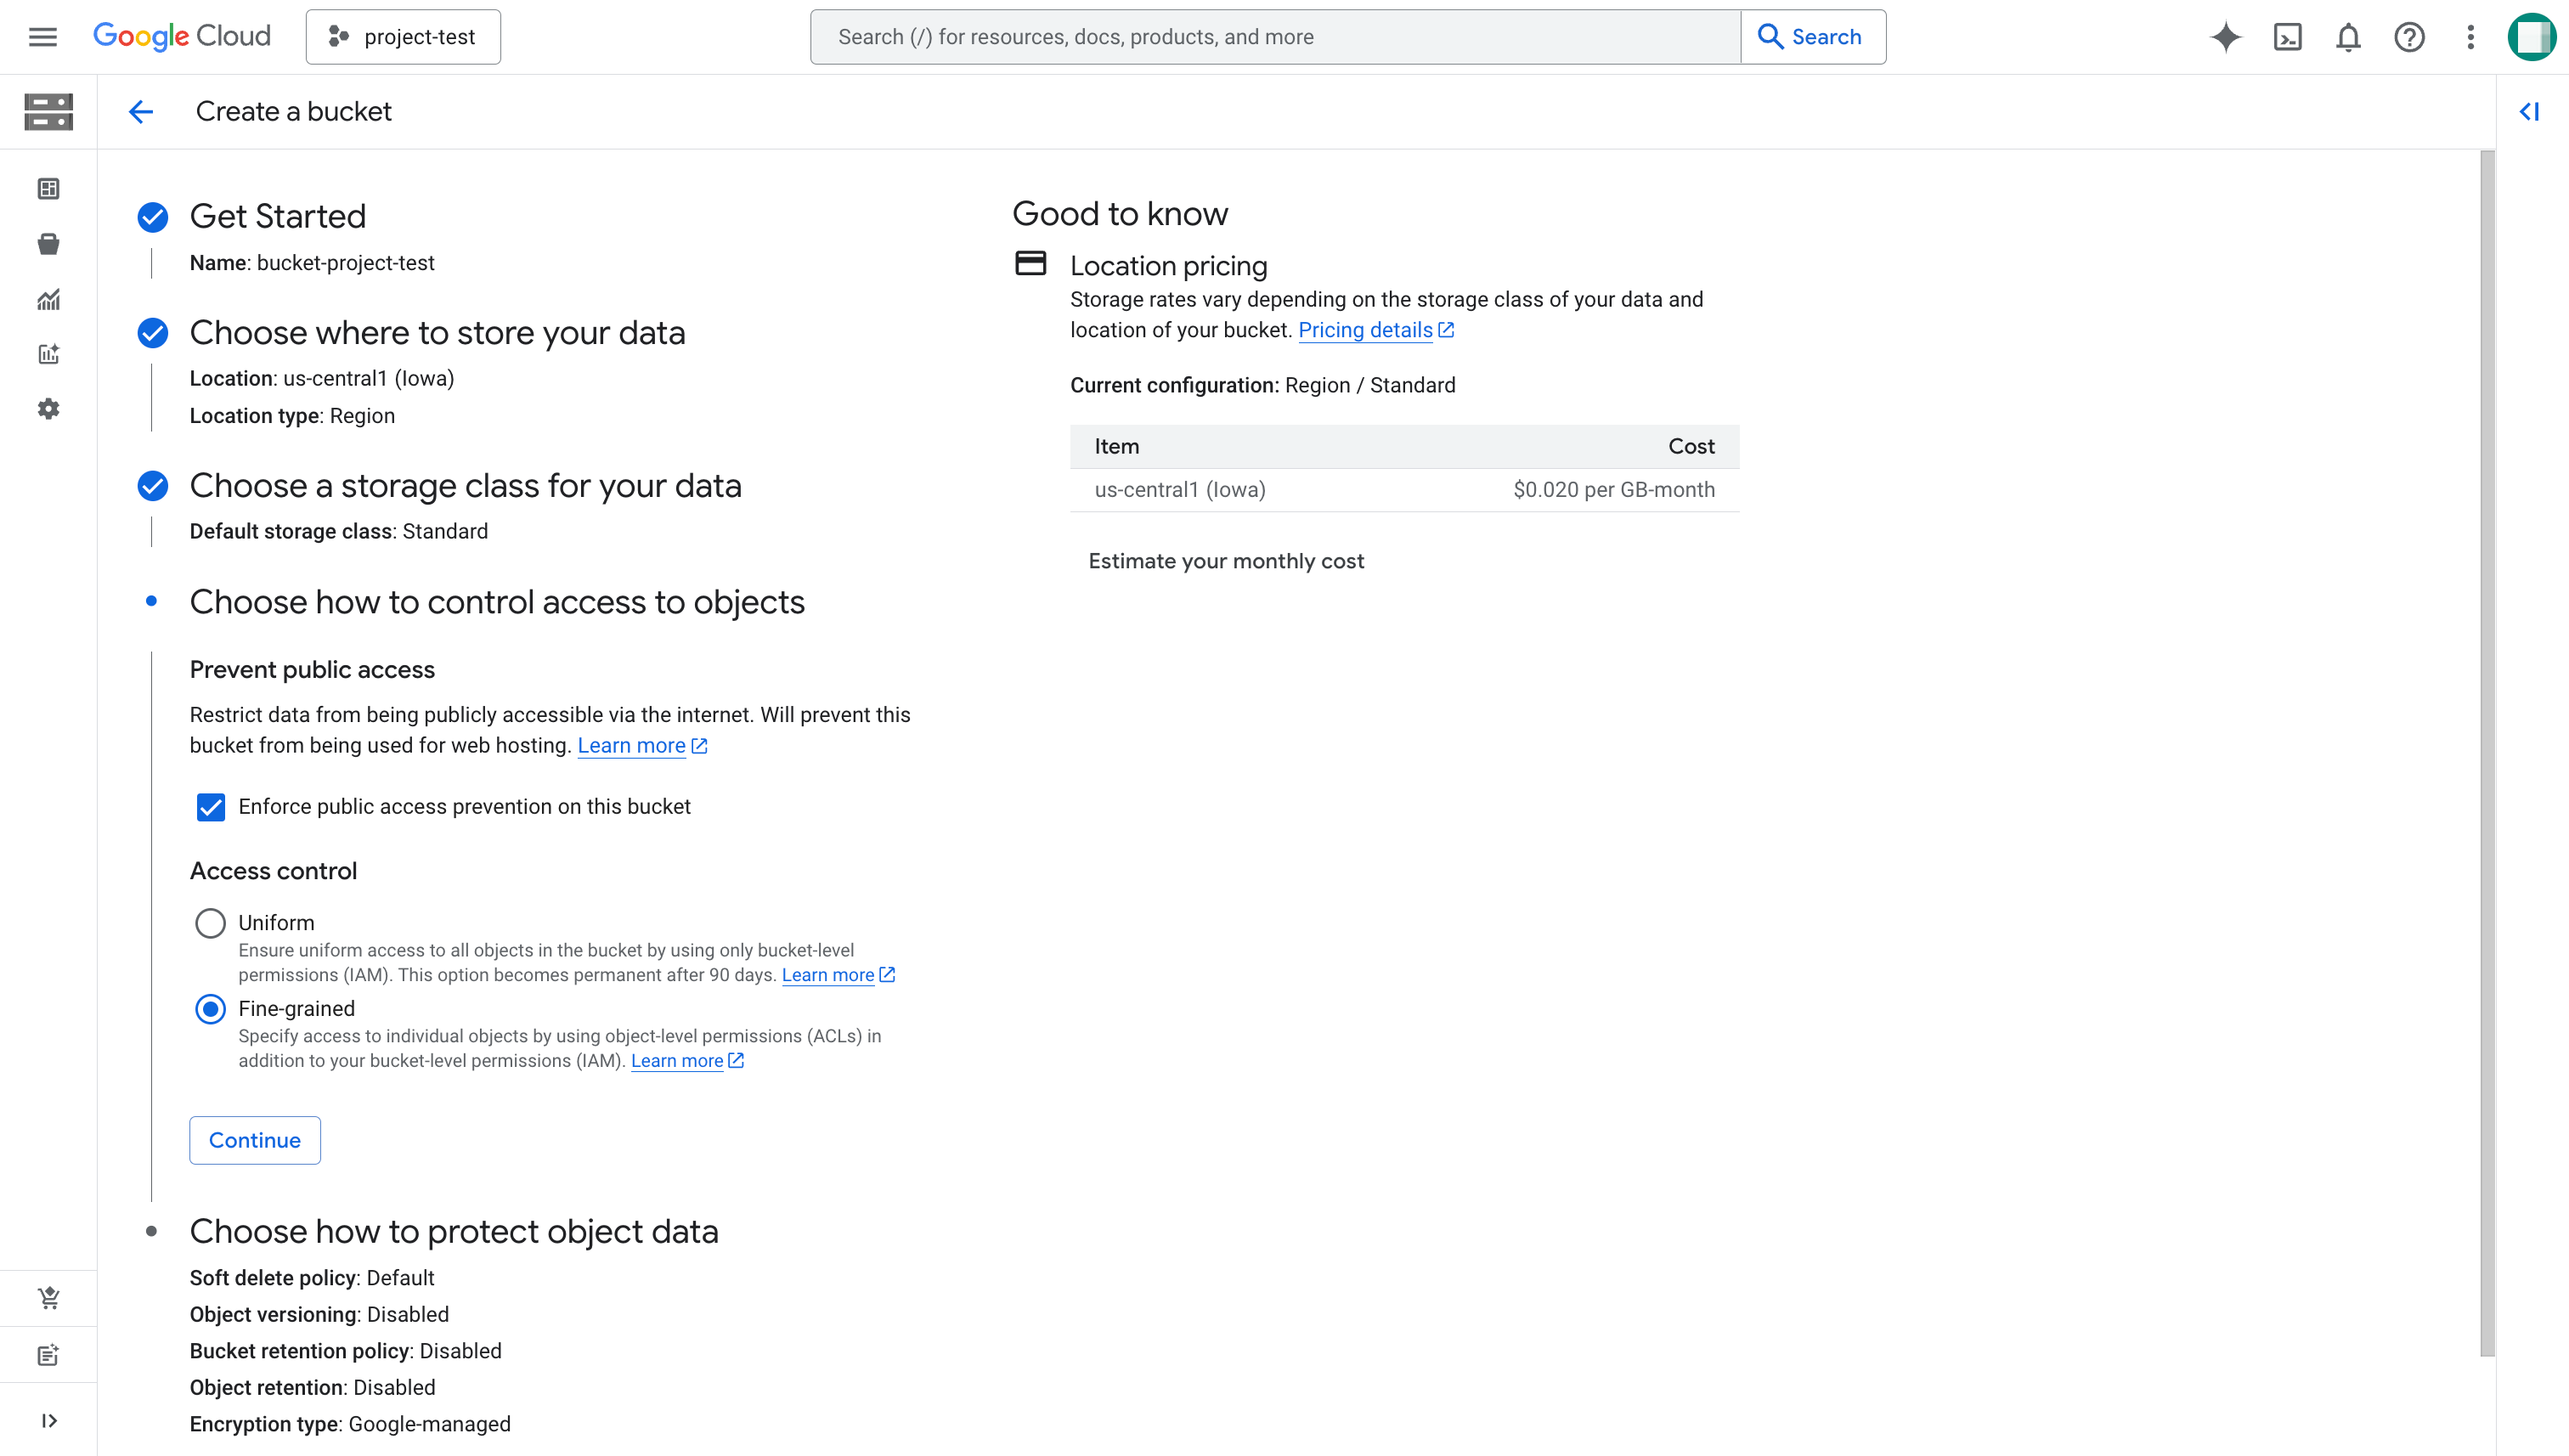
On the Create a bucket page, follow these steps:
a. Enter a globally unique name for your bucket (for example,
bucket-project-test), and click Continue.b. For Location type, choose Region, select the region where you want to deploy your cluster, and click Continue.
c. Choose Set a default Class and then Standard, and click Continue.
d. For Prevent public access, keep Enforce public access prevention on this bucket selected, and select Fine-grained in Access control.
-
Click Create.
Create a service account�
Follow these steps to create a service account:
- Sign in to your project in the Google Cloud console.
- Expand the left-side navigation menu, and choose IAM & Admin > Service Accounts.
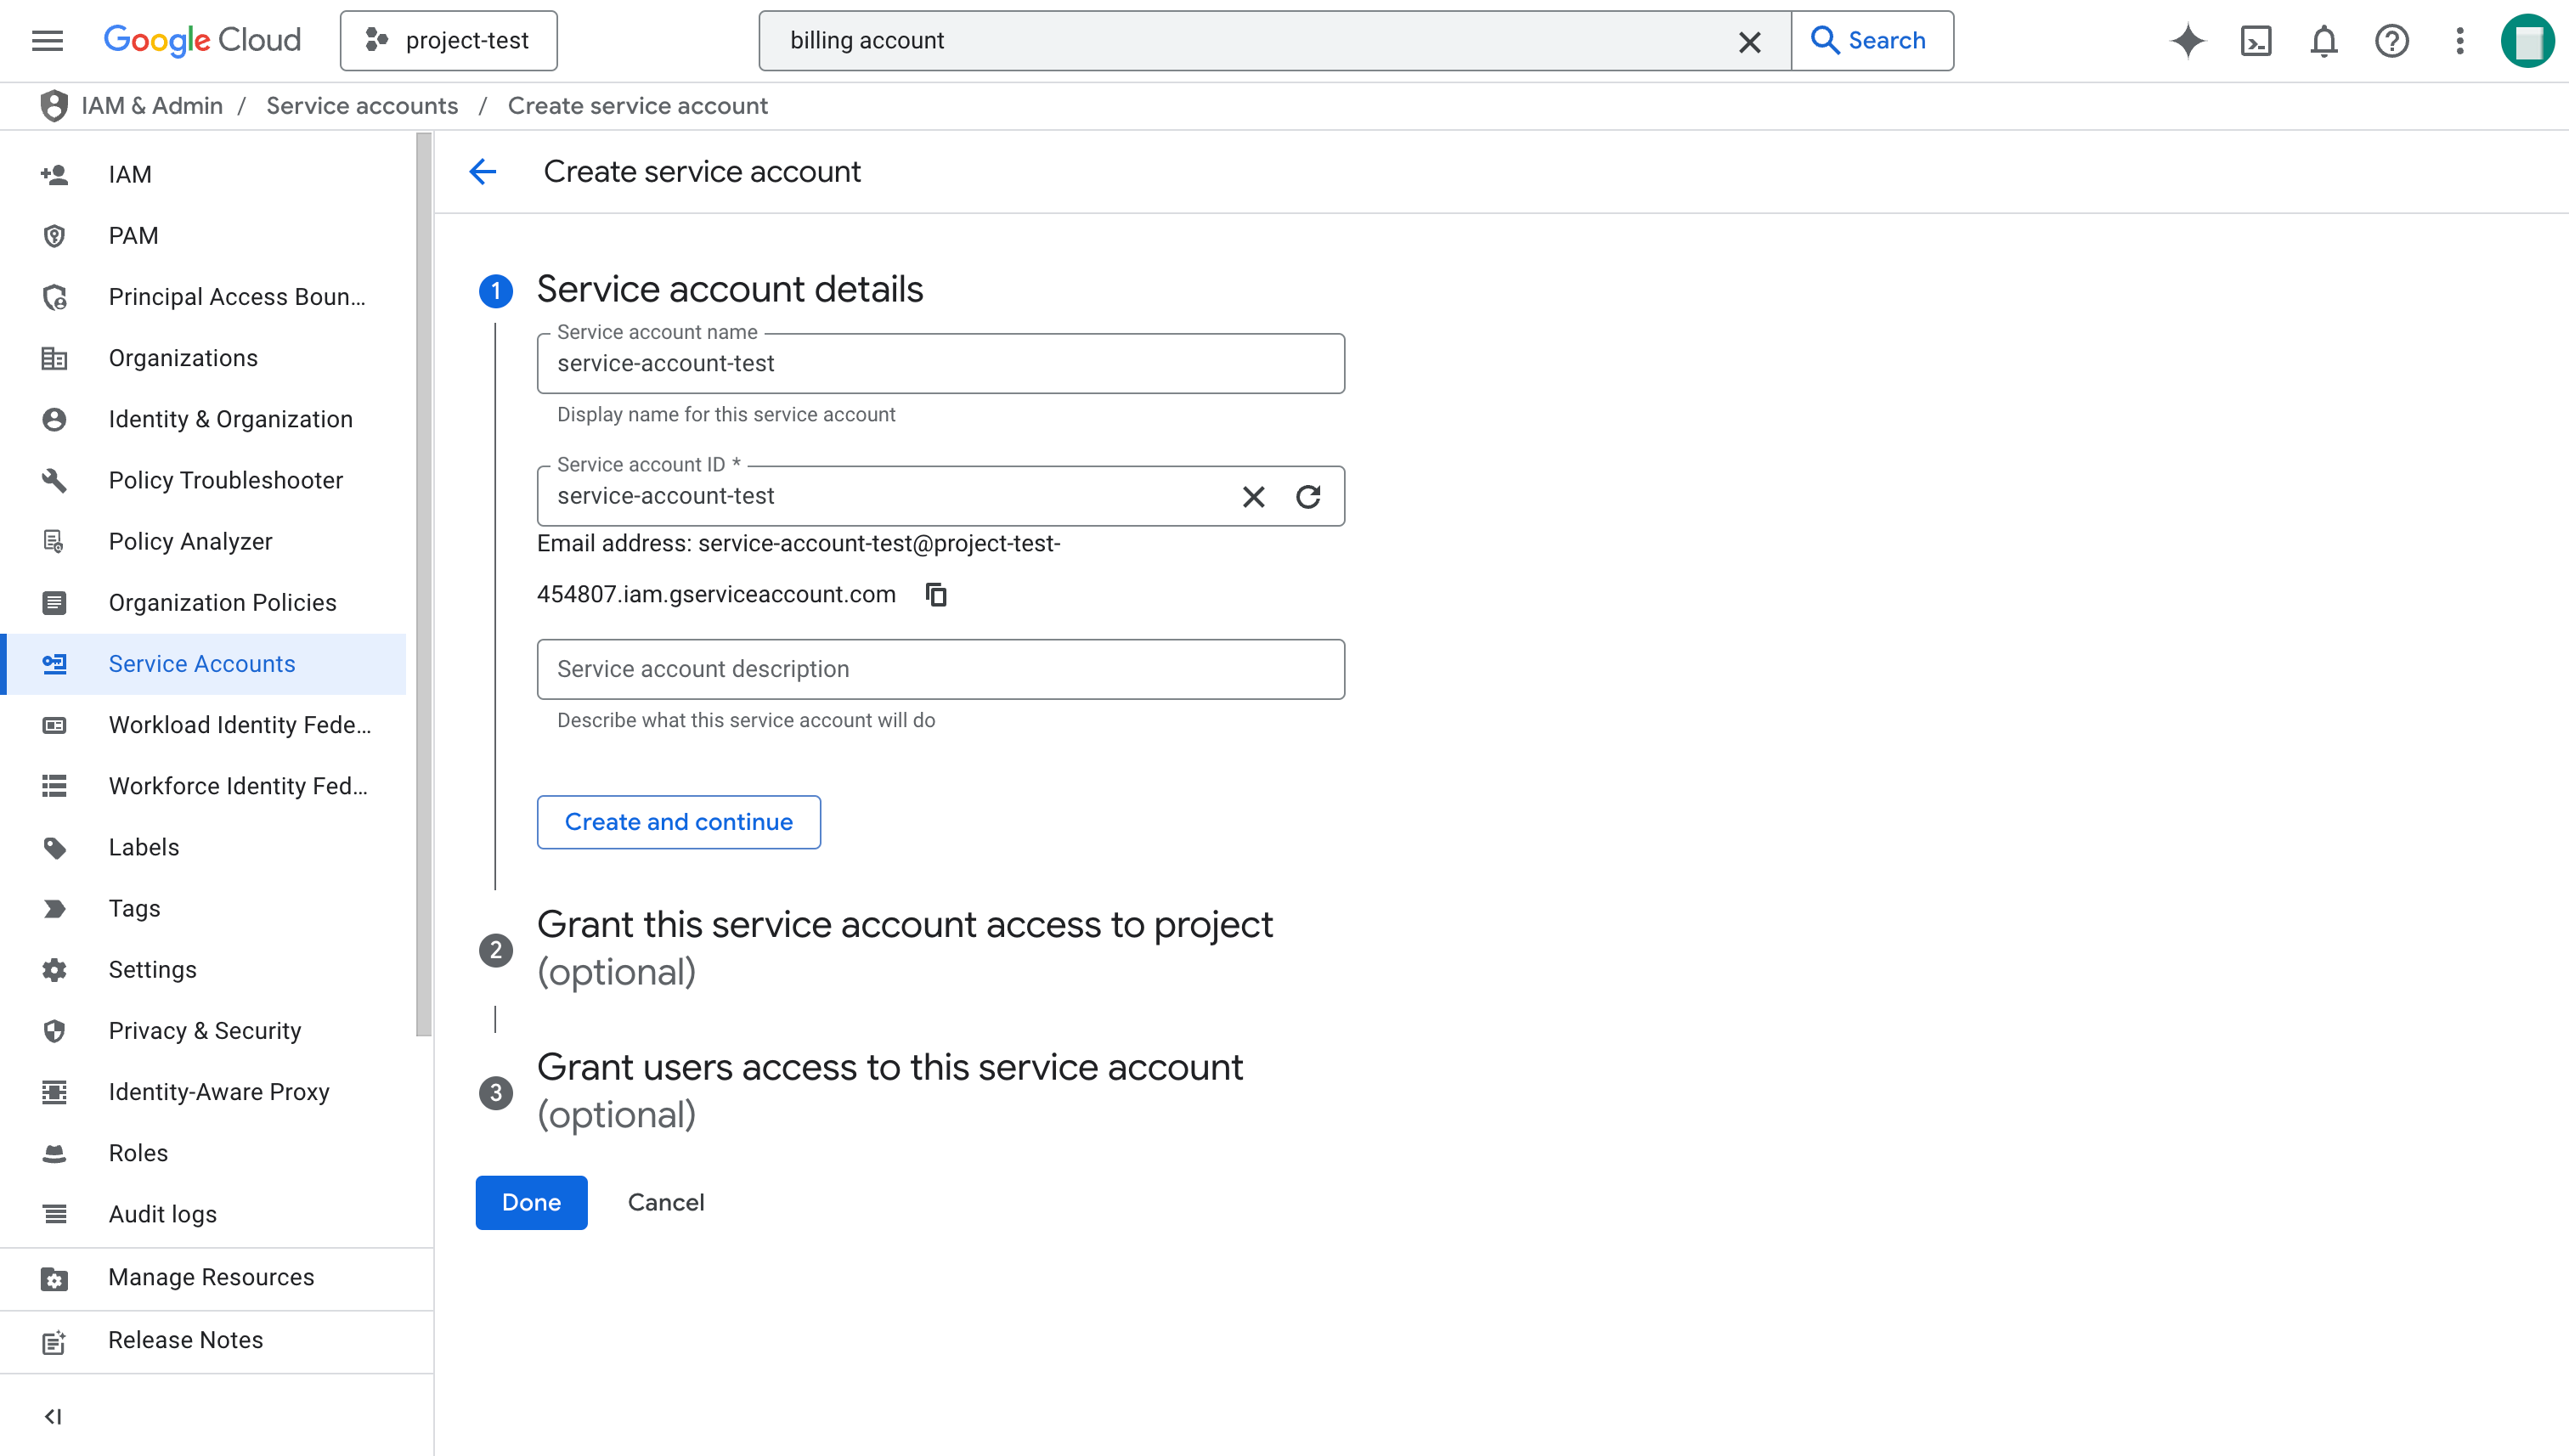
- Click Create service account.

- On the Create service account page, enter the Service account name (for example,
data-service-account), Service account ID (that is the username of the Email address), and optionally a description for the new service account, and click Done.
After the service account is created, copy its Email from the Service Accounts page and save it to a location that you can access later.
Grant the Owner role to the service account
For quick deployment, the Owner role in your Google Cloud project is required.
Follow these steps to grant the Owner role to the service account:
-
Sign in to your project in the Google Cloud console.
-
Expand the left-side navigation menu, and choose IAM & Admin > IAM.
-
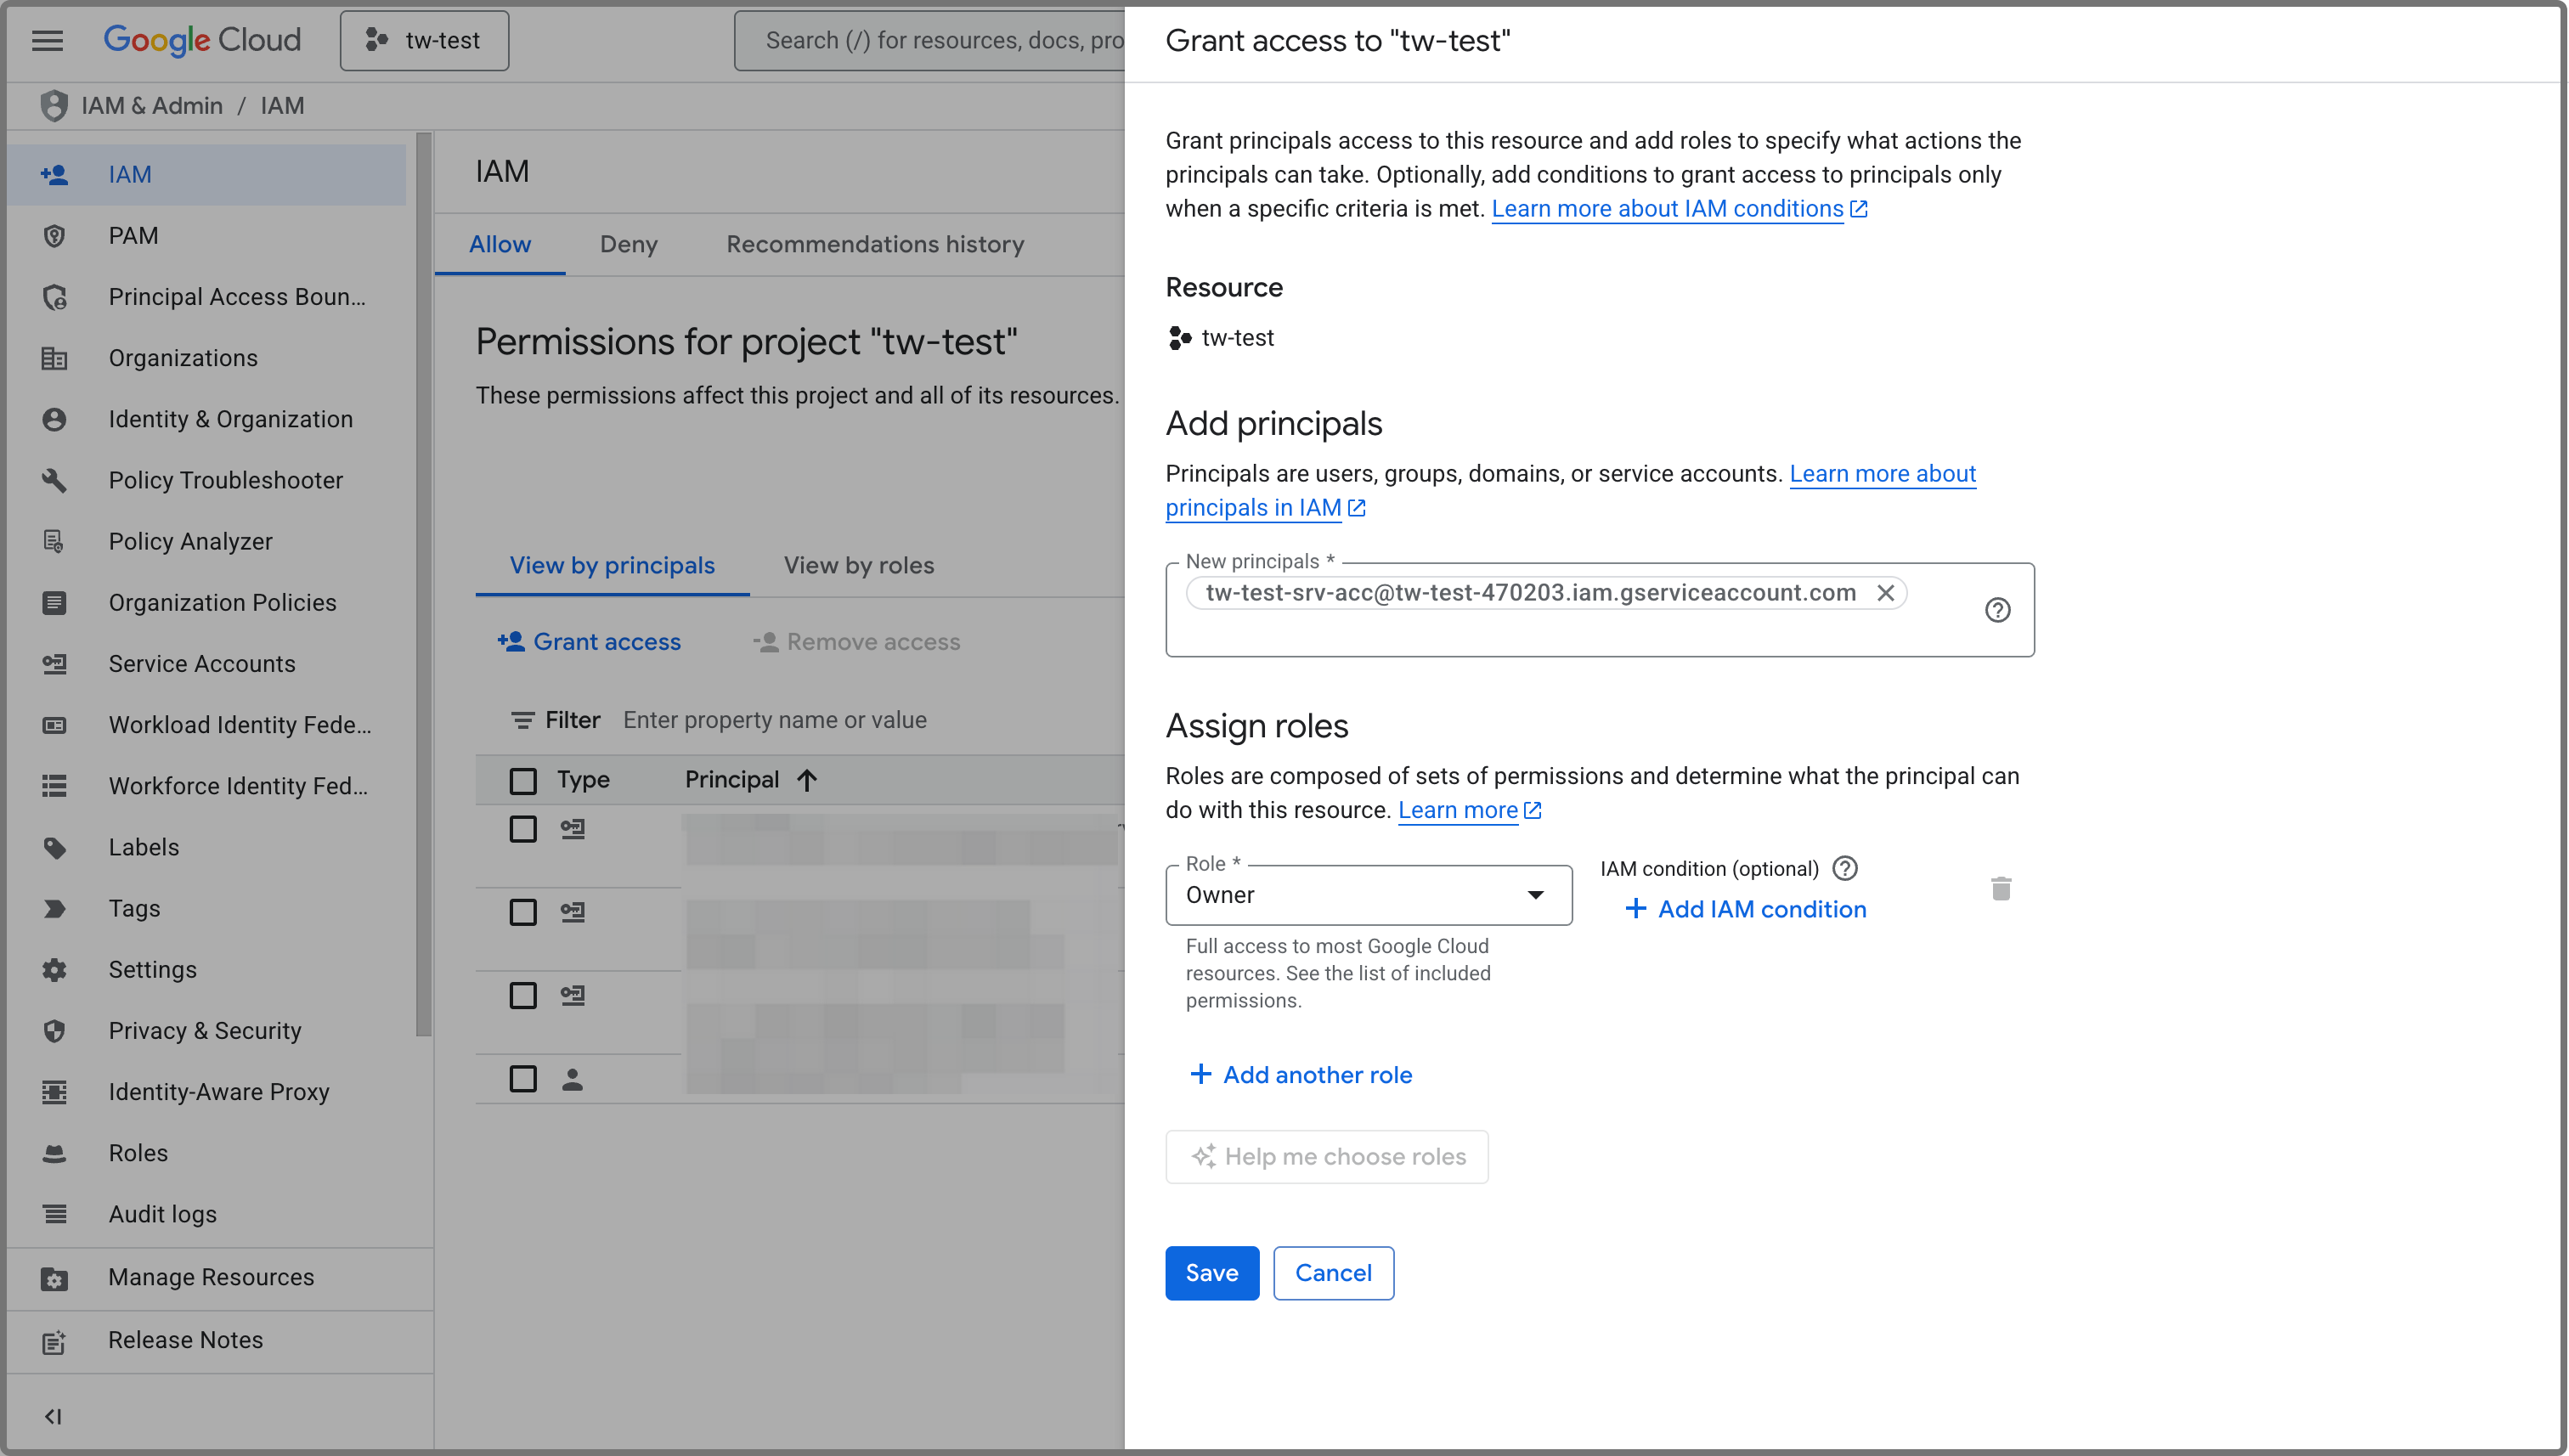
On the Allow tab of the IAM page, click Grant access.
-
On the dialog box that appears, follow these steps:
a. Paste the service account Email you copied earlier to the New principals field.
b. Search and select the
Ownerrole in the Role field.
-
Click Save to grant the access.