Create a service principal for CelerData on Azure
Applications in Azure require restricted access and non-interactive authentication for automation. This can be achieved by using service principals that allow applications to sign in with specific permissions. While deploying a CelerData cluster, CelerData requires a series of permissions to launch necessary resources in your Azure account. Therefore, you must create a service principal for CelerData to declare the necessary permissions.
Step 1: Create an App registration
Follow these steps to create an App registration:
-
Sign in to the Microsoft Azure portal.
-
Navigate to the App registrations service page, and click New registration.
-
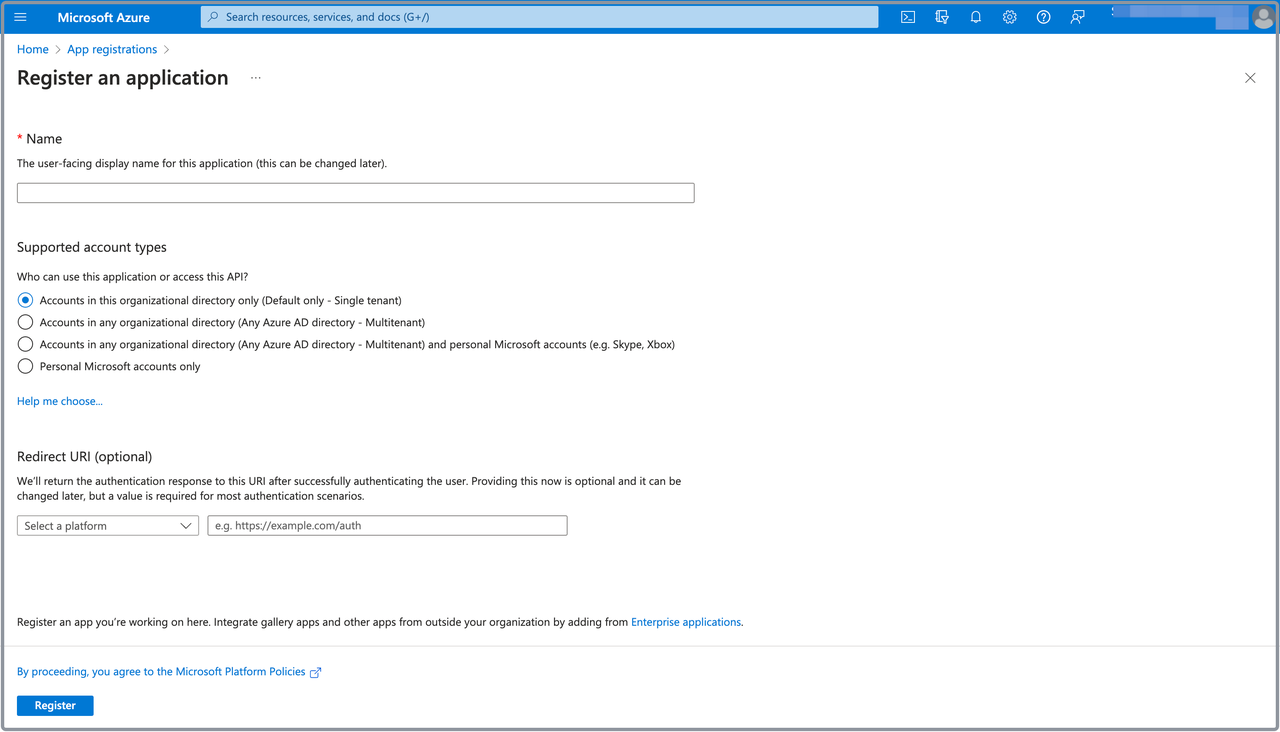
On the Register an application page:
- Enter a name for the application in the Name field.
- Select Accounts in this organizational directory only (Default only - Single tenant) in the Supported account types section.
- Click Register.
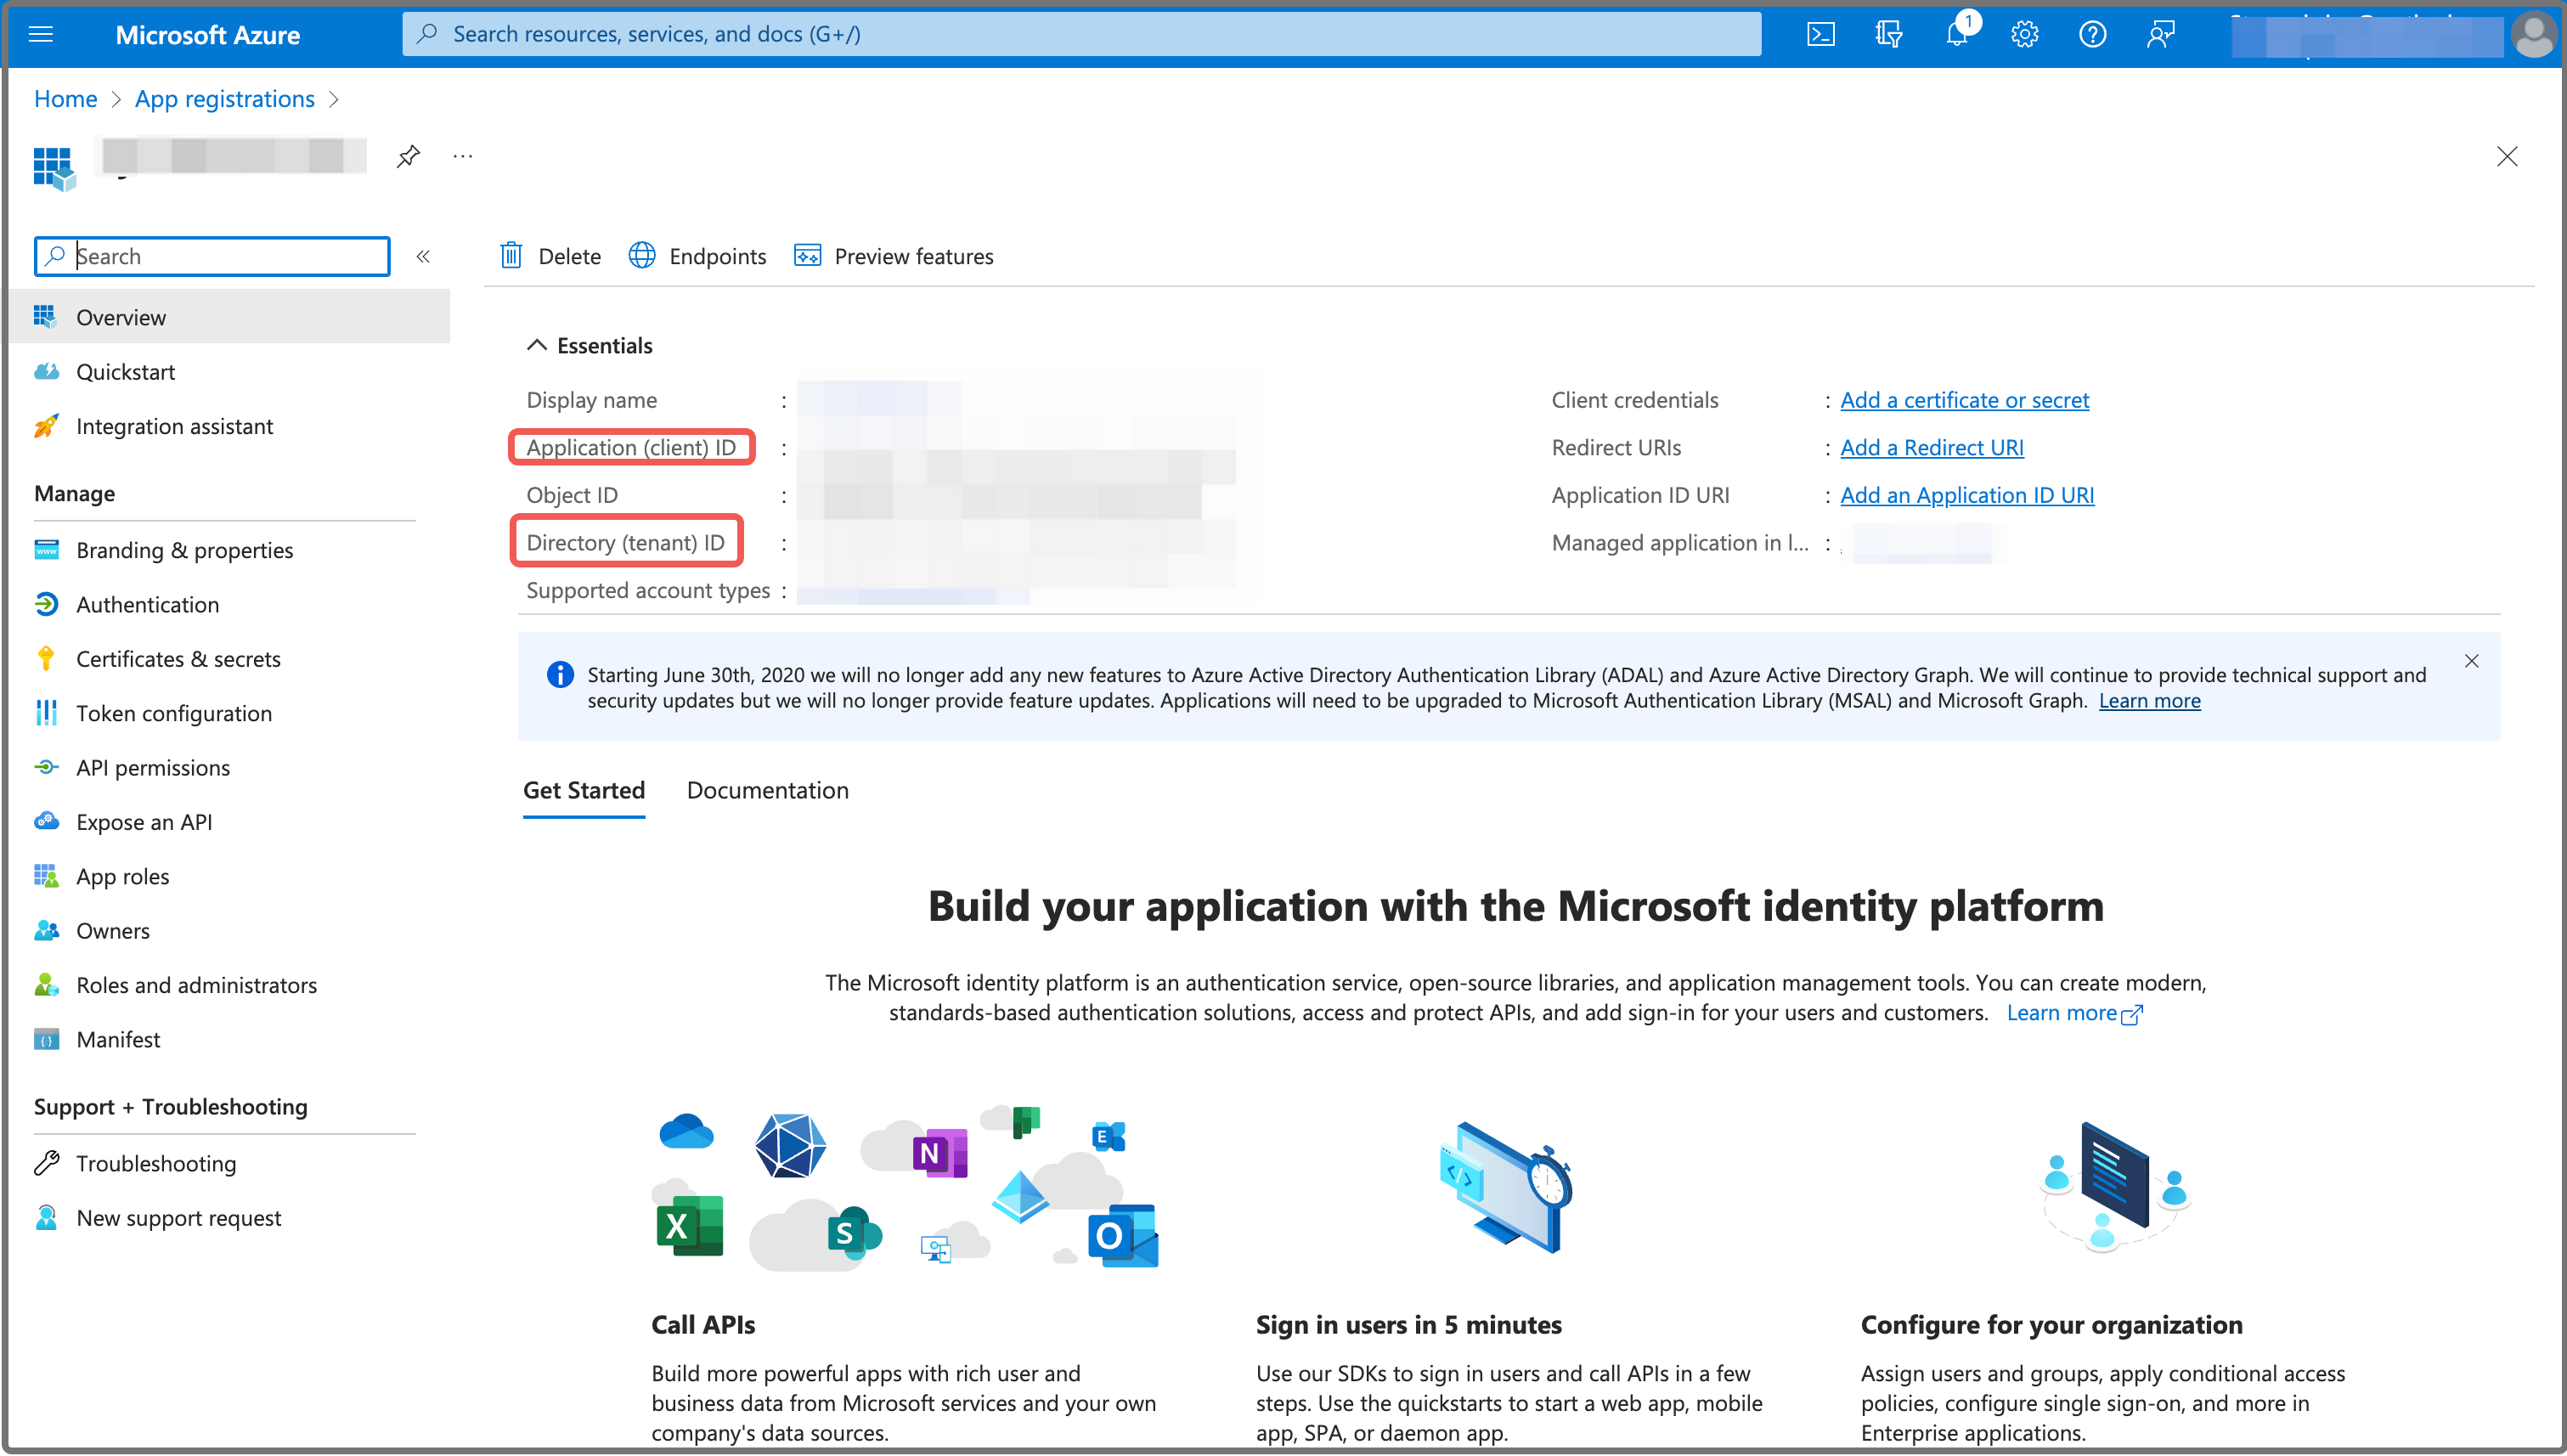
To obtain the Application (client) ID and the Directory (tenant) ID for the CelerData cluster deployment, you need to navigate to the App registrations service page, find and click the application you just registered, and click the Copy buttons next to the Application (client) ID and the Directory (tenant) ID fields to save them.
Step 2: Create a client secret for the application
Follow these steps to create a client secret for the application you have registered with Azure in Step 1:
-
Navigate to the App registrations service page, and click the application.
-
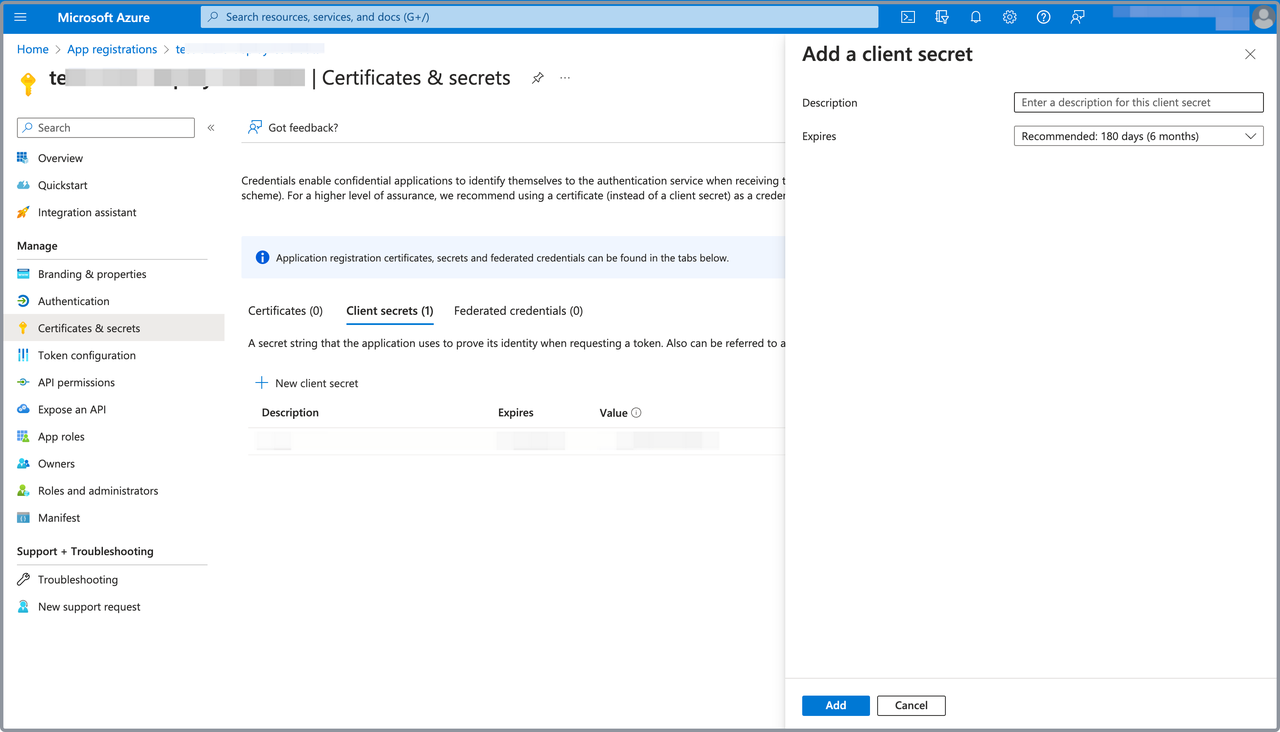
On the new page that appears, choose Certificates & secrets in the left-side pane, and click New client secret on the Client secrets tab.
-
In the Add a client secret pane that appears, enter a description for the client secret in the Description field, select or customize a validity period from the Expires drop-down list, and click Add.
-
Click the Copy button to copy the Value of the client secret you created, and save it for the CelerData cluster deployment process.
CAUTION
- Client secret values cannot be viewed, except for immediately after creation. Be sure to save the secret when created before leaving the page.
- Because the client secret value of each registered application has a fixed lifecycle in Azure, you can update it within the CelerData Cloud BYOC console in the event of the expiration of the client secret. For detailed instructions, see Rotate secret value.
Step 3: Add role assignments to the application
In this section, you need to add the following role assignments to the application you have registered with Azure in Step 1:
- Reader
- Virtual Machine Contributor
- Network Contributor
- Managed Identity Operator
The following procedures add Reader role assignment to the application as an example. Repeat these procedures until you have added all role assignments listed above.
-
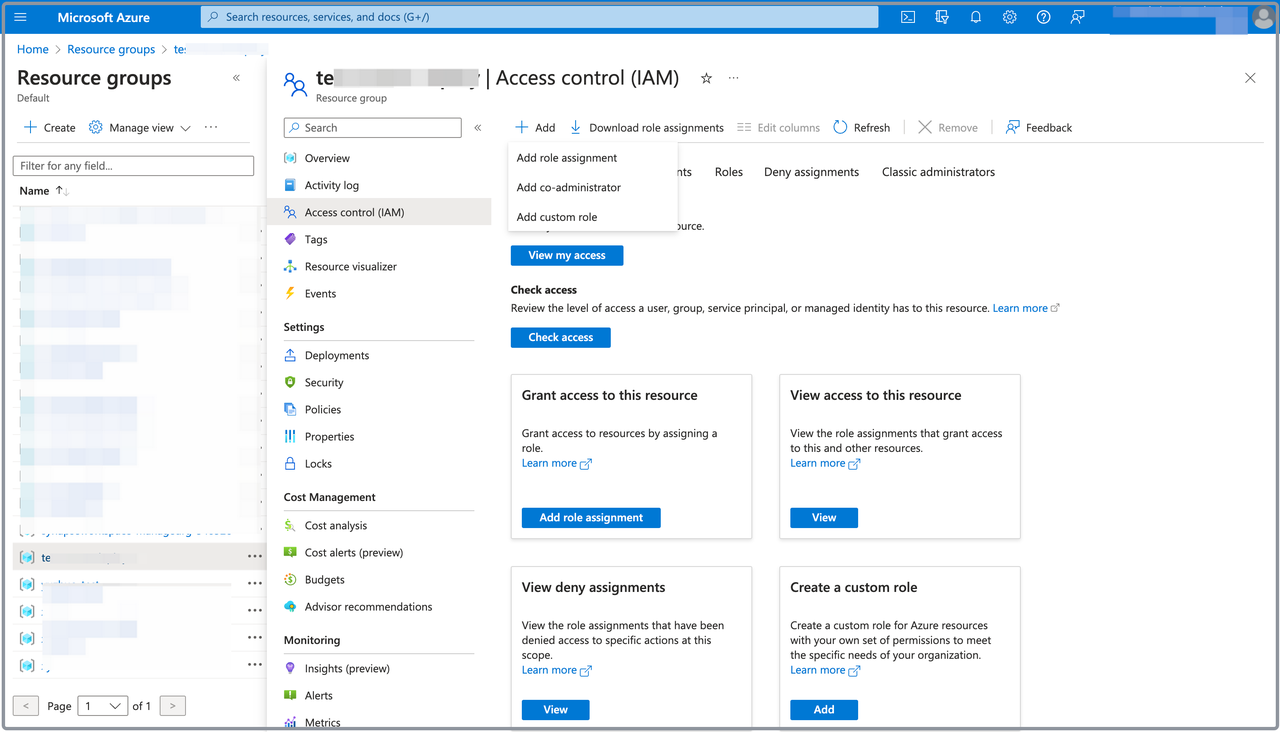
Navigate to the Resource groups service page, and click the resource group you created for the CelerData cluster deployment.
-
On the page that appears, choose Access control (IAM) in the left-side pane.
-
On the page that appears, click Add, and then click Add role assignment.
-
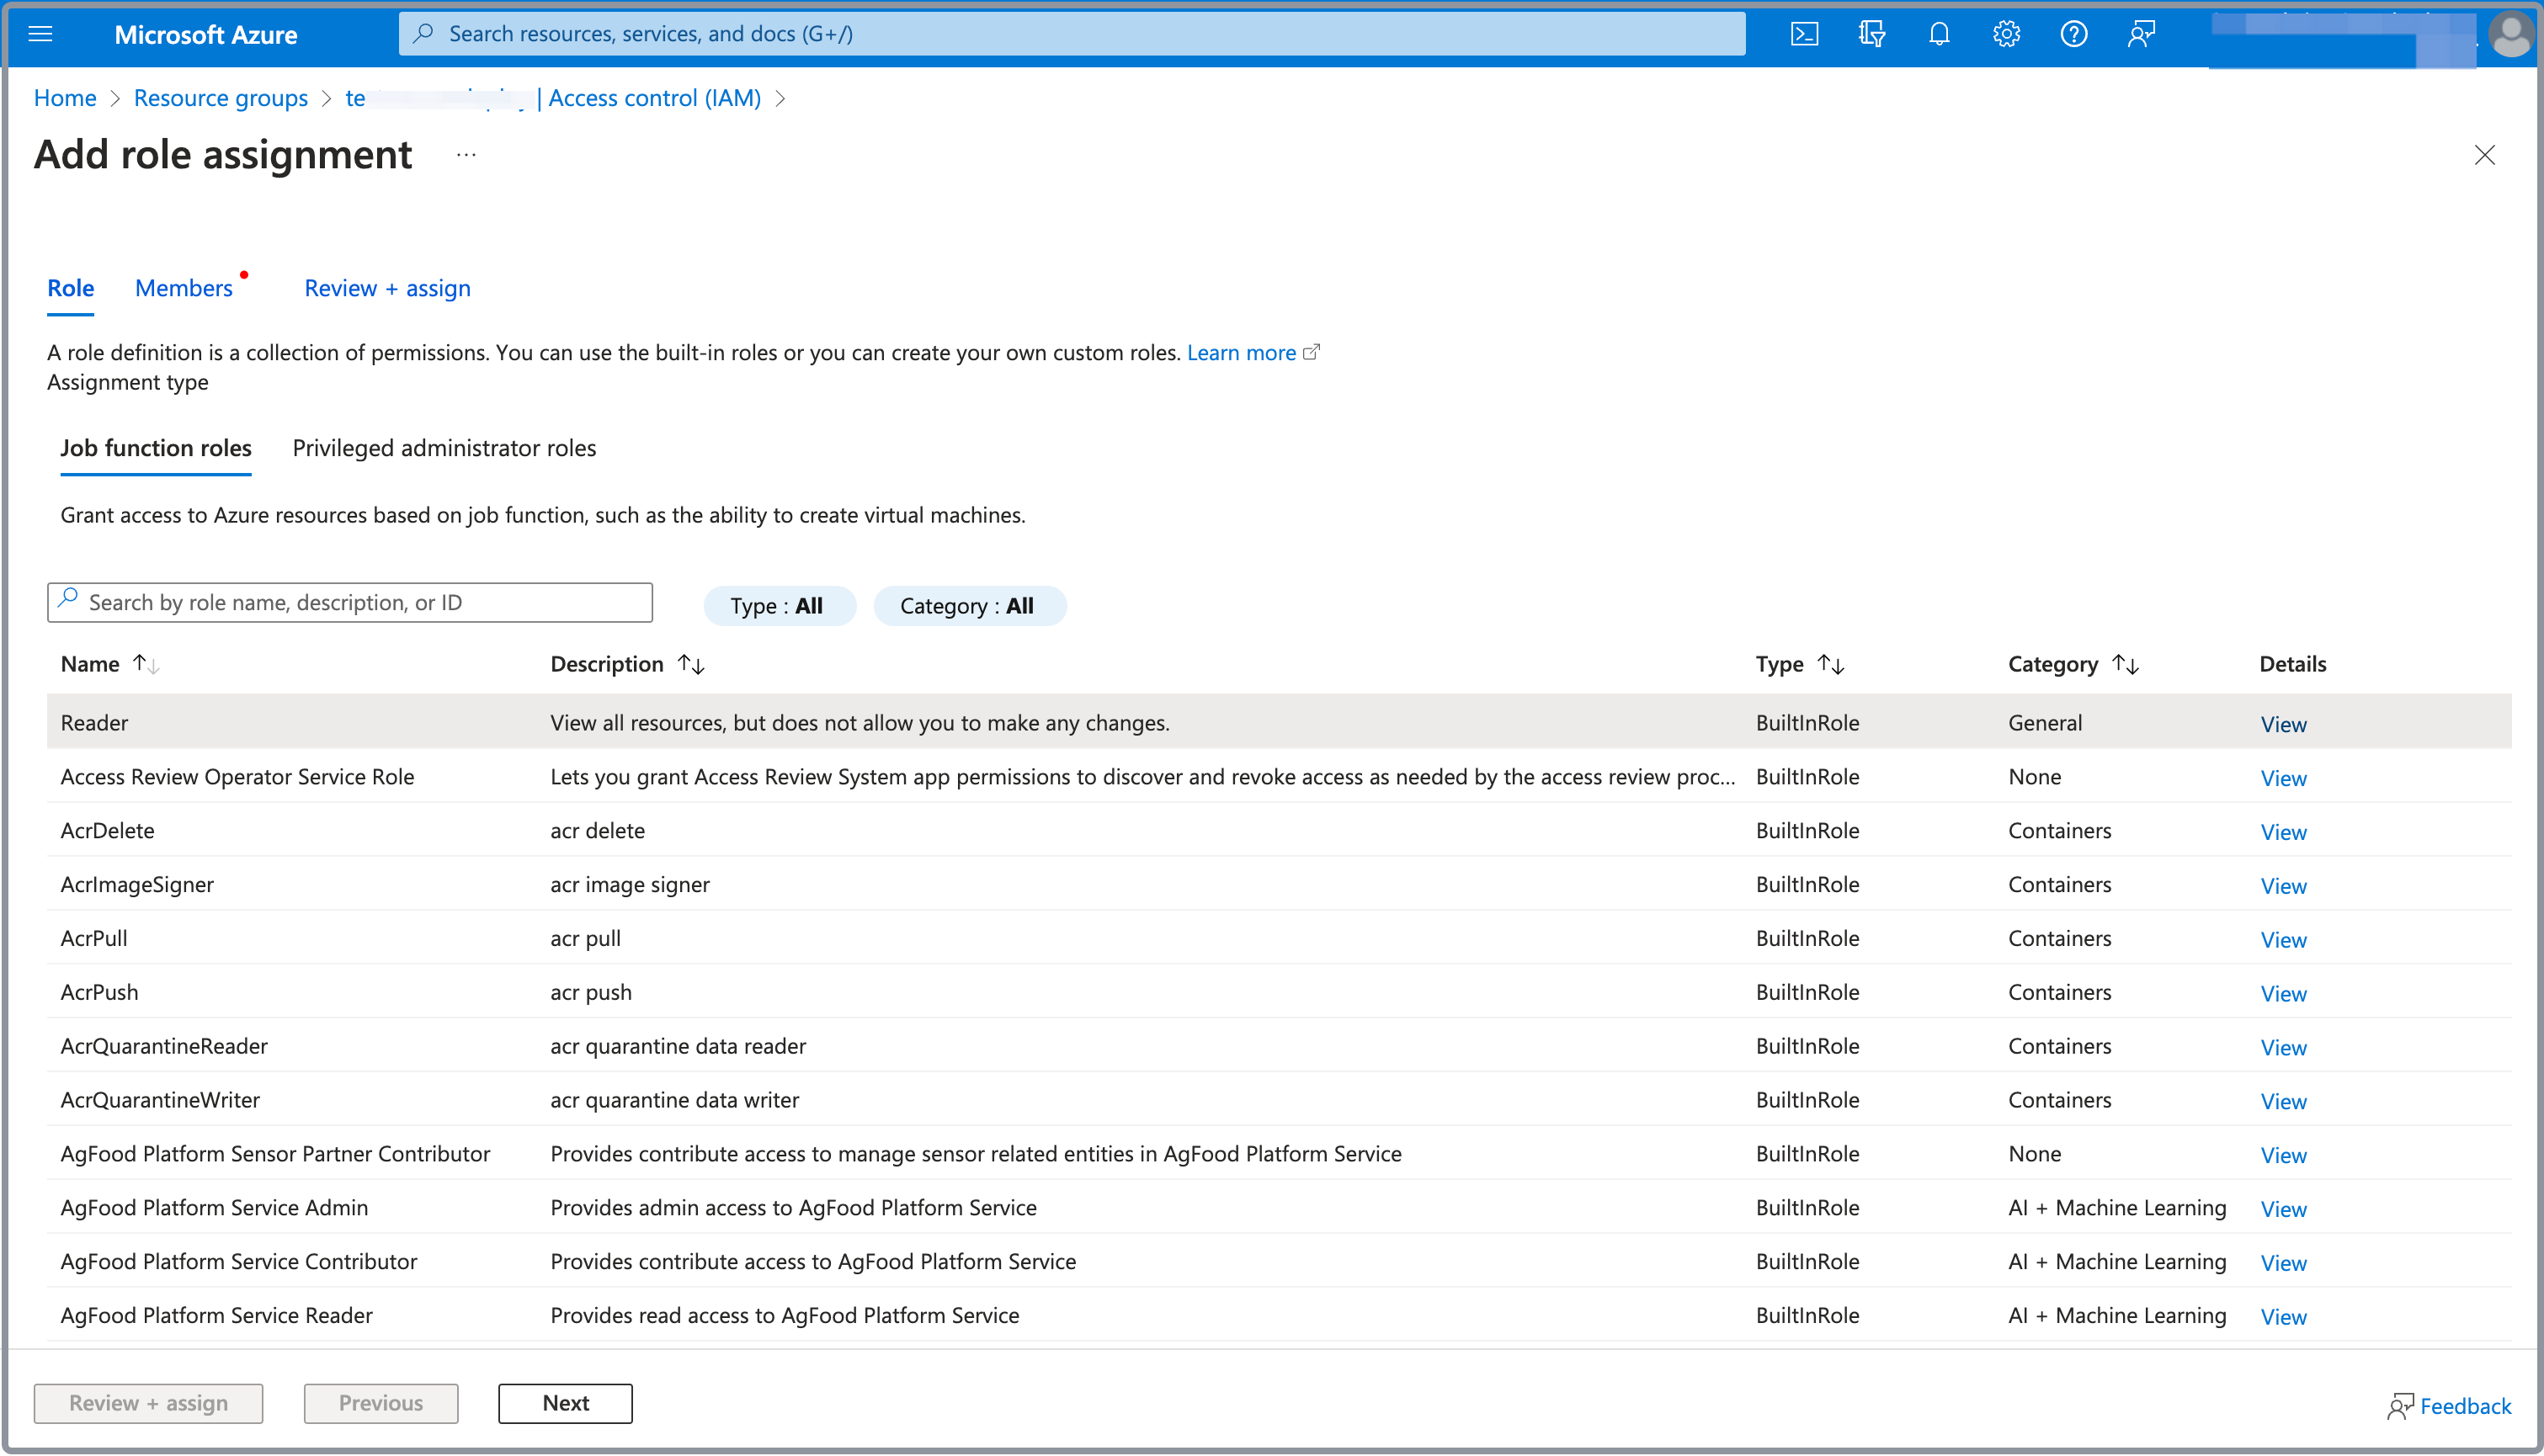
In the Job function roles tab of the Add role assignment page, select Reader, and click Next to continue.
-
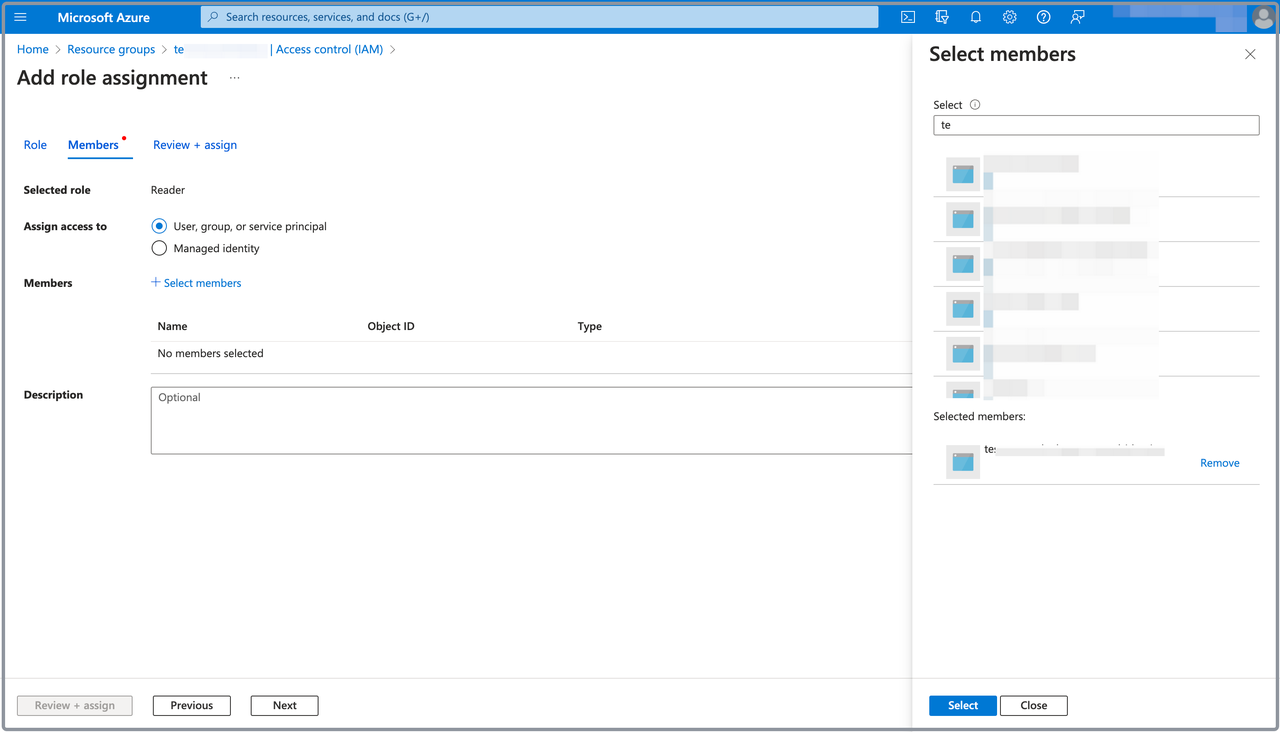
On the Members tab, select User, group, or service principal for Assign access to.
-
For Members, click Select members. In the right-side pane that appears, search for and select the application you registered in Step 1, and click Select.
-
Click Review + assign, and, on the Review + assign tab, review the information you have filled. Then, click Review + assign to add the assignment.