Create a managed identity for Azure storage account
CelerData generates a profile for each query during query execution and stores it for reference. The profile is generated by the virtual machines on which your CelerData cluster is deployed, and is stored in an Azure storage container.
This topic will guide you on how to create a managed identity in Azure, and grant it the read permission on virtual machines and the write permissions on your storage account and container. Once these steps are completed, CelerData will automatically attach the managed identity to the virtual machines, ensuring that the cluster can store query profiles in the container.
Step 1: Create a managed identity
Follow these steps to create a managed identity:
-
Navigate to the Managed Identities service page, and click Create.
-
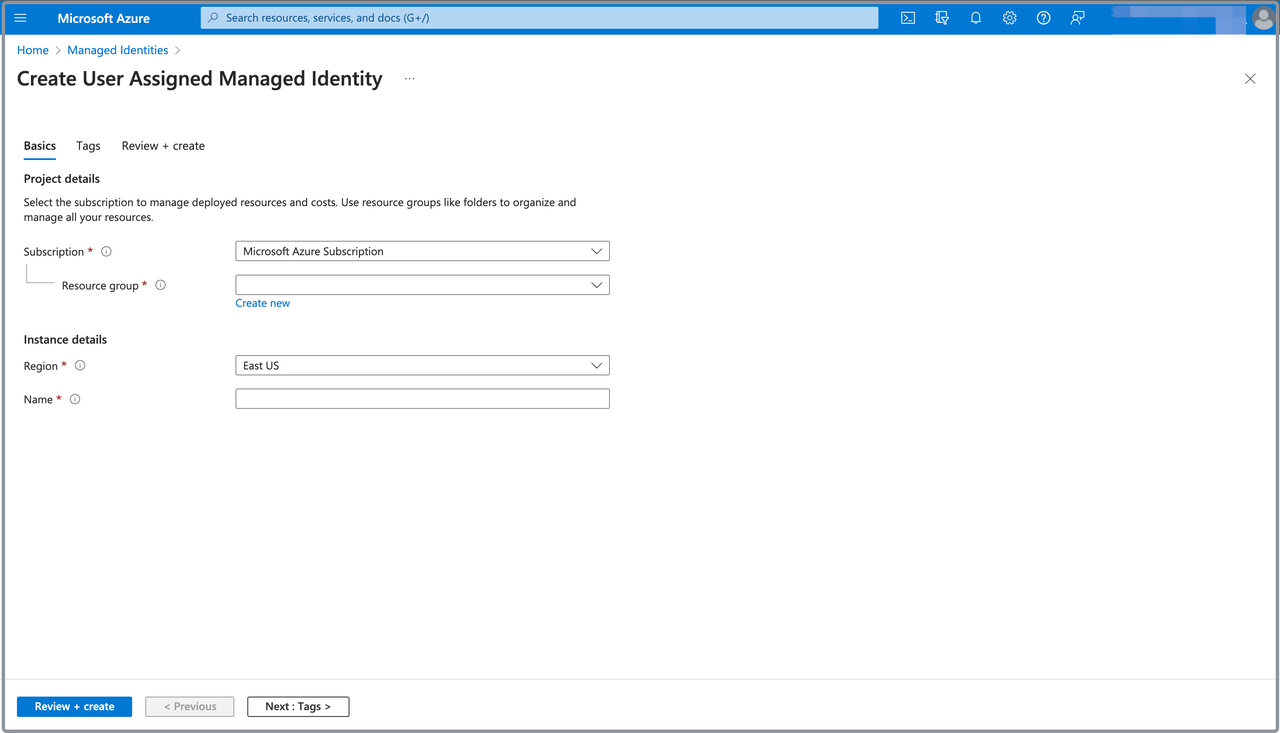
On the Basics tab of the Create User Assigned Managed Identity page:
- Select your Microsoft subscription from the Subscription drop-down list.
- Select the resource group you want to use from the Resource group drop-down list.
- Select the region of the managed identity from the Region drop-down list.
- Enter a name for the managed identity in the Name field.
-
Click Review + create, and, on the Review + create tab, review the information you have filled. Then, click Create to create the managed identity.
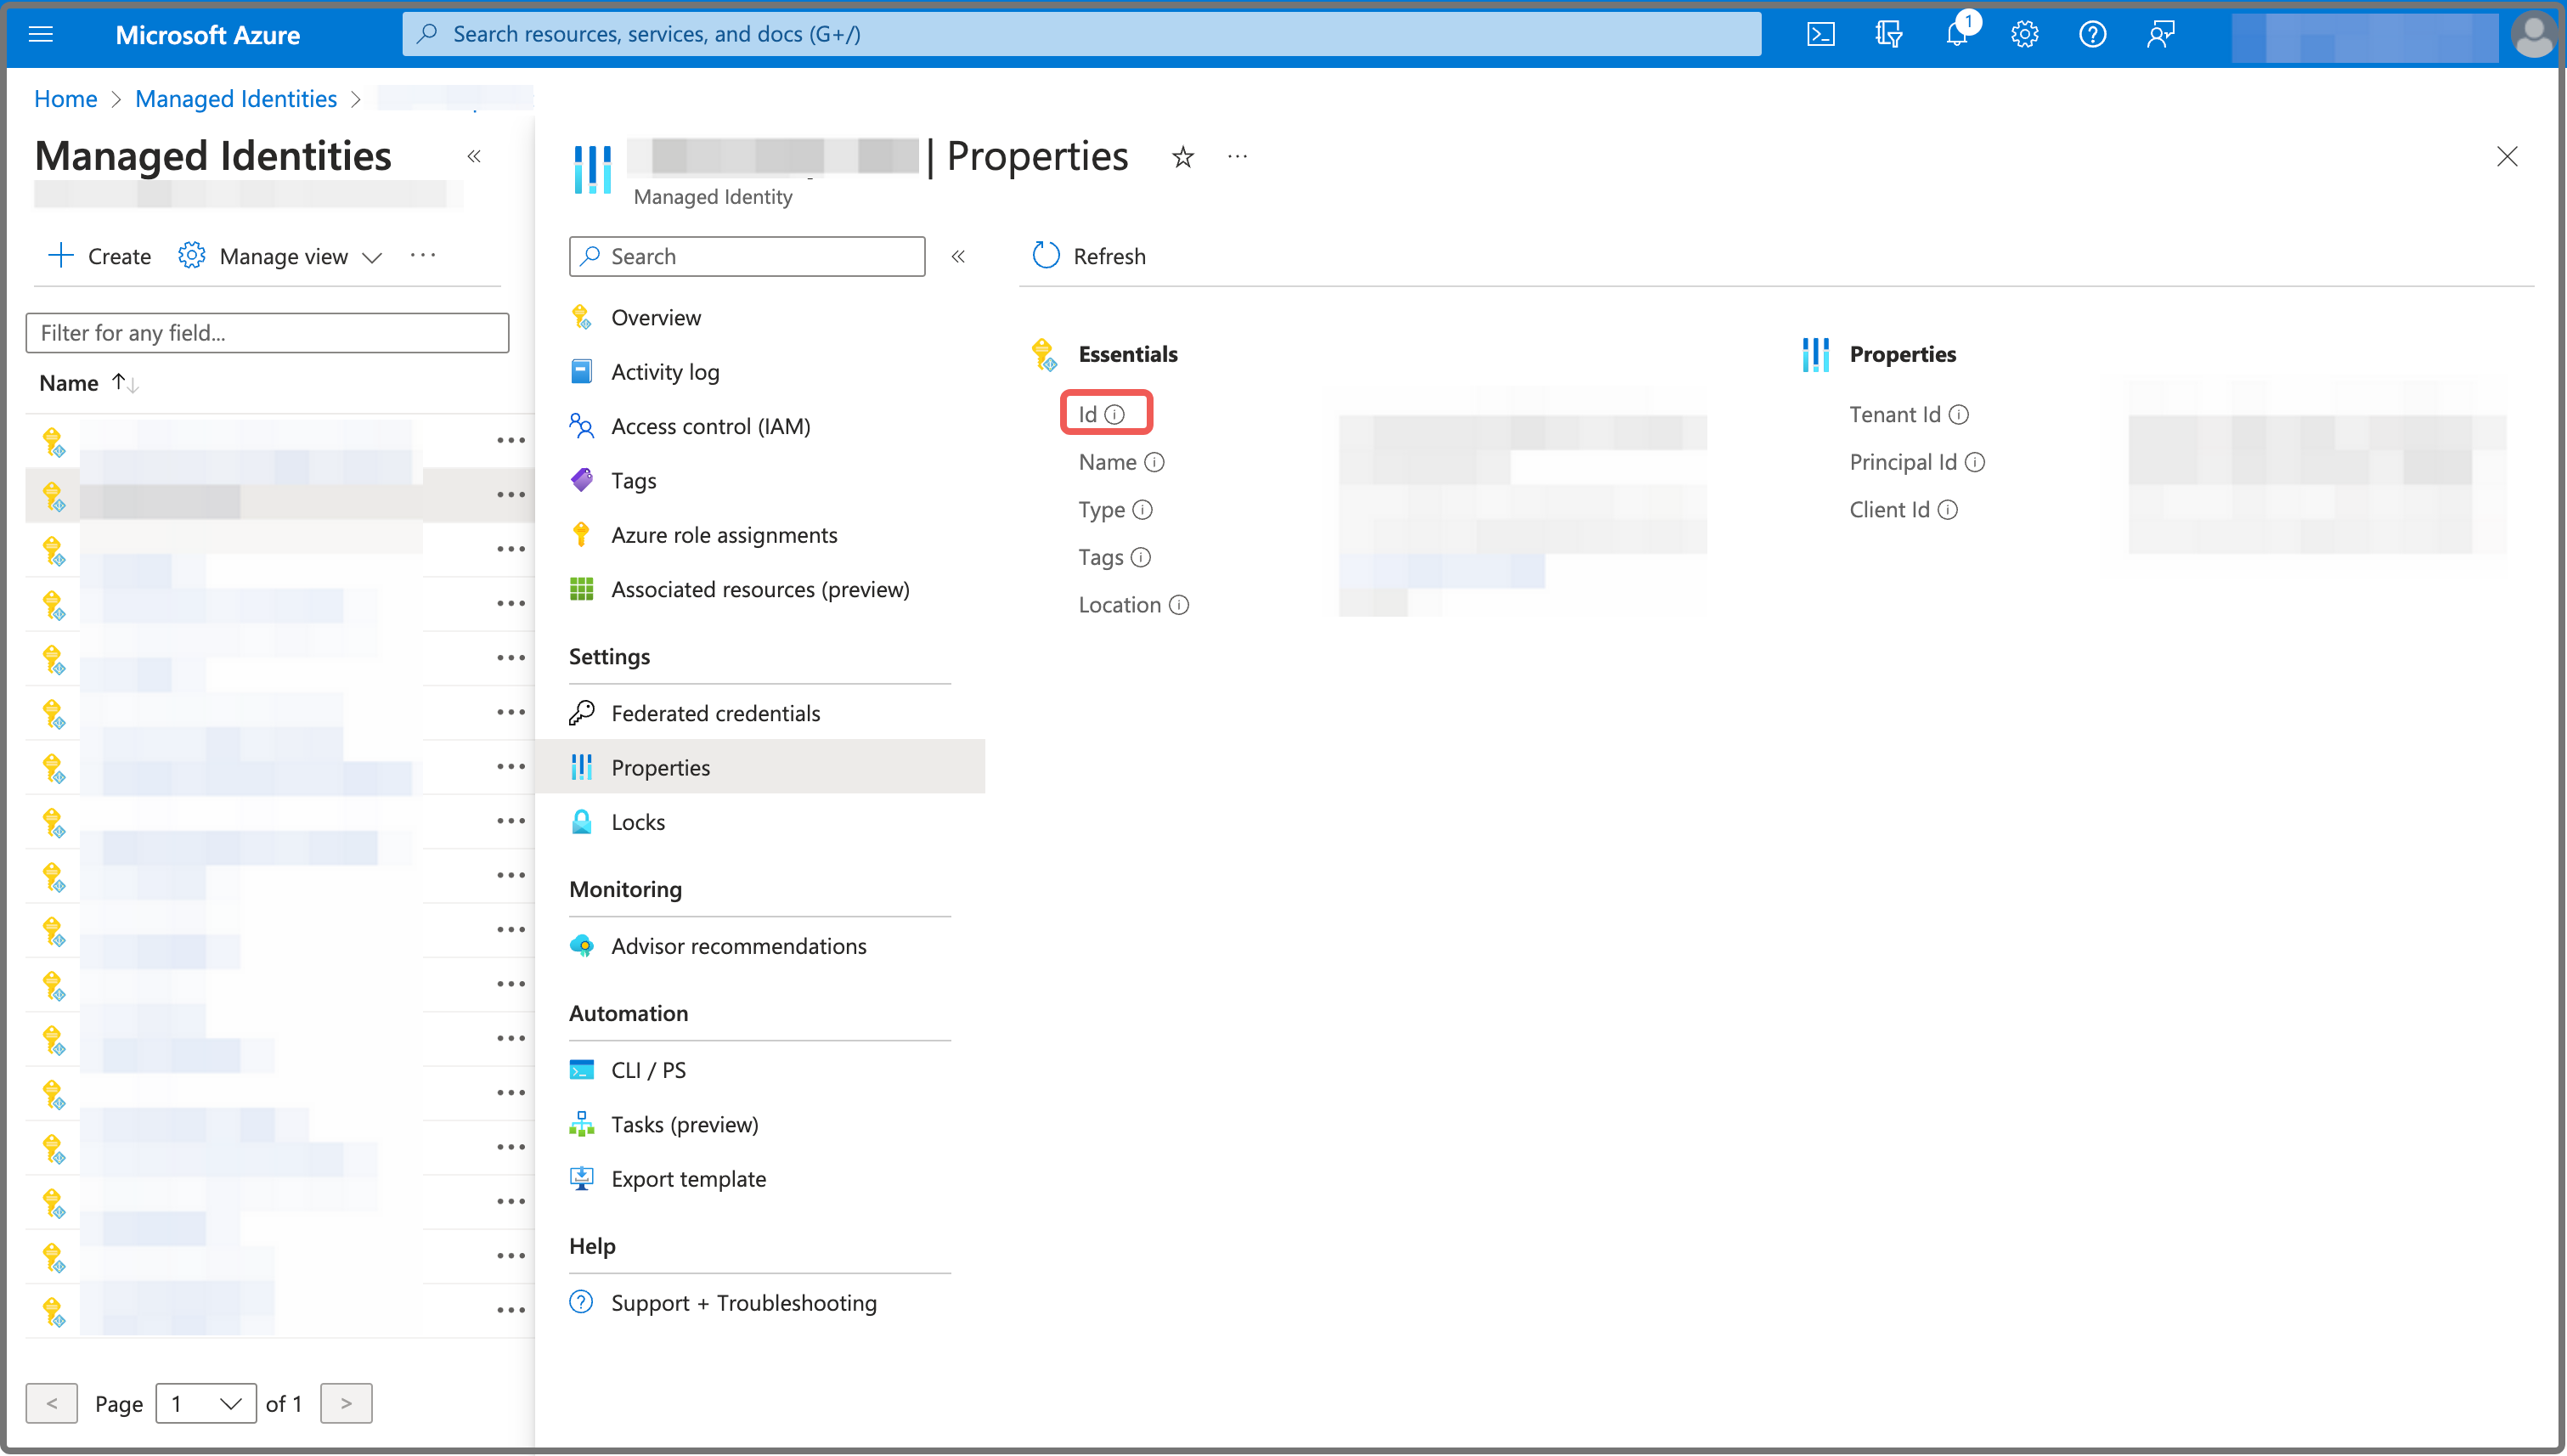
To obtain the Managed identity resource ID for the CelerData cluster deployment, you need to navigate to the Managed Identities service page, and click the managed identity you created. On the page that appears, choose Properties in the left-side pane, and in the right-side pane click the Copy button next to the Id field to save it.
Step 2: Add role assignments to the managed identity
In this section, you are guided to complete the following goals:
- Grant the read permission on virtual machines to the managed identity.
- Grant the write permissions on the storage account and the container to the managed identity.
Grant read permission to managed identity
Follow these steps to grant the read permission on virtual machines to the managed identity:
-
Navigate to the Resource groups service page, and click the resource group you want to use.
-
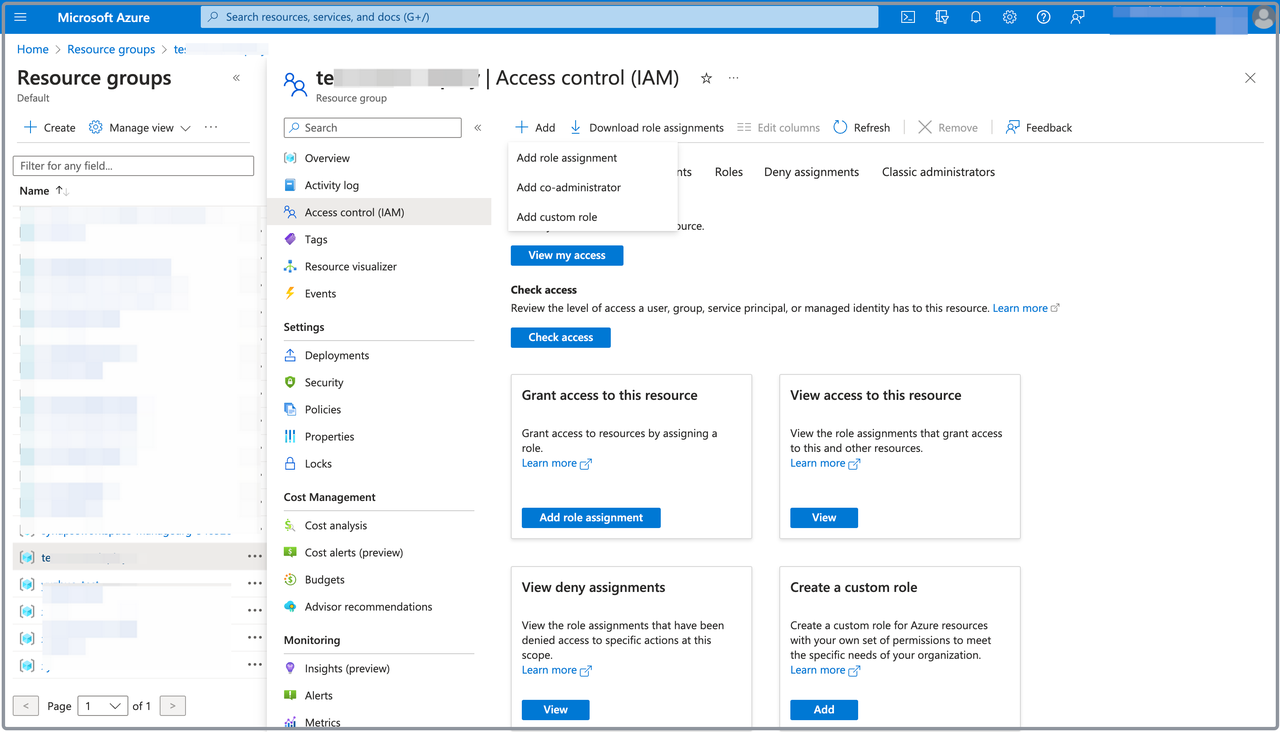
In the left-side pane of the page that appears, choose Access control (IAM).
-
On the page that appears, click Add, and then click Add role assignment.
-
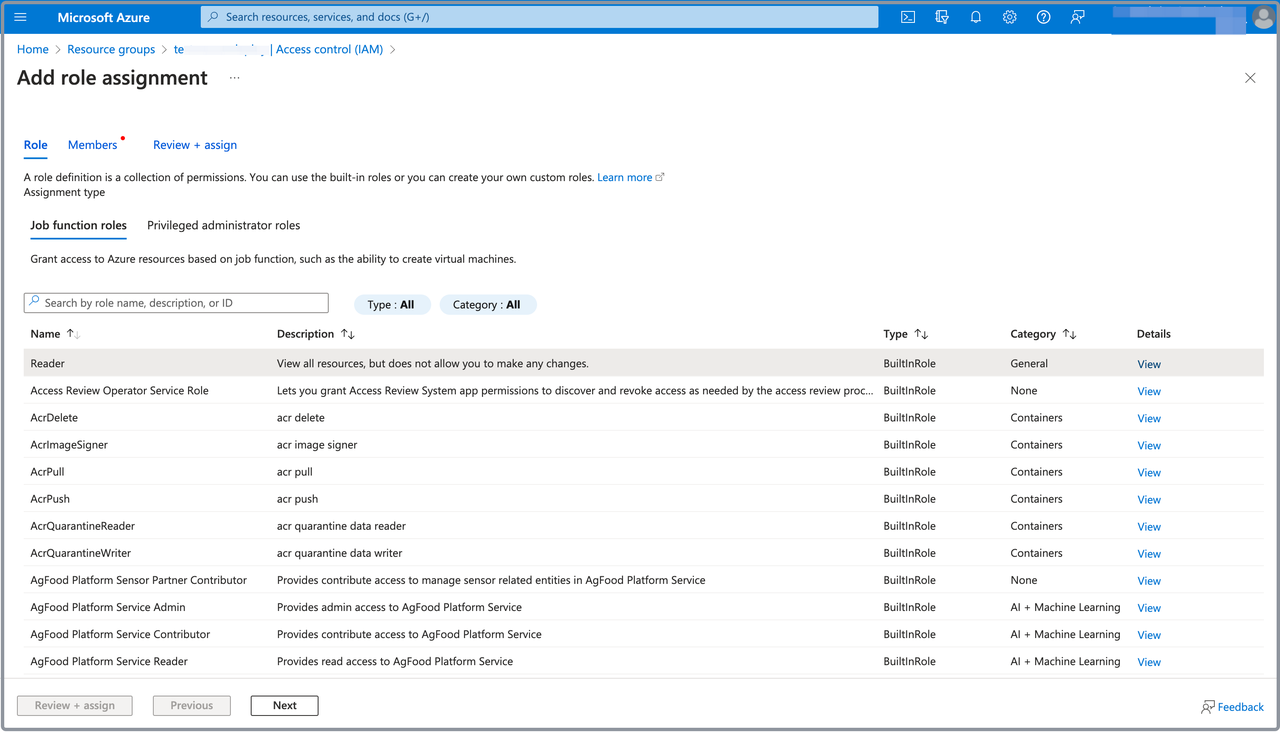
On the Job function roles tab of the Add role assignment page, select Reader, and click Next to continue.
-
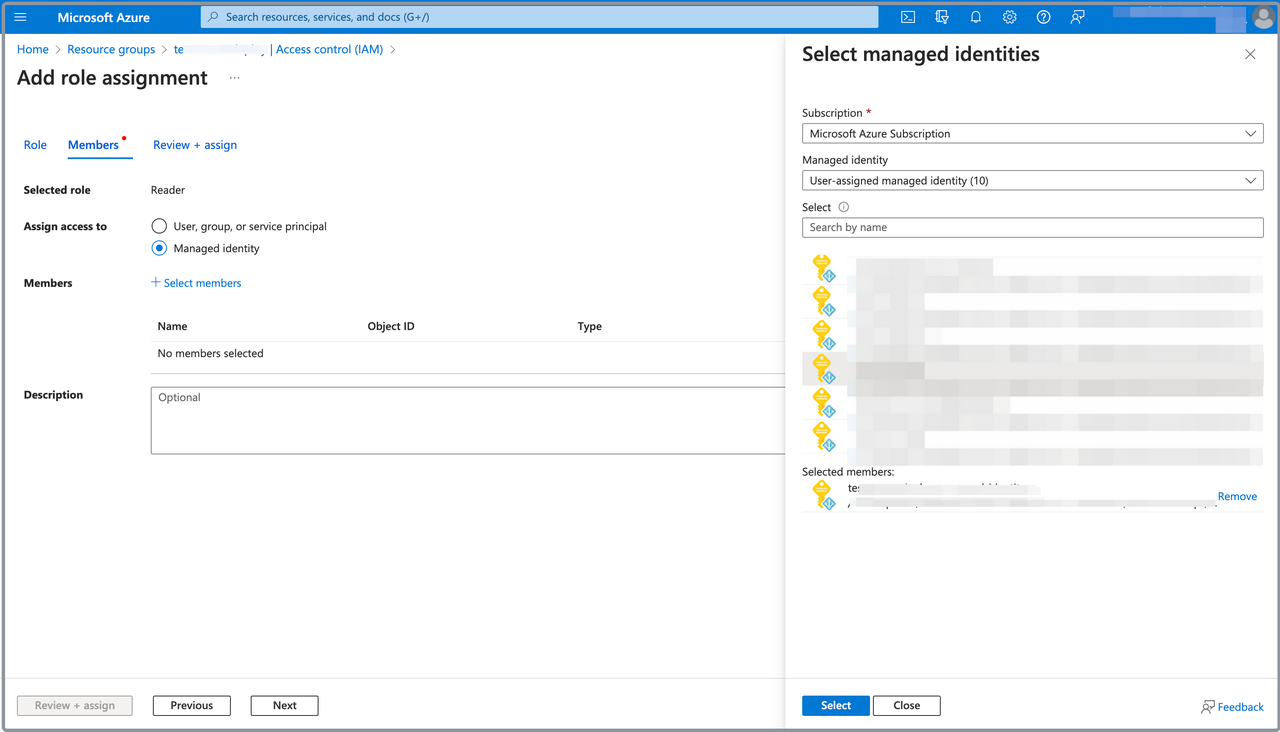
On the Members tab, select Managed identity for Assign access to.
-
For Members, click Select members. In the right-side pane that appears, select your Microsoft subscription from the Subscription drop-down list, select User Assigned Managed Identity from the Managed identity drop-down list, search for and select the managed identity you created in Step 1 from the Select section, and click Select.
-
Click Review + assign, and, on the Review + assign tab, review the information you have filled. Then, click Review + assign to add the assignment.
Grant write permissions to managed identity
You need to grant write permissions on both the storage account and the container.
Grant write permissions on the storage account
Follow these steps to grant the write permission on the storage account to the managed identity:
-
Navigate to the Storage accounts service page, and click the storage account in which you want to store the query profiles of your CelerData cluster.
-
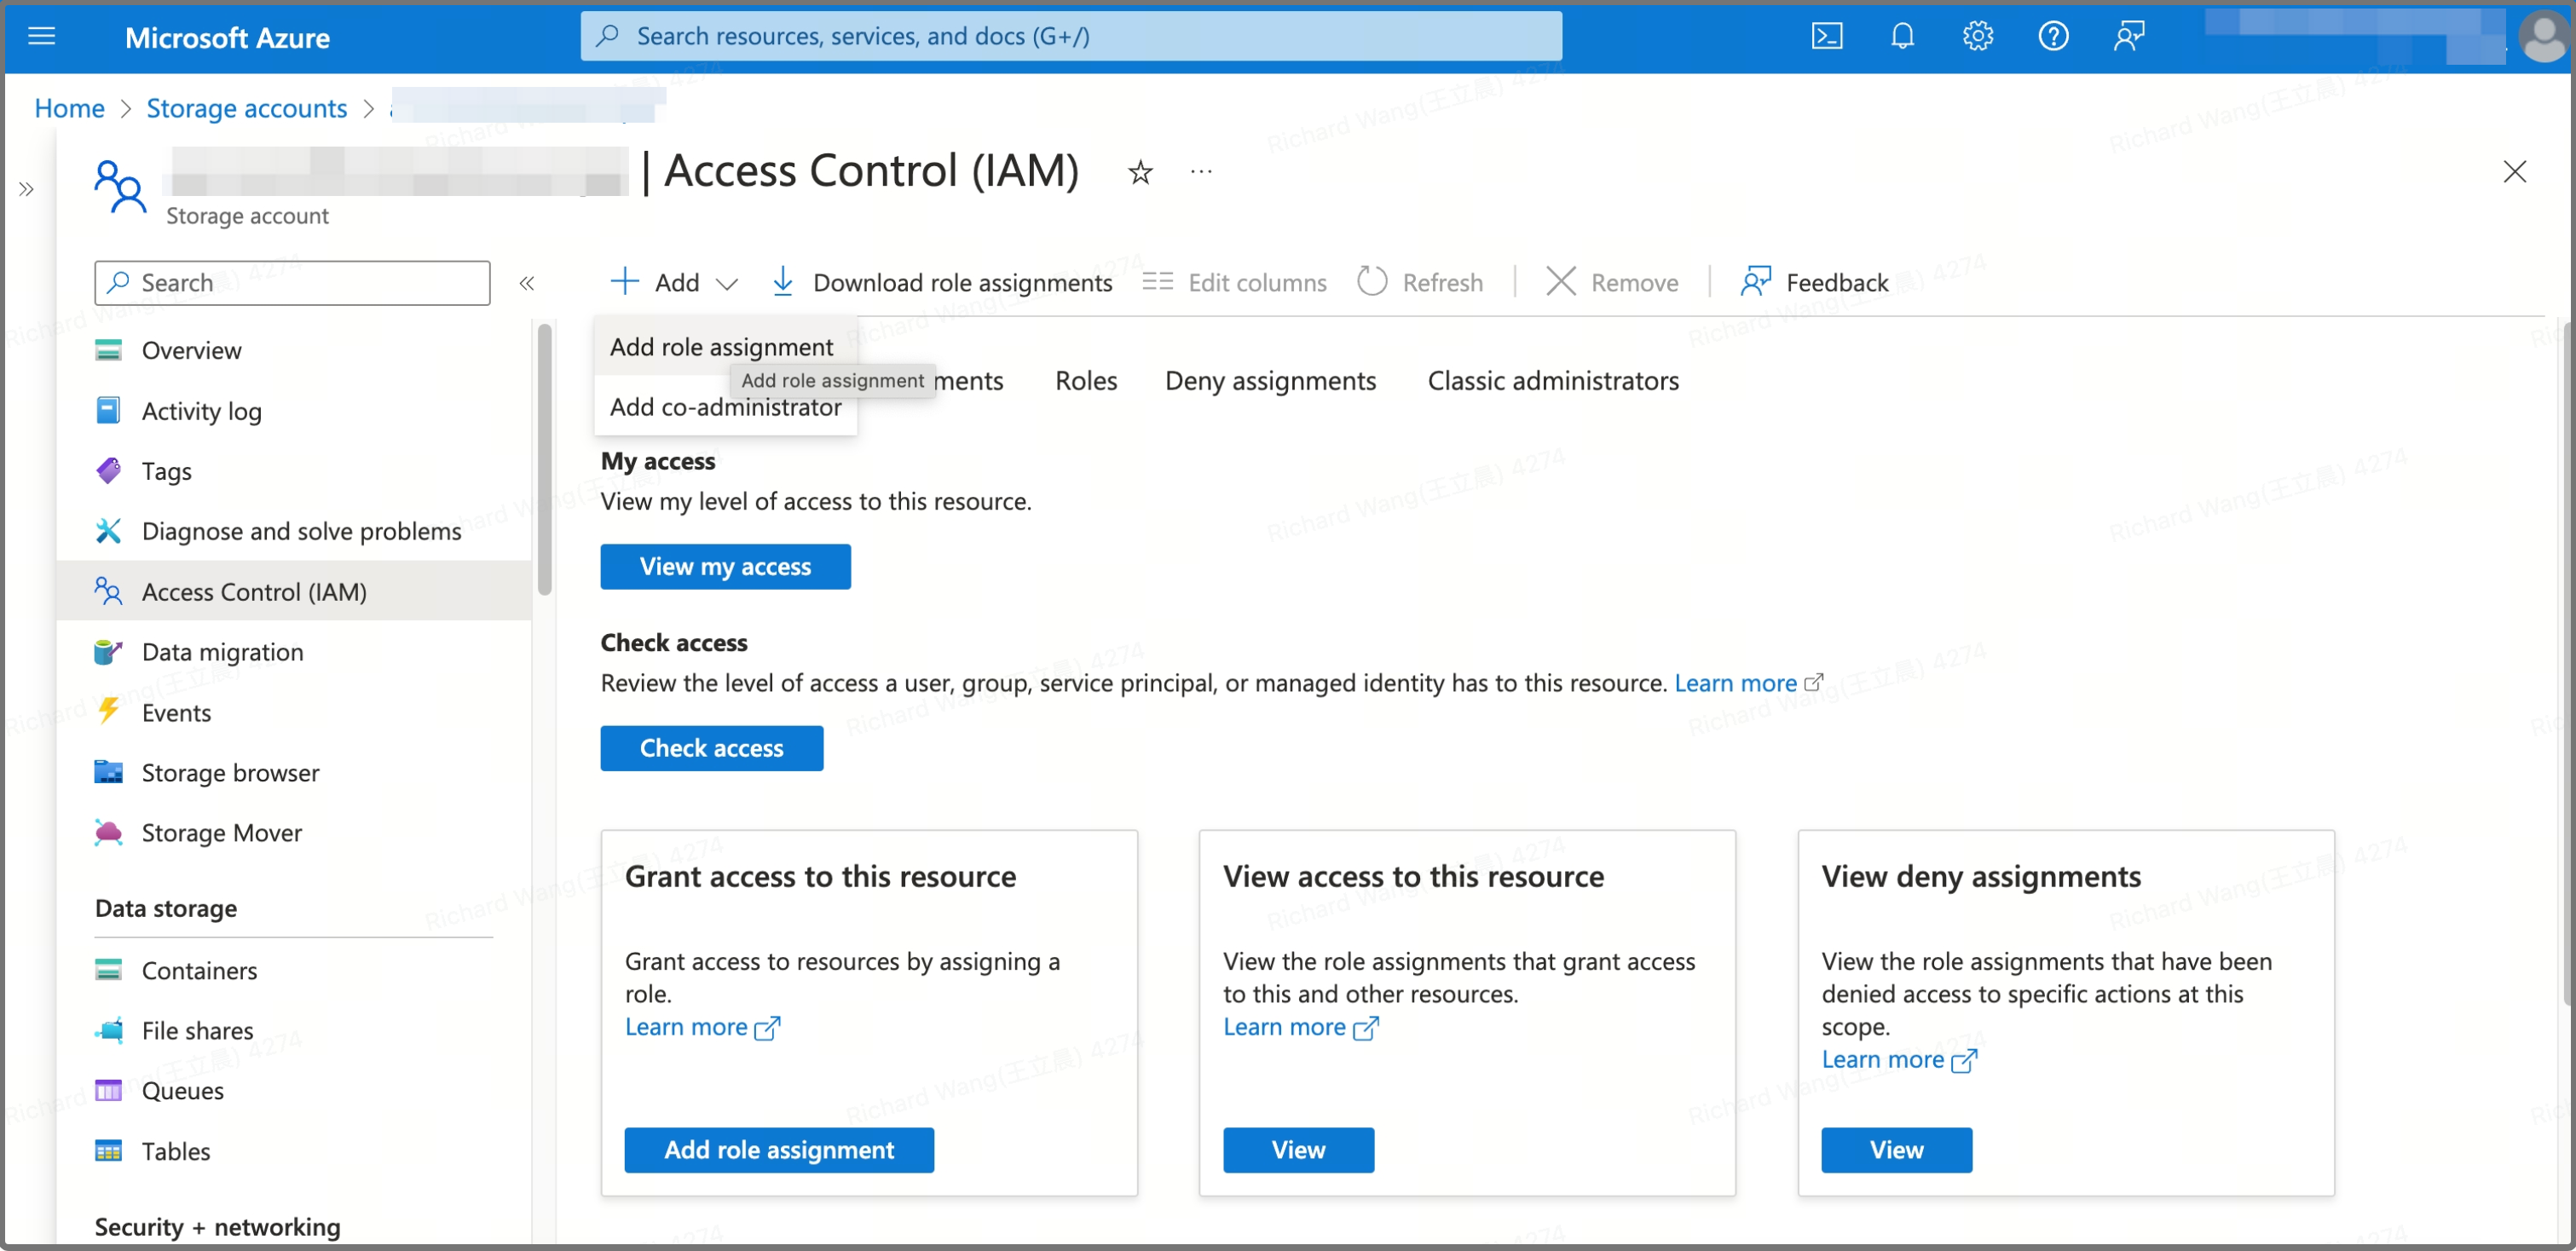
On the page that appears, choose Access control (IAM) in the left-side pane. Then, click Add, and choose Add role assignment.
-
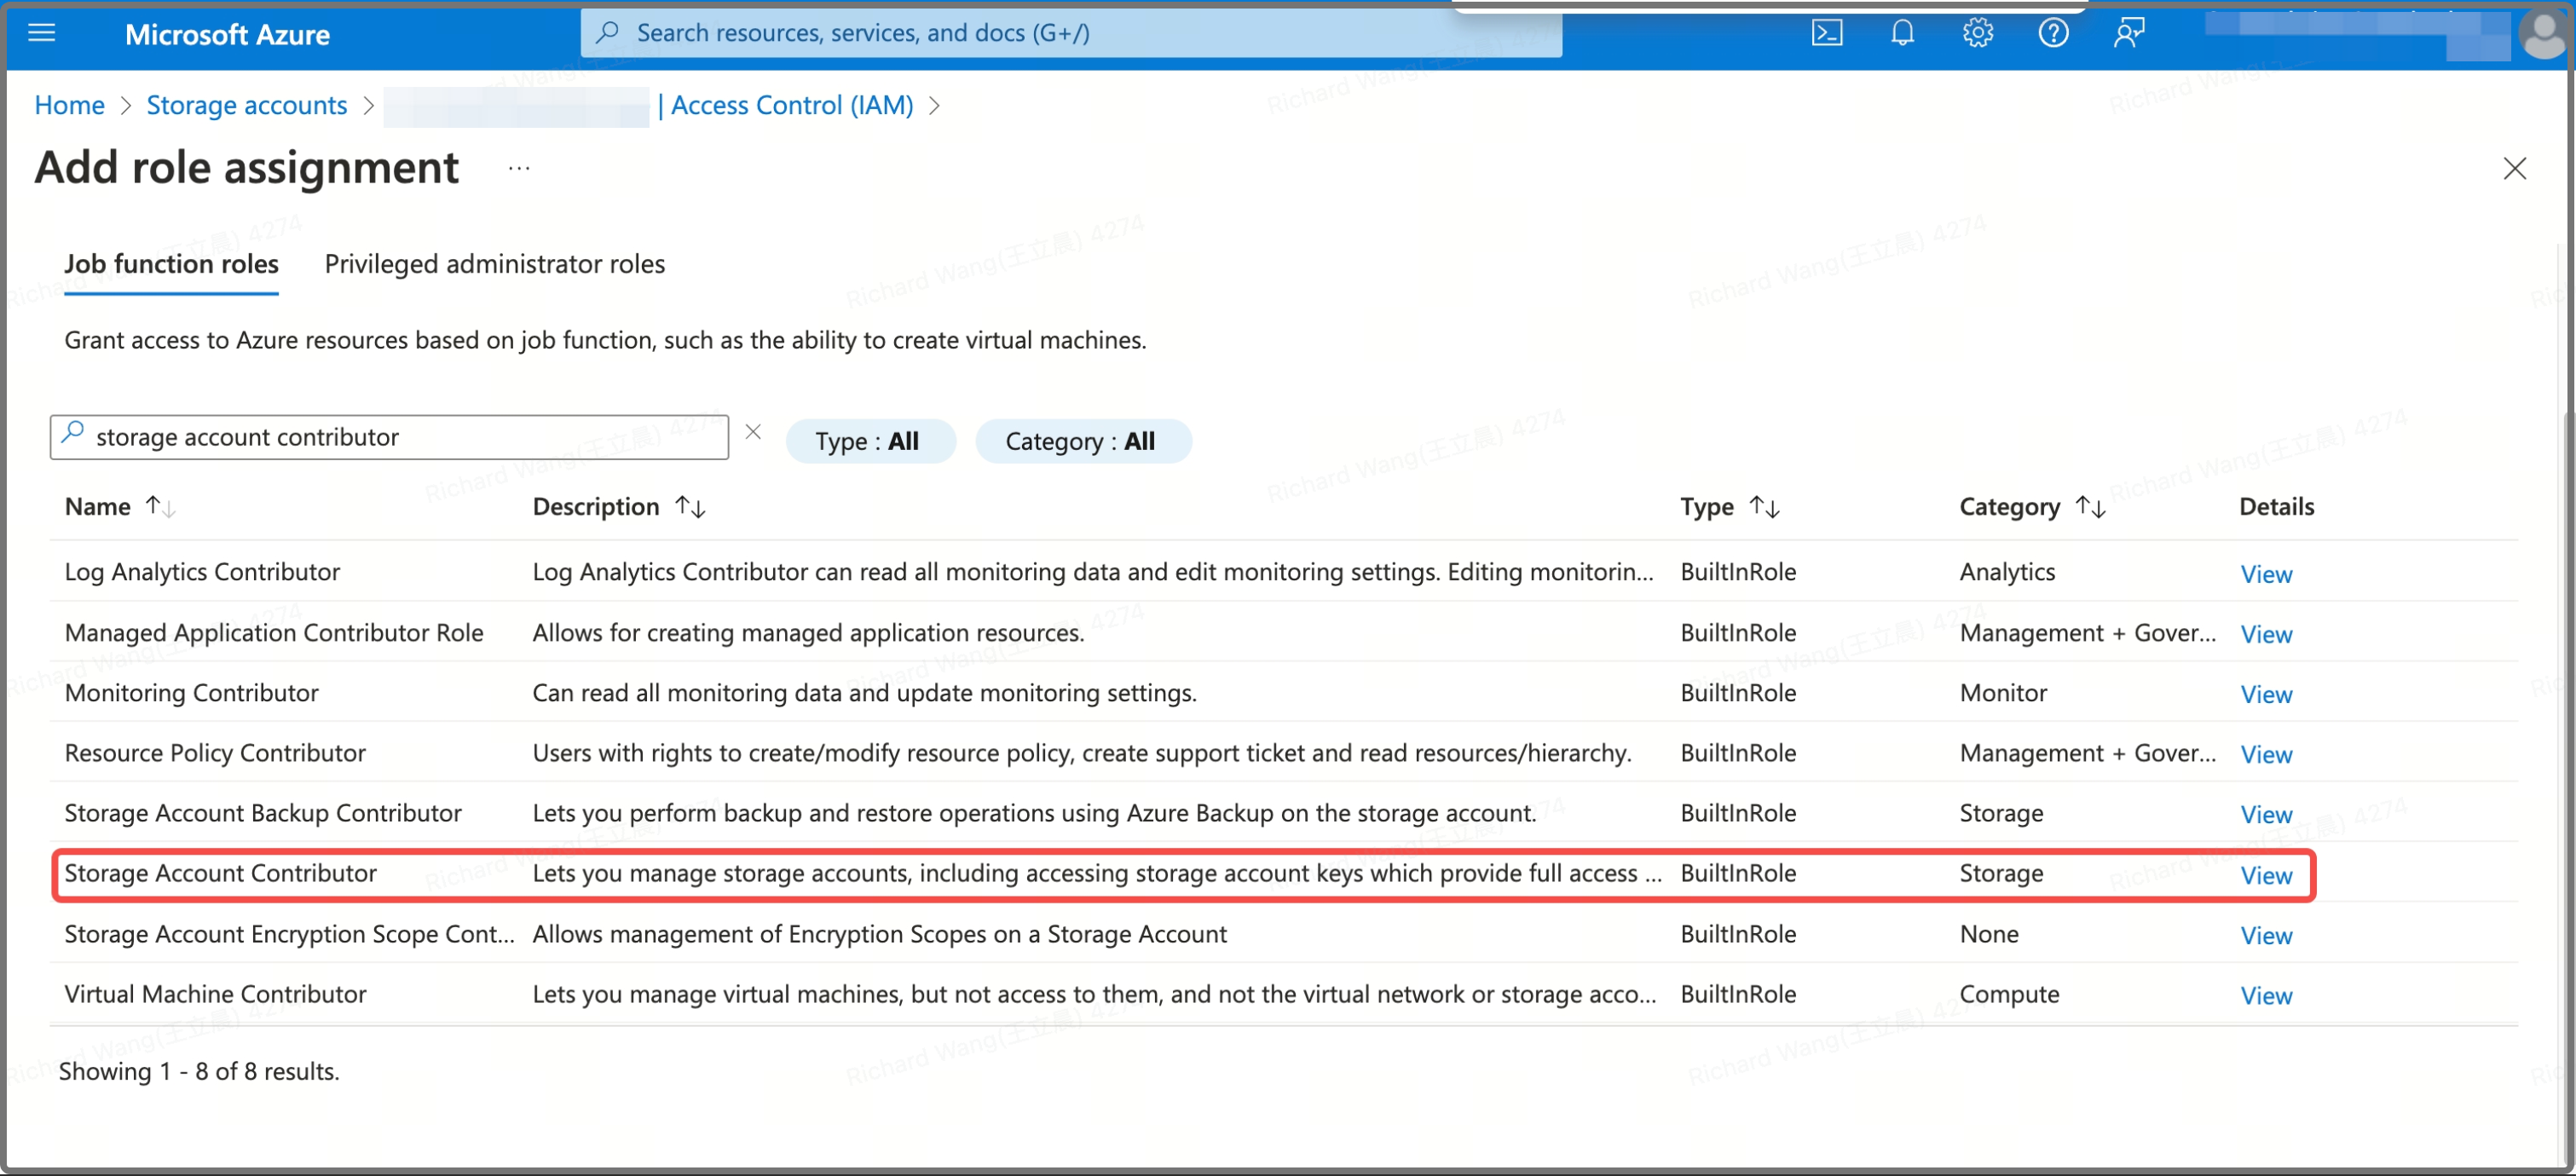
On the Job function roles tab of the Add role assignment page, select Storage Account Contributor, and click Next to continue.
-
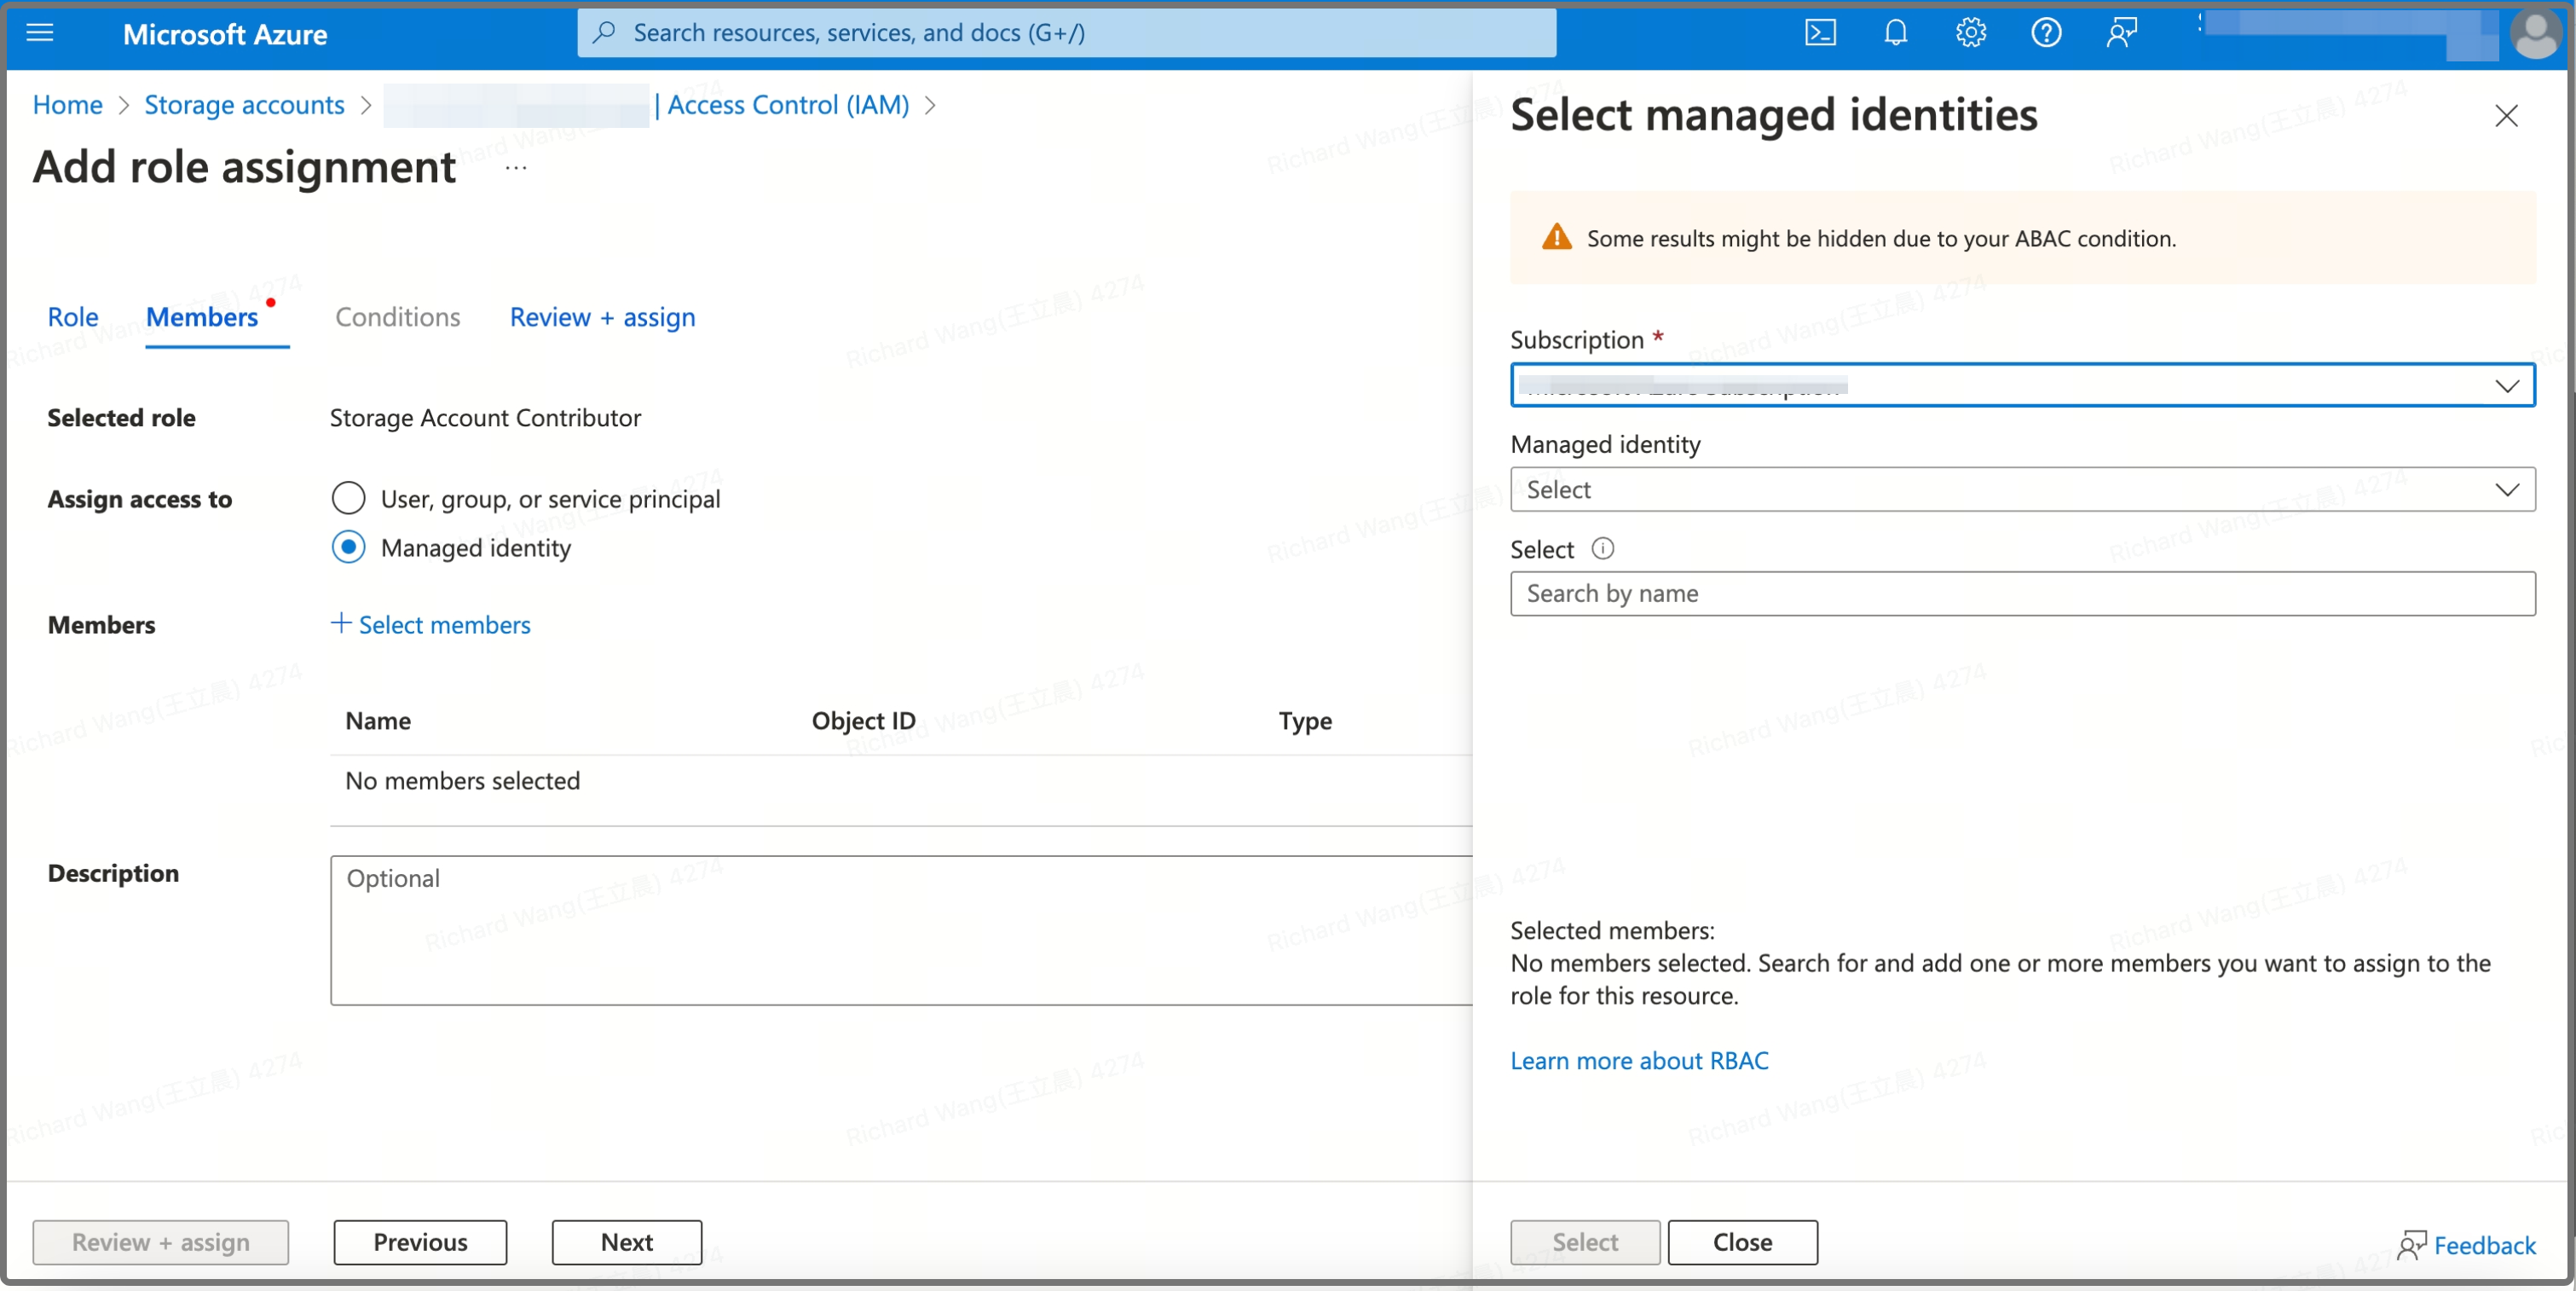
On the Members tab, select Managed identity for Assign access to.
-
For Members, click Select members. On the right-side pane that appears, select your Microsoft subscription from the Subscription drop-down list, select User Assigned Managed Identity from the Managed identity drop-down list, search for and select the managed identity you created in Step 1 from the Select section, and click Select.
-
Click Review + assign, and, on the Review + assign tab, review the information you have filled. Then, click Review + assign to add the assignment.
Grant write permissions on the storage container
Follow these steps to grant the write permission on the storage container to the managed identity:
- Navigate back to the Storage accounts service page, and click the storage account whose write permission has been granted to the managed identity.
- On the page that appears, choose Containers in the left-side pane, and click the storage container in which you want to store the query profiles of your CelerData cluster.
- On the page that appears, choose Access control (IAM) in the left-side pane. Then, click Add, and choose Add role assignment.
- On the Job function roles tab of the Add role assignment page, select Storage Blob Data Contributor, and click Next to continue.
- On the Members tab, select Managed identity for Assign access to.
- For Members, click Select members. On the right-side pane that appears, select your Microsoft subscription from the Subscription drop-down list, select User Assigned Managed Identity from the Managed identity drop-down list, search for and select the managed identity you created in Step 1 from the Select section, and click Select.
- Click Review + assign, and, on the Review + assign tab, review the information you have filled. Then, click Review + assign to add the assignment.