Create a service IAM role for EC2
You need to create a service IAM role for EC2, which will be referenced in a data credential, either from the Cloud settings page in the CelerData Cloud BYOC console before you create a deployment or as part of the workflow of creating a deployment.
Before you begin
To create a service IAM role for EC2 before deployment, follow these steps:
-
Sign in to the CelerData Cloud BYOC console.
-
In the left-side navigation pane, choose Cloud settings > AWS.
-
On the Data credentials tab of the AWS Cloud page, click Create data credential.
-
In the Create data credential dialog box, copy the JSON policy template in IAM policy information, and then save the JSON policy template to a location that you can access later.
To create a service IAM role for EC2 during deployment, follow these steps:
-
Sign in to the CelerData Cloud BYOC console.
-
Start the deployment wizard and proceed to STEP2: Configure cloud credentials.
-
In the Data credential section, select or create a data credential, copy the JSON policy template in IAM policy information, and then save the JSON policy template to a location that you can access later.
Step 1: Create an IAM role for EC2
-
Sign in to the AWS IAM console as a user with administrator privileges.
-
In the left-side navigation pane, choose Access management > Roles.
-
On the Roles page, click Create role.
The Create role wizard appears, helping you create an IAM role with three steps.
-
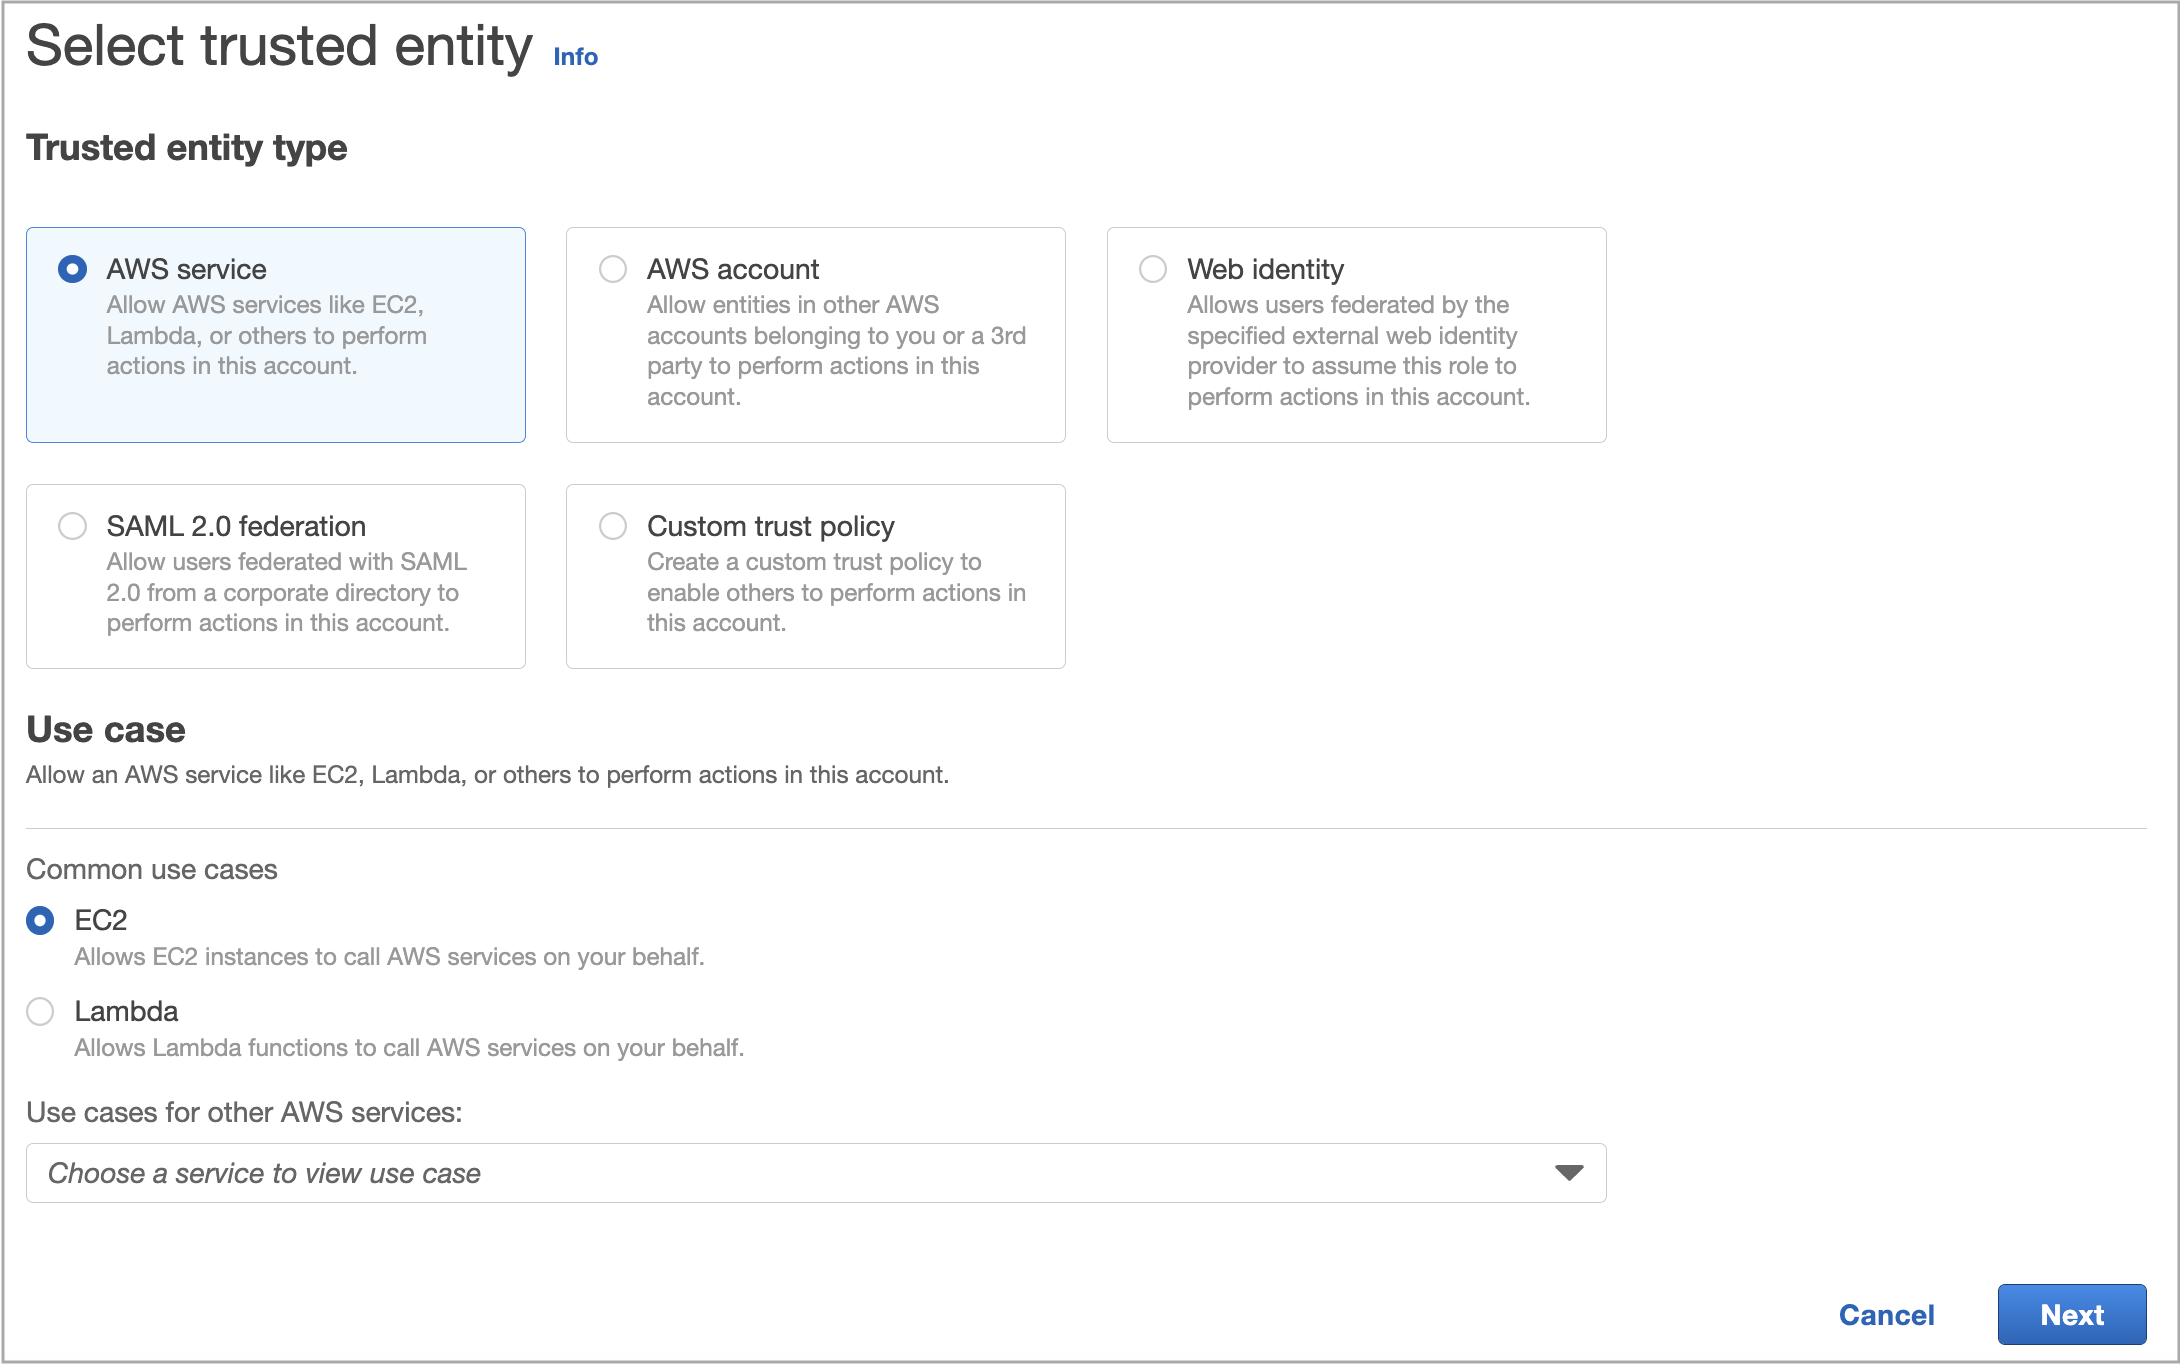
In the Select trusted entity step, do as follows:
a. In the Trusted entity type section, select AWS service.
b. In the Use case section, select EC2.
c. Click Next.
-
In the Add permissions step, click Next.
-
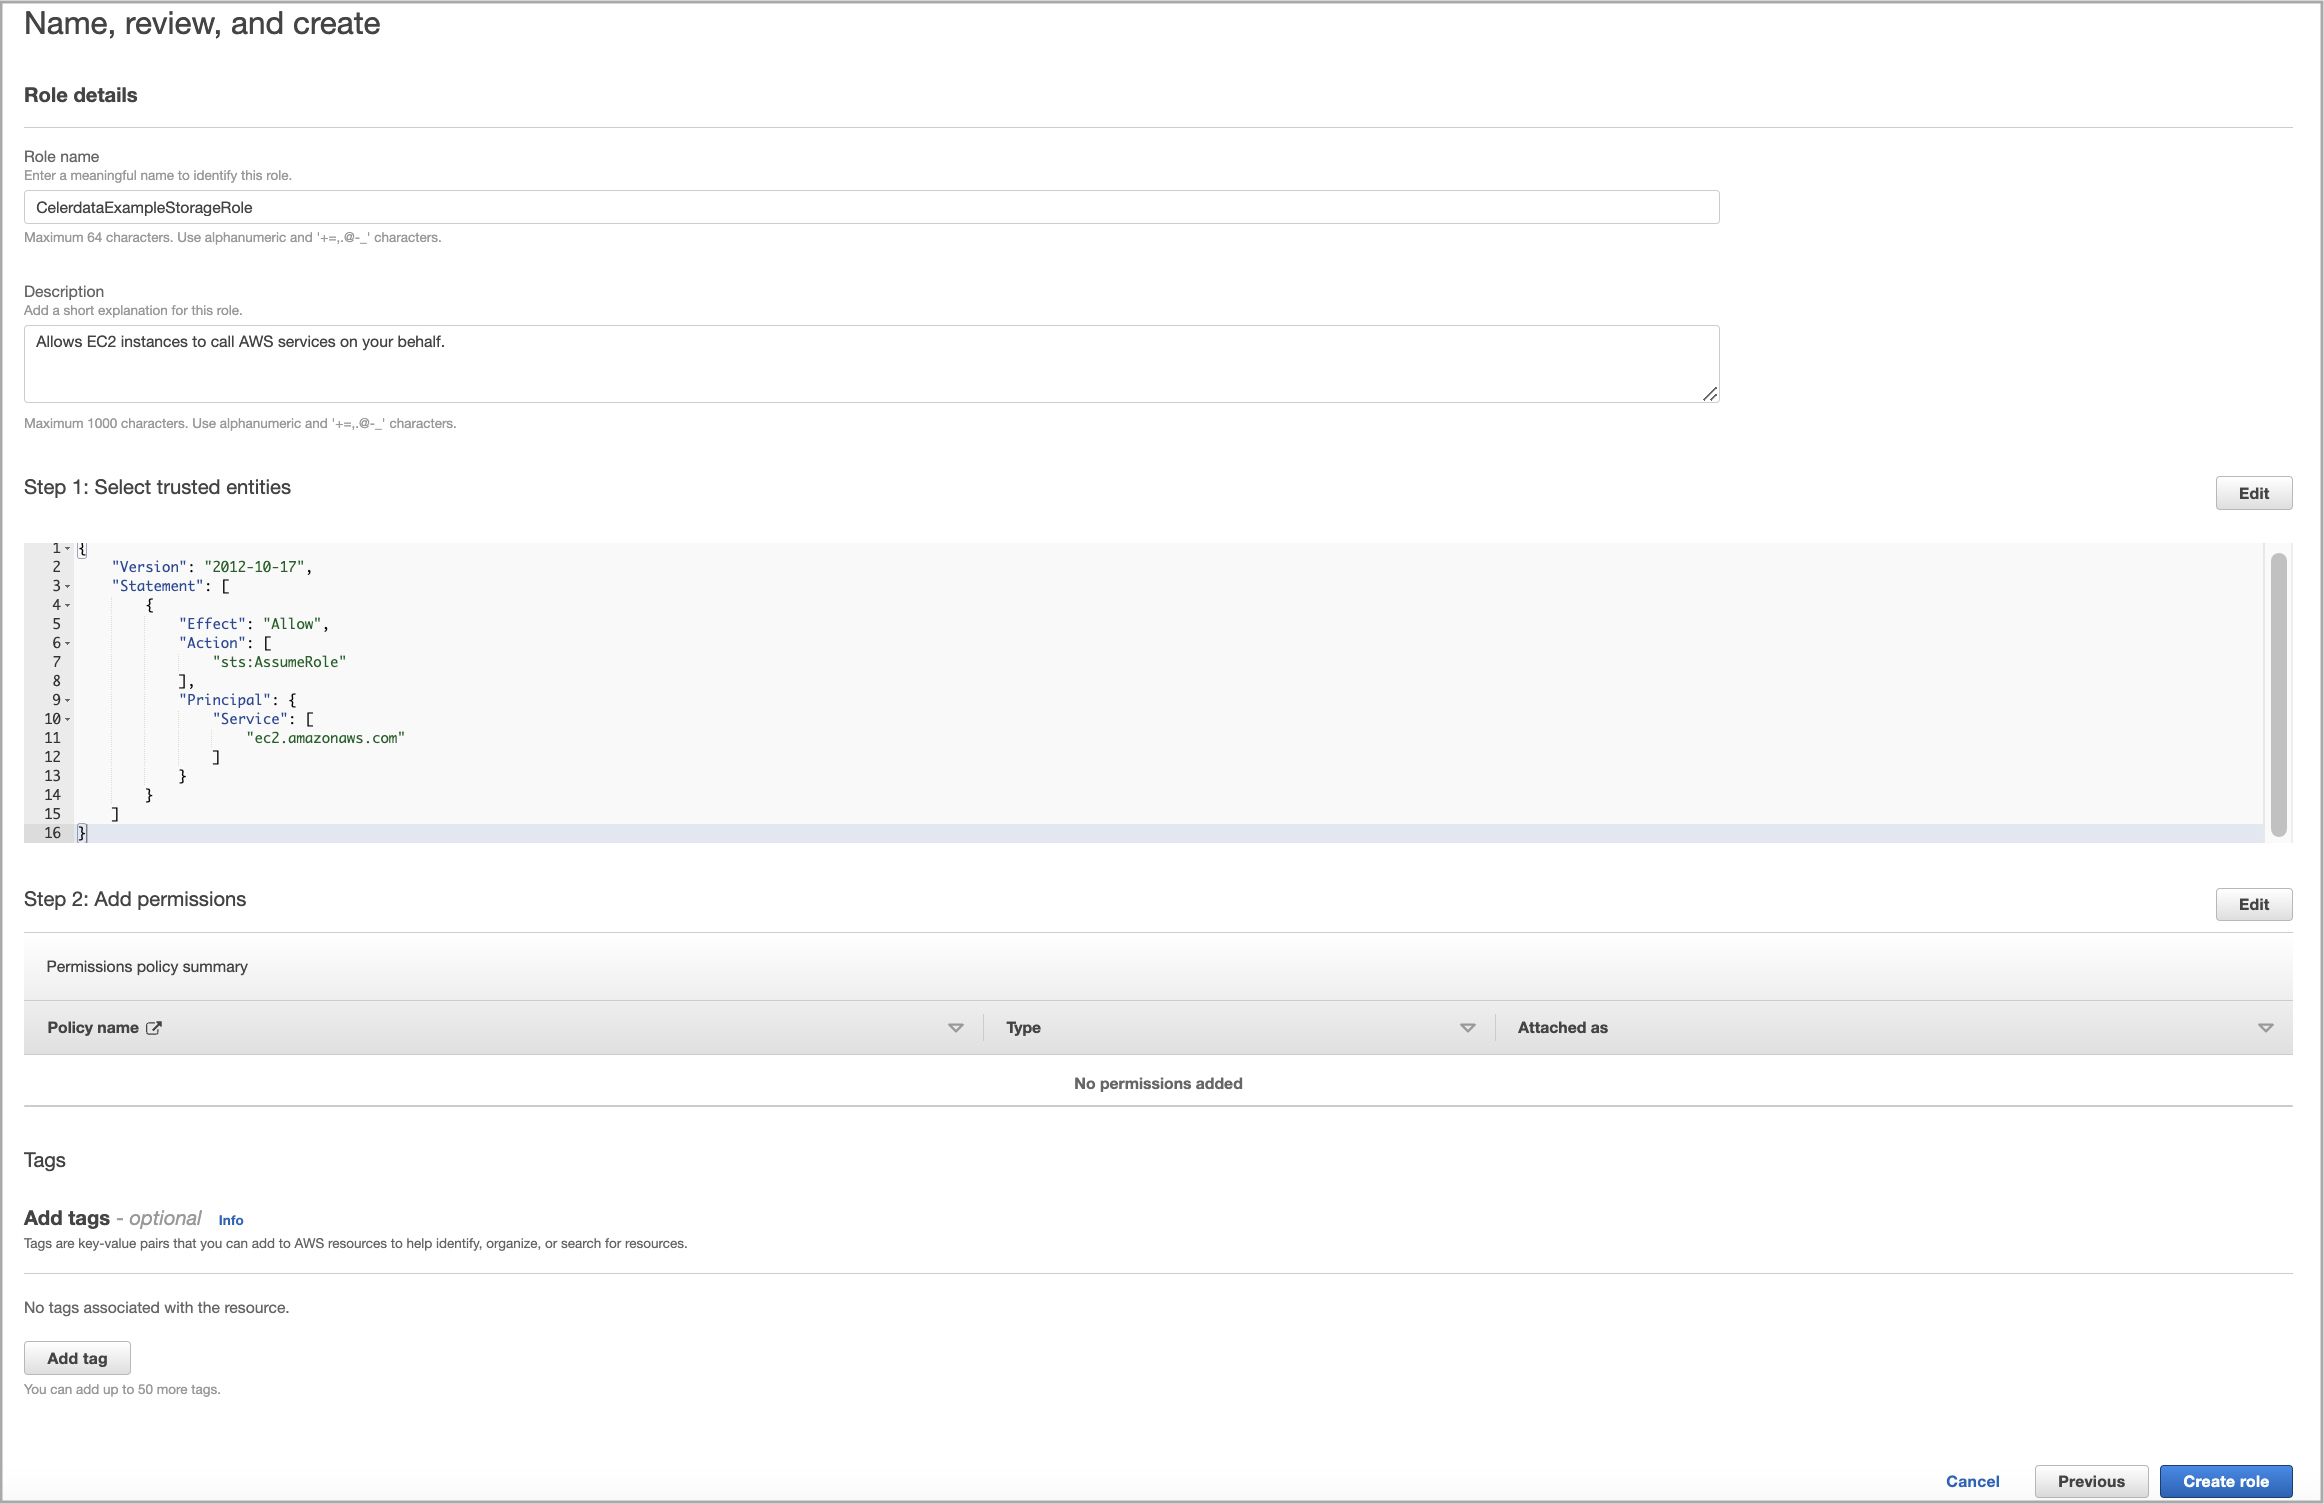
In the Name, review, and create step, enter a role name, optionally enter a description or add tags, and then click Create role.
Step 2: Add an inline policy to the IAM role for EC2
-
In the left-side navigation pane, choose Access management > Roles.
-
On the Roles page, find the IAM role that you just created and click its name.
-
In the Permissions policies section of the page that appears, click Add permissions and choose Create inline policy.
-
In the Specify permissions step, click the JSON tab, delete the existing JSON policy document, and paste the Policy template that you have obtained in Before you begin. In the policy template, replace
<s3-bucket-name>with the name of your bucket, which must reside in the AWS region in which you want to create deployments. Then, click Review policy.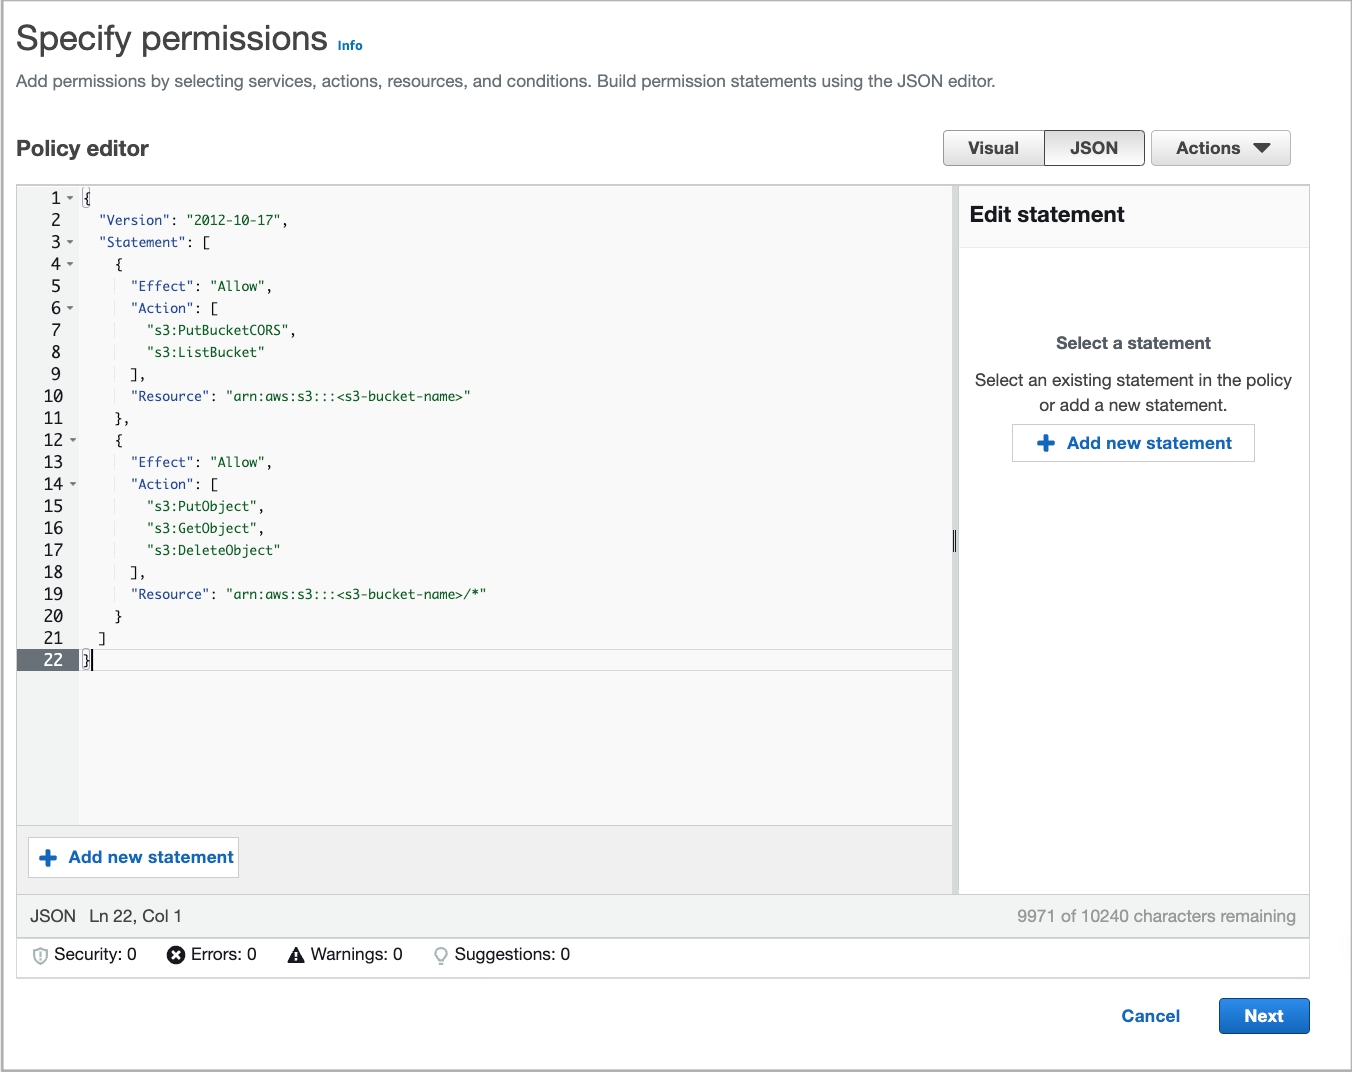
-
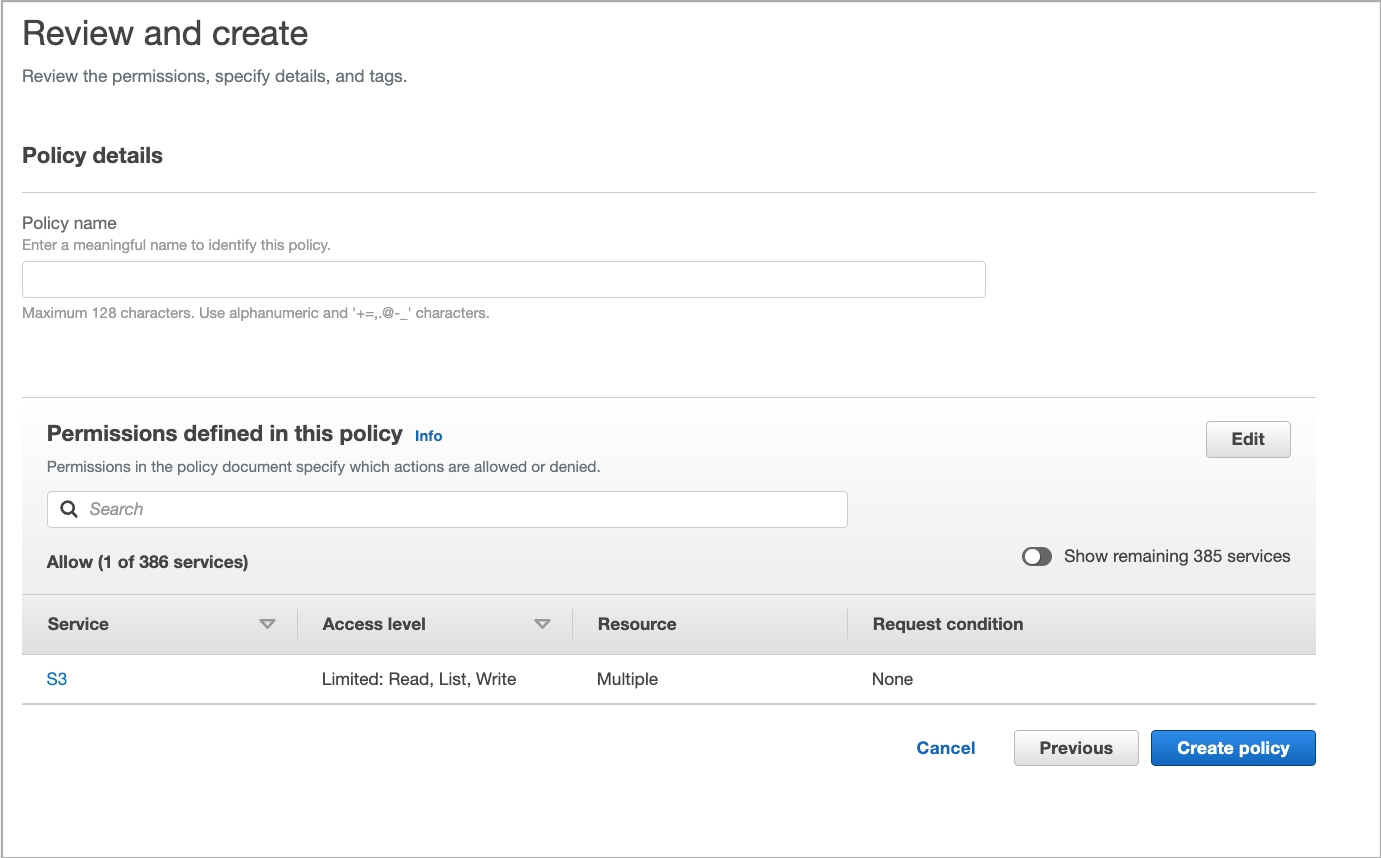
In the Review Policy step, enter a policy name and click Create policy.
(Optional) Step 3: Attach a policy for SSM Agent to the IAM role for EC2
This step is required if you want to connect to your CelerData cluster by using AWS Systems Manager Agent (SSM Agent).
NOTE
You cannot connect to an existing CelerData cluster by using AWS Systems Manager Agent (SSM Agent) even after you perform this step on the IAM role for EC2 referenced in the data credential that was used to deploy the cluster.
-
In the left-side navigation pane, choose Access management > Roles.
-
On the Roles page, find the IAM role that you just created and click its name.
-
In the Permissions policies section of the page that appears, click Add permissions and choose Attach policies.
-
On the page that appears, find and select AmazonSSMManagedInstanceCore. Then, click Add permissions.
You are directed back to the IAM role's details page, and in the Permissions policies section you can find the AmazonSSMManagedInstanceCore policy you just attached.
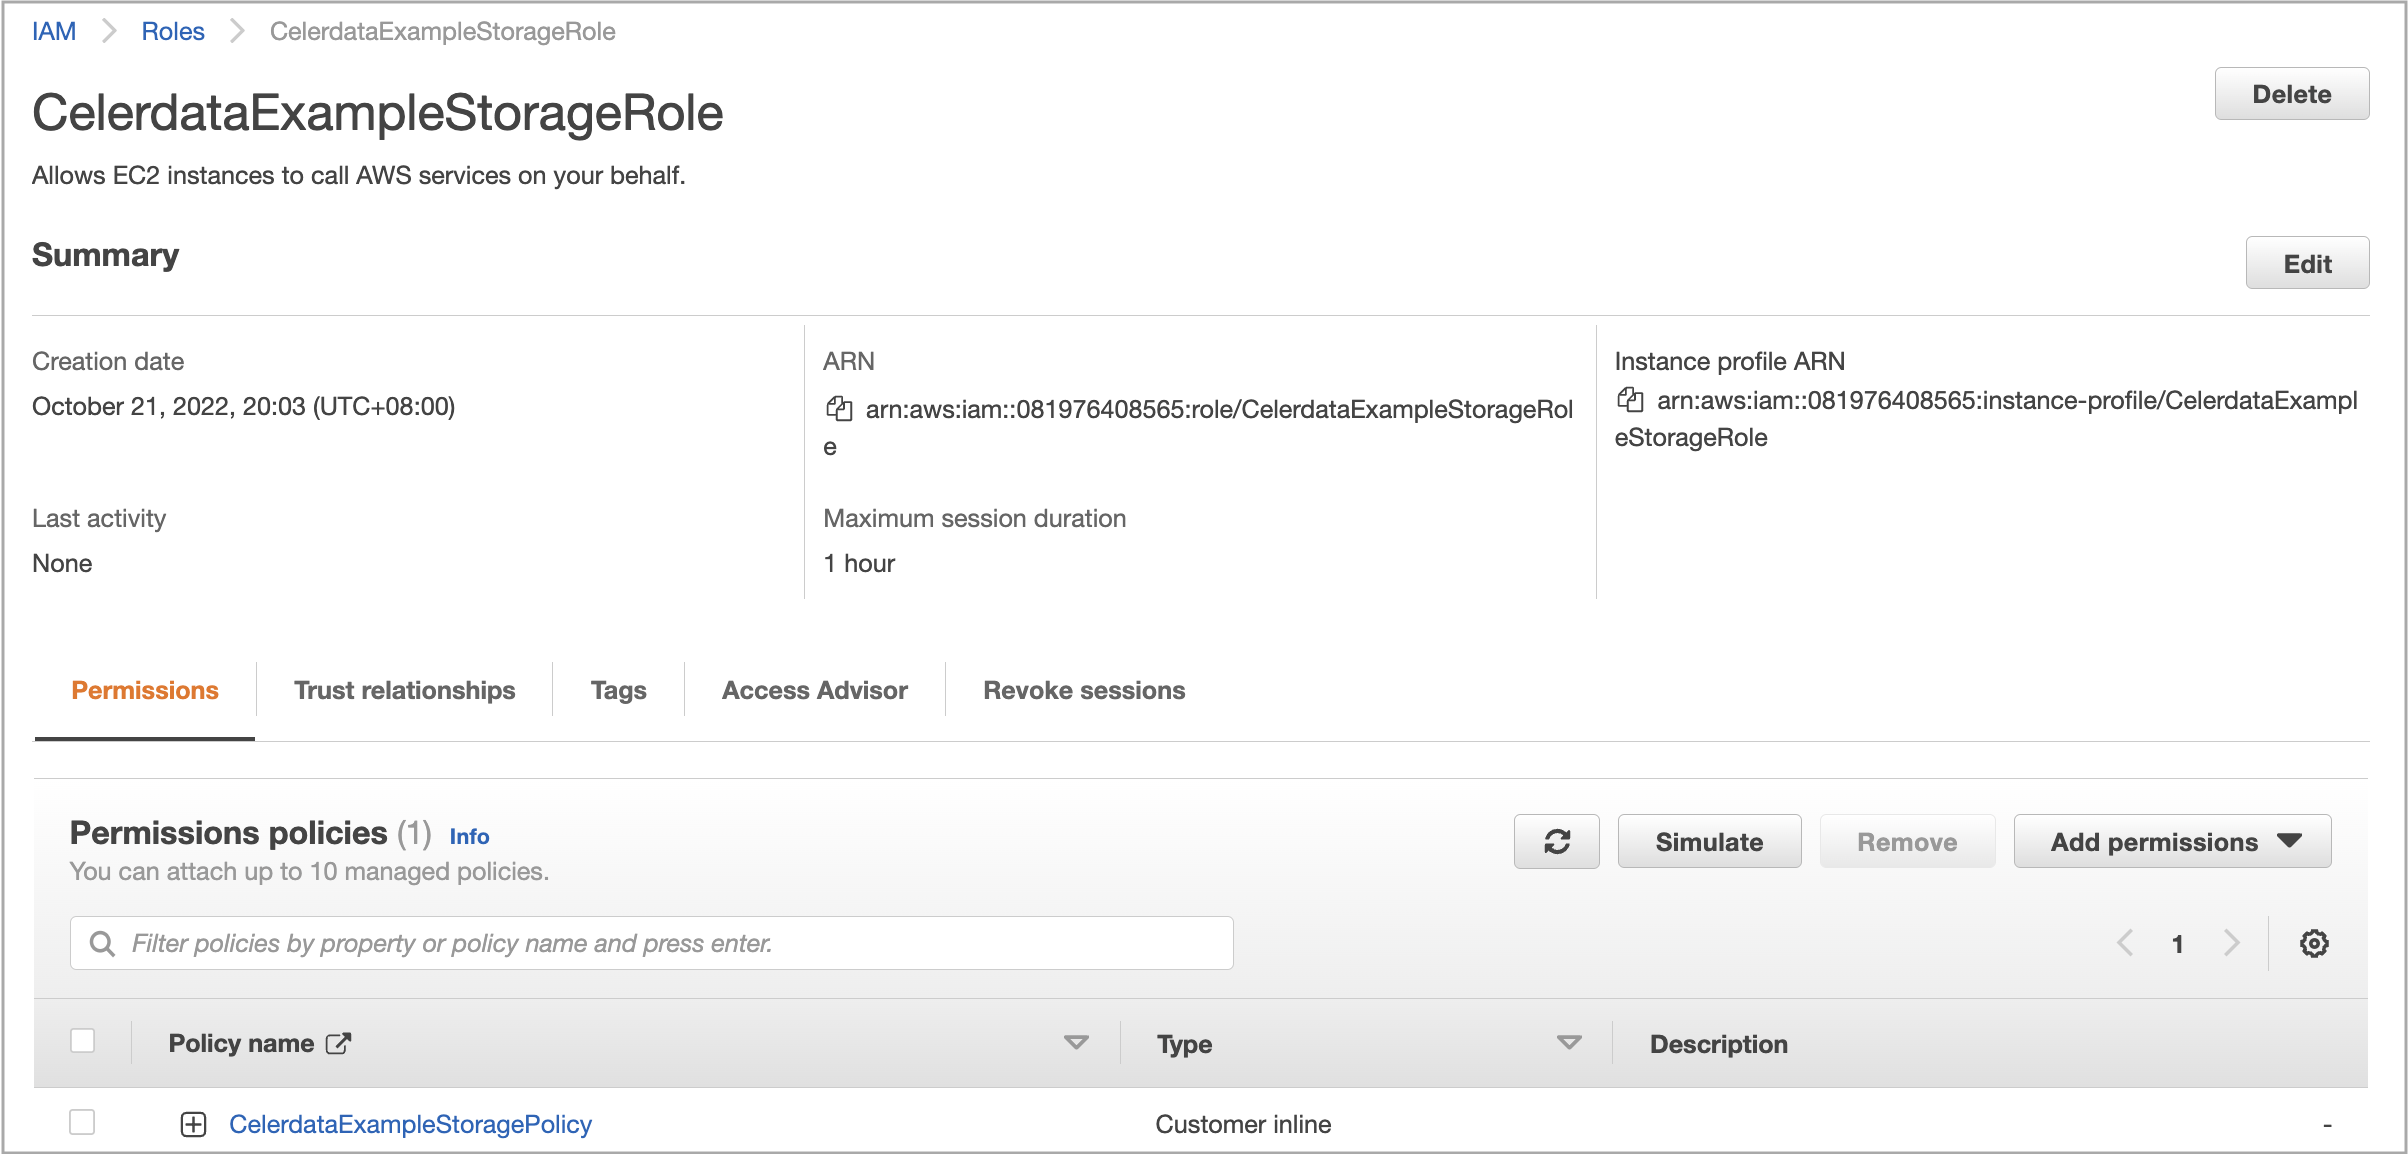
Step 4: Obtain the instance profile ARN of the IAM role for EC2
In the Summary section of the role details page that appears, copy the Instance profile ARN of the IAM role for EC2 and save the instance profile ARN to a location that you can access later. You will need to provide the instance profile ARN when you create a data credential.
