Suspend and resume a CelerData cluster
CelerData allows suspending a cluster to avoid unnecessary costs during idle time. Once your cluster is suspended, CelerData does not charge you with CCUs for your suspended cluster any more. Also, you no longer need to pay your cloud provider for the virtual machines on which your cluster runs.
You can resume your suspended cluster if you need it again.
Suspend a cluster
CelerData provides three suspend methods:
- Manual suspend
- Scheduled suspend
- Auto suspend on idle
Note that when CelerData suspends a cluster, it suspends all of the cluster's warehouses (including the default warehouse) together with the cluster.
Manual suspend
-
Sign in to the CelerData Cloud BYOC console.
-
On the Clusters page, click the cluster that you want to suspend.
-
On the cluster details page, click Manage and choose Suspend cluster.
-
In the message that appears, click Confirm.
CelerData immediately starts suspending the cluster. This may take a few minutes, during which the cluster stays in the Suspending state. During that period of time, you cannot perform operations such as scaling the cluster, adding warehouses to the cluster, or releasing the cluster. When suspending the cluster is complete, the cluster enters the Suspended state.
NOTE
You can only suspend clusters that are in the Running state. If a cluster is not in the Running state, the Suspend cluster menu item is not displayed.
Scheduled suspend
-
Sign in to the CelerData Cloud BYOC console.
-
On the Clusters page, click the cluster that you want to periodically suspend.
-
On the cluster details page, click the Resource Scheduling tab. Then, click Create scheduling policy in the Scheduling policy section.

-
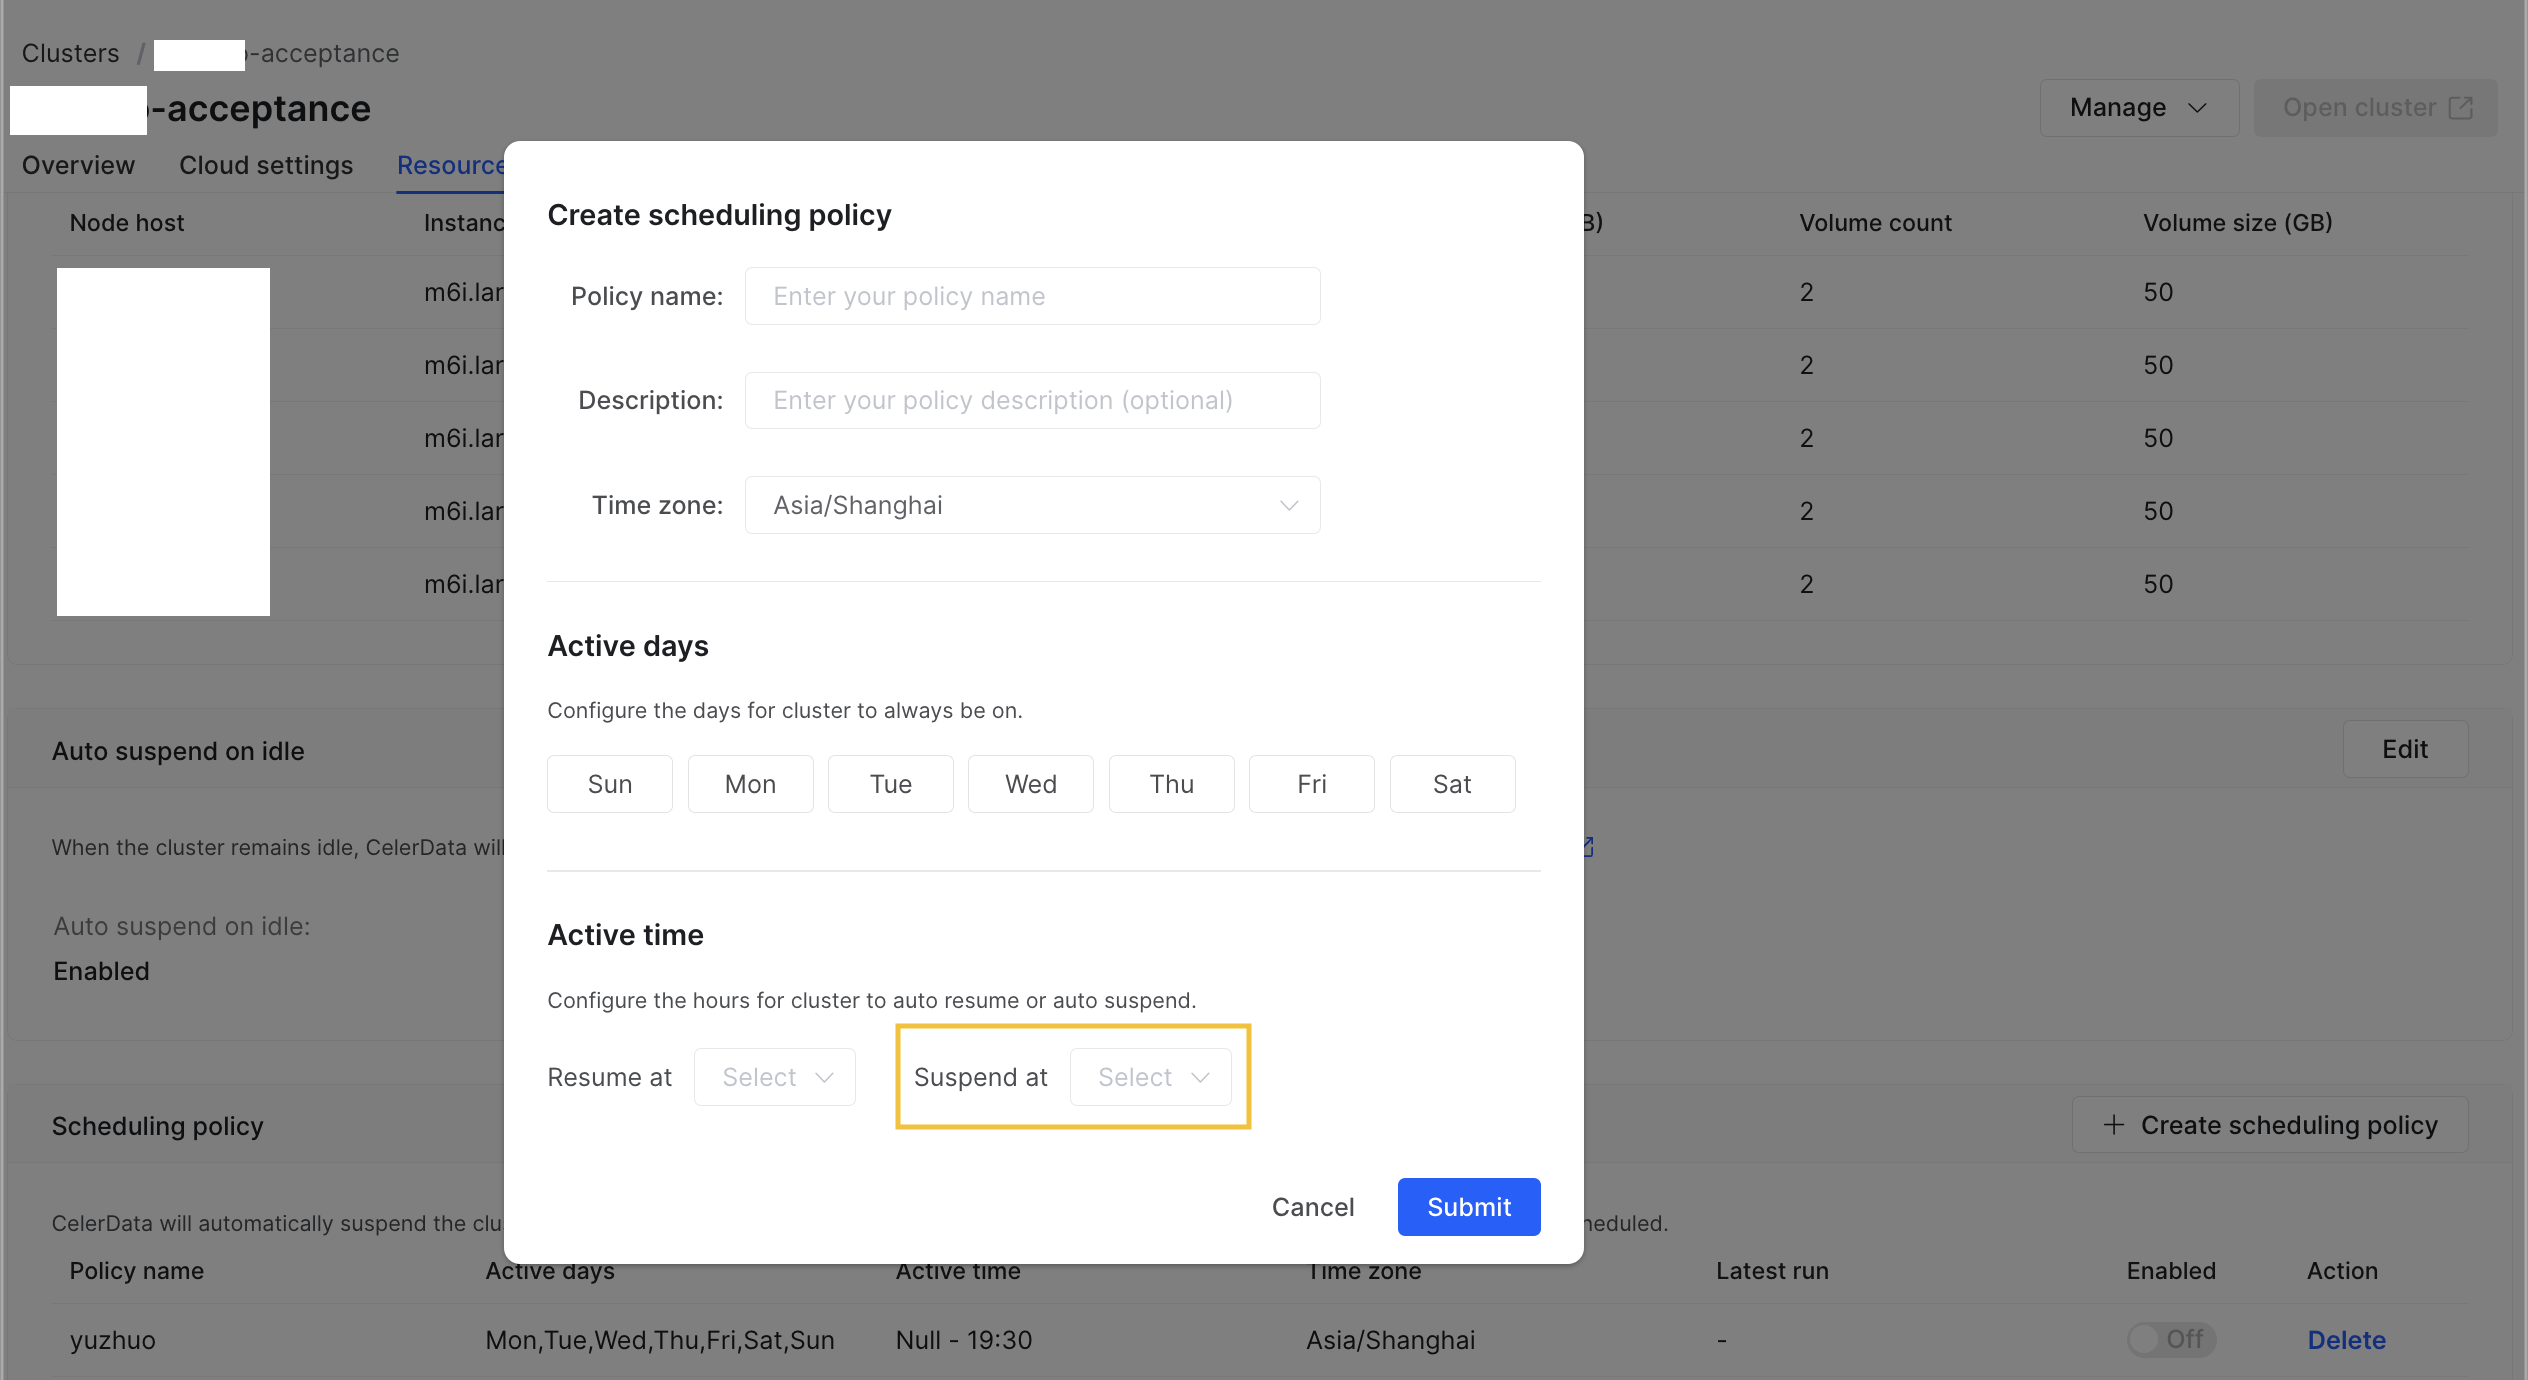
In the Create scheduling policy dialog box, specify the name, description, and time zone of the scheduling policy, select the days on which you want the cluster to be off, select the hour at which you want CelerData to automatically suspend the cluster, and then click Submit.

-
In the Scheduling policy section of the cluster details page, find the scheduling policy you just created, and turn on its switch in the Enabled column to make it take effect.
The cluster will be suspended at the selected hour on every selected day according to the scheduling policy that you created.
Auto suspend on idle
When the Auto Suspend feature is enabled, CelerData monitors the activity levels of the nodes in the cluster. If the nodes stay idle for a specified amount of time, CelerData automatically suspends the cluster.
With the Auto Suspend feature, resources are allocated only when needed. This delivers efficient resource utilization and further reduces costs.
Follow these steps to configure the Auto Suspend feature:
-
Sign in to the CelerData Cloud BYOC console.
-
On the Clusters page, click the cluster that you want to suspend when it stays idle.
-
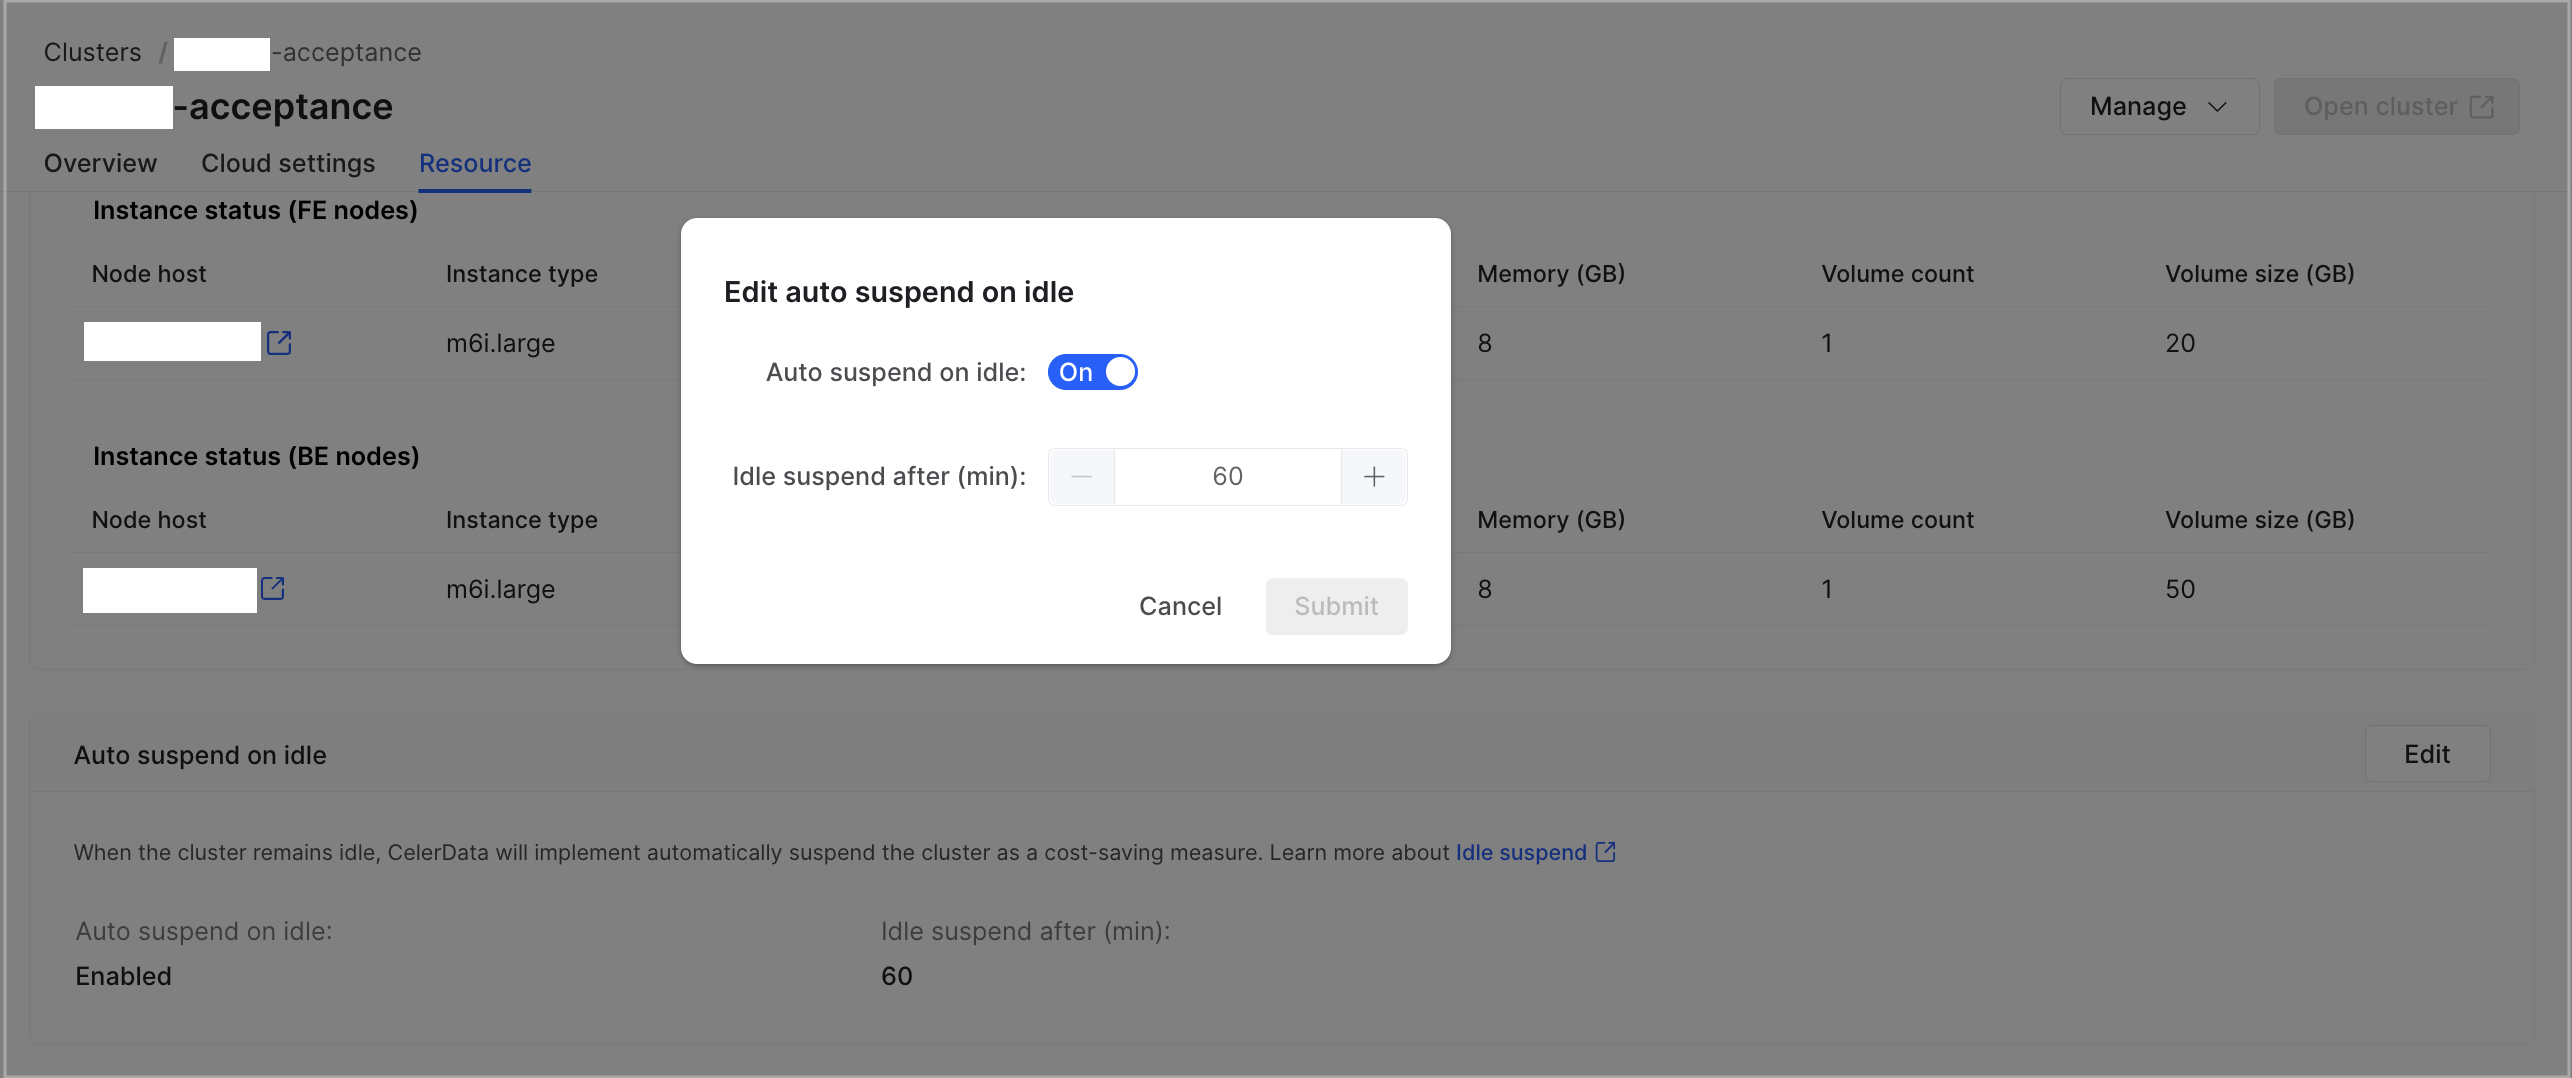
On the cluster details page, click the Resource Scheduling tab. Then, click Edit in the Auto suspend on idle section.

-
In the Edit auto suspend on idle dialog box, turn on the switch next to Idle suspend, select the maximum amount of time during which the cluster can stay idle, and then click Submit.

If you want to disable this feature, turn off the switch and click Submit in the dialog box.
Resume a cluster
CelerData provides two resume methods:
- Manual resume
- Scheduled resume
Note that when CelerData resumes a cluster, it resumes only the default warehouse together with the cluster. For the other warehouses created after the cluster deployment, you need to resume them one by one if you need them to run. For more information, see Suspend and resume a warehouse.
Manual resume
-
Sign in to the CelerData Cloud BYOC console.
-
On the Clusters page, click the cluster that you want to resume.
-
On the cluster details page, click Manage and choose Resume cluster.
CelerData displays a message stating that only the default warehouse will be resumed and asking you whether you want to resume the cluster. CelerData starts resuming the cluster only after you click Confirm in the message.
Resuming the cluster takes a few minutes, during which the cluster stays in the Resuming state. During that period of time, you cannot perform operations such as scaling the cluster or adding warehouses to the cluster. When resuming the cluster is complete, the cluster enters the Running state.
noteYou can only resume clusters that are in the Suspended state. If a cluster is not in the Suspended state, the Resume menu item is not displayed.
Scheduled resume
-
Sign in to the CelerData Cloud BYOC console.
-
On the Clusters page, click the cluster that you want to periodically resume.
-
On the cluster details page, click the Resource Scheduling tab. Then, click Create scheduling policy in the Scheduling policy section.

-
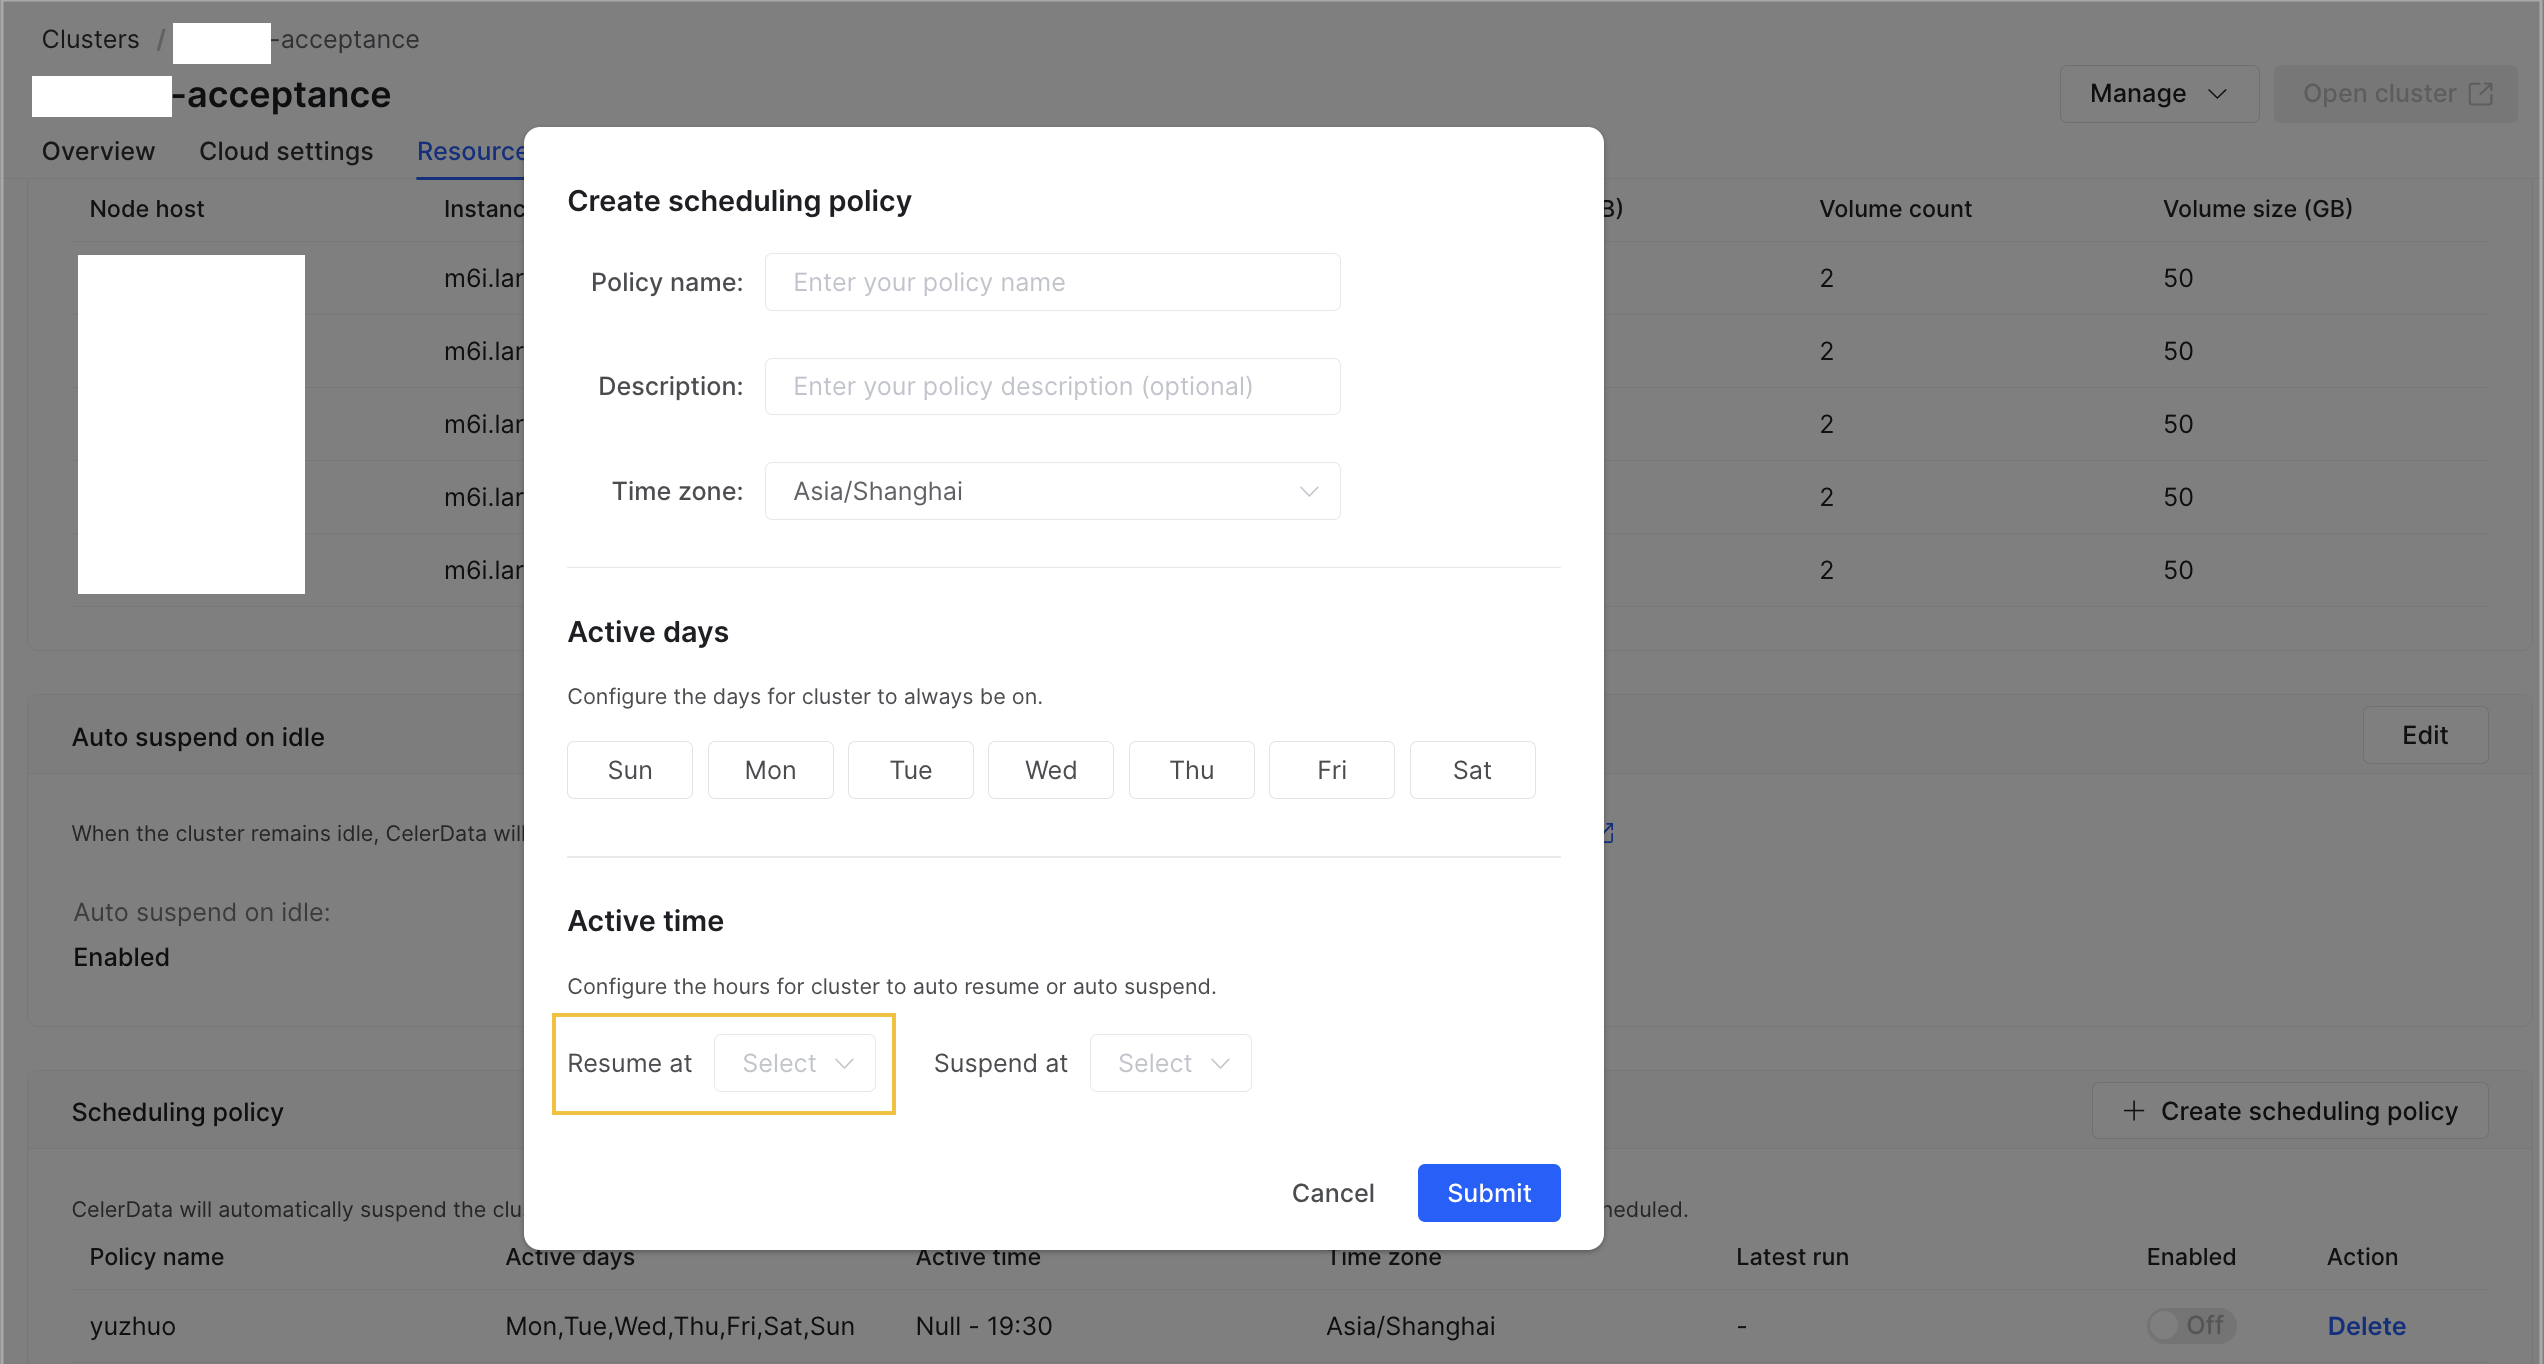
In the Create scheduling policy dialog box, specify the name, description, and time zone of the scheduling policy, select the days on which you want the cluster to be on, select the hour at which you want CelerData to automatically resume the cluster, and then click Submit.

-
In the Scheduling policy section of the cluster details page, find the scheduling policy you just created, and turn on its switch in the Enabled column to make it take effect.
The cluster will be resumed at the selected hour on every selected day according to the scheduling policy that you created.
What's more
You can configure a single scheduling policy that controls both scheduled resume and scheduled suspend.
You can also delete a scheduling policy. To achieve this, open the cluster details page, navigate to the Resource Scheduling tab, find the scheduling policy you want to delete, click Delete in its Action column, and then click Delete in the message that appears.