Create a Private Service Connect Endpoint
You can create a Private Service Connect (PSC) endpoint on Google Cloud Platform (GCP) to enable direct, secure connectivity between CelerData's VPC and your own VPC. If your cluster is deployed in a private subnet without internet access, you must configure the correct PSC endpoint for connectivity.
PSC endpoint is also required for enabling End-to-End Private Link for your cluster, which can secure all the traffic between your client and the CelerData Cloud service in addition to that between your CelerData cluster and CelerData Cloud service. You can even disable the public access to CelerData cluster console to forbid any traffic directly from the public internet to your CelerData cluster console.
Before proceeding, make sure you have enabled necessary APIs for your project.
Ensure your cluster is not publicly accessible
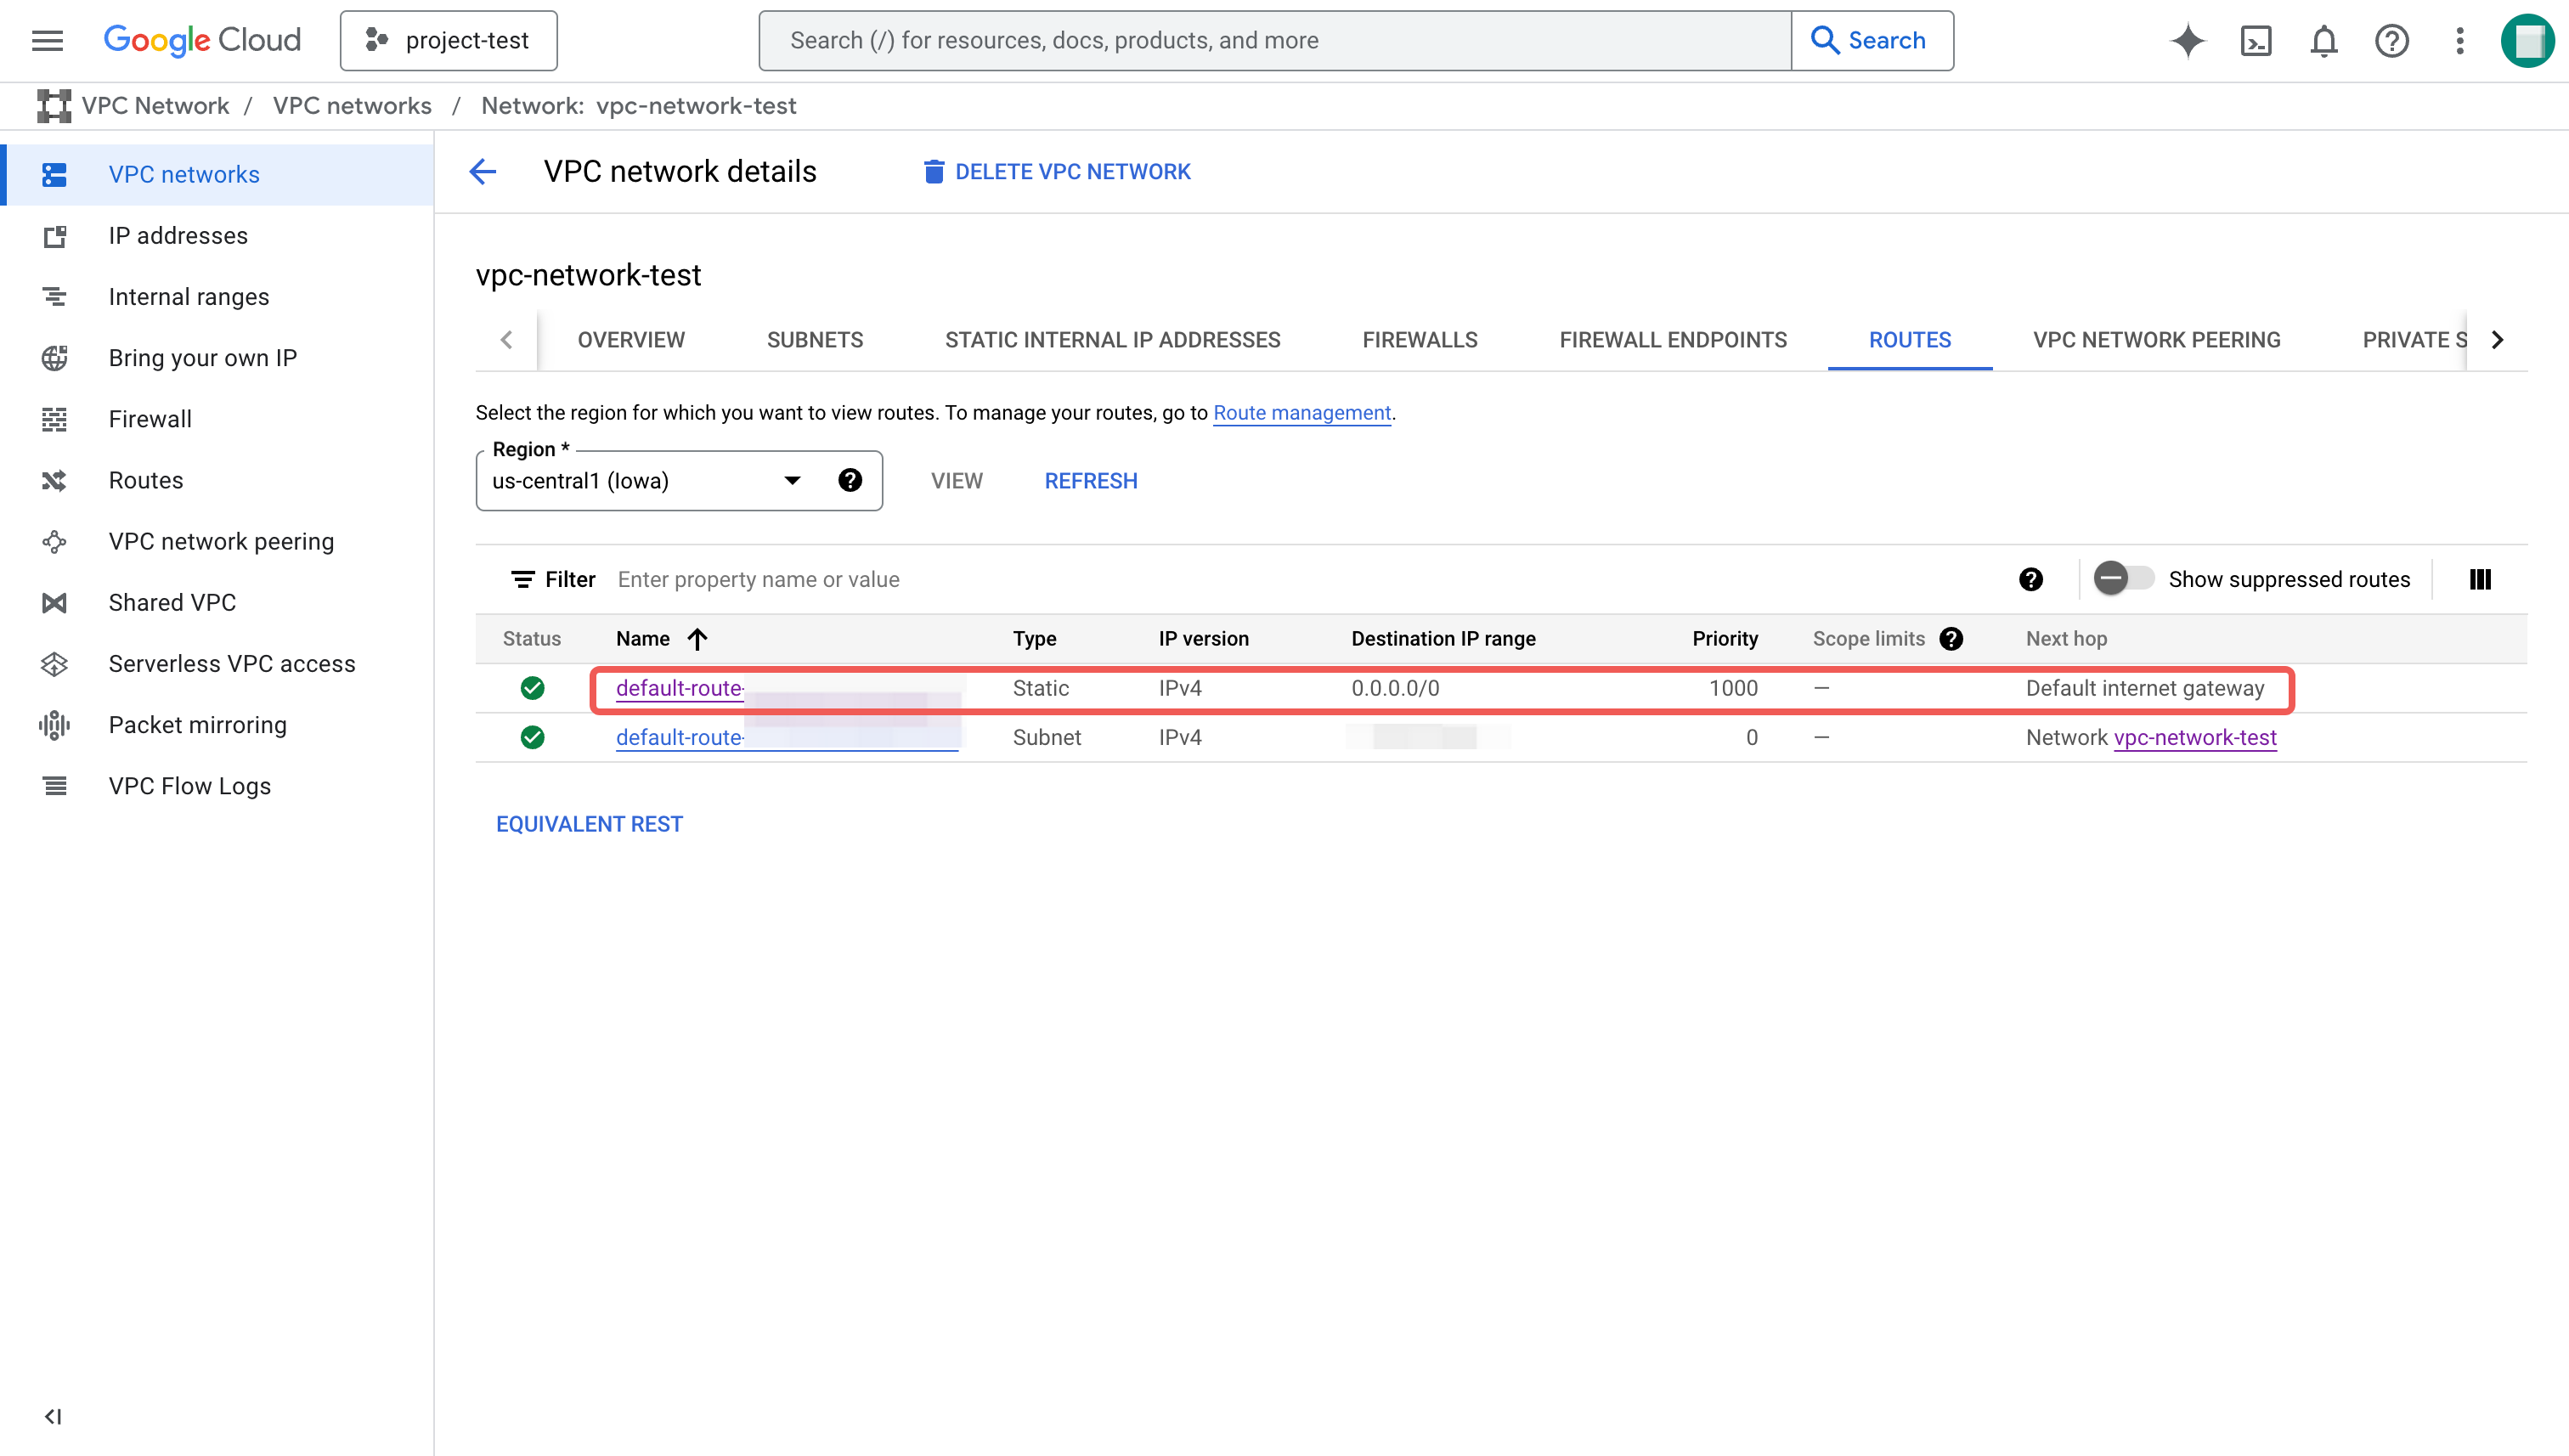
For security reasons, your cluster should not be accessible over the public internet. To verify this, check your VPC routes to ensure there is no route with:
- Destination IP range:
0.0.0.0/0 - Next hop: Default internet gateway
If such a route exists, CelerData Cloud will create a public Network Load Balancer (NLB) for SQL query processing, making your cluster accessible from the public internet.
Follow these steps to check your VPC routes:
-
Sign in to your project in the Google Cloud console.
-
Expand the left-side navigation menu, and choose VPC Network > VPC networks.
-
Click the VPC where your CelerData cluster will be deployed.
-
On the Routes tab of the VPC network details page, select the region of your CelerData cluster in the Region drop-down list.
-
Click View to see all routes in the selected VPC and region.
-
Look for any route with:
- Destination IP range:
0.0.0.0/0 - Next hop: Default internet gateway
- Destination IP range:
-
If found, click the route name, review the details, and click DELETE.
-
On the dialog box that appears, click DELETE.
Create a PSC Endpoint
To create a PSC endpoint, follow these steps:
-
Sign in to your project in the Google Cloud console.
-
Expand the left-side navigation menu, and choose Network Services > Private Service Connect.
-
In the Endpoints section, click CONNECT ENDPOINT.
-
On the Connect endpoint page, configure the following:
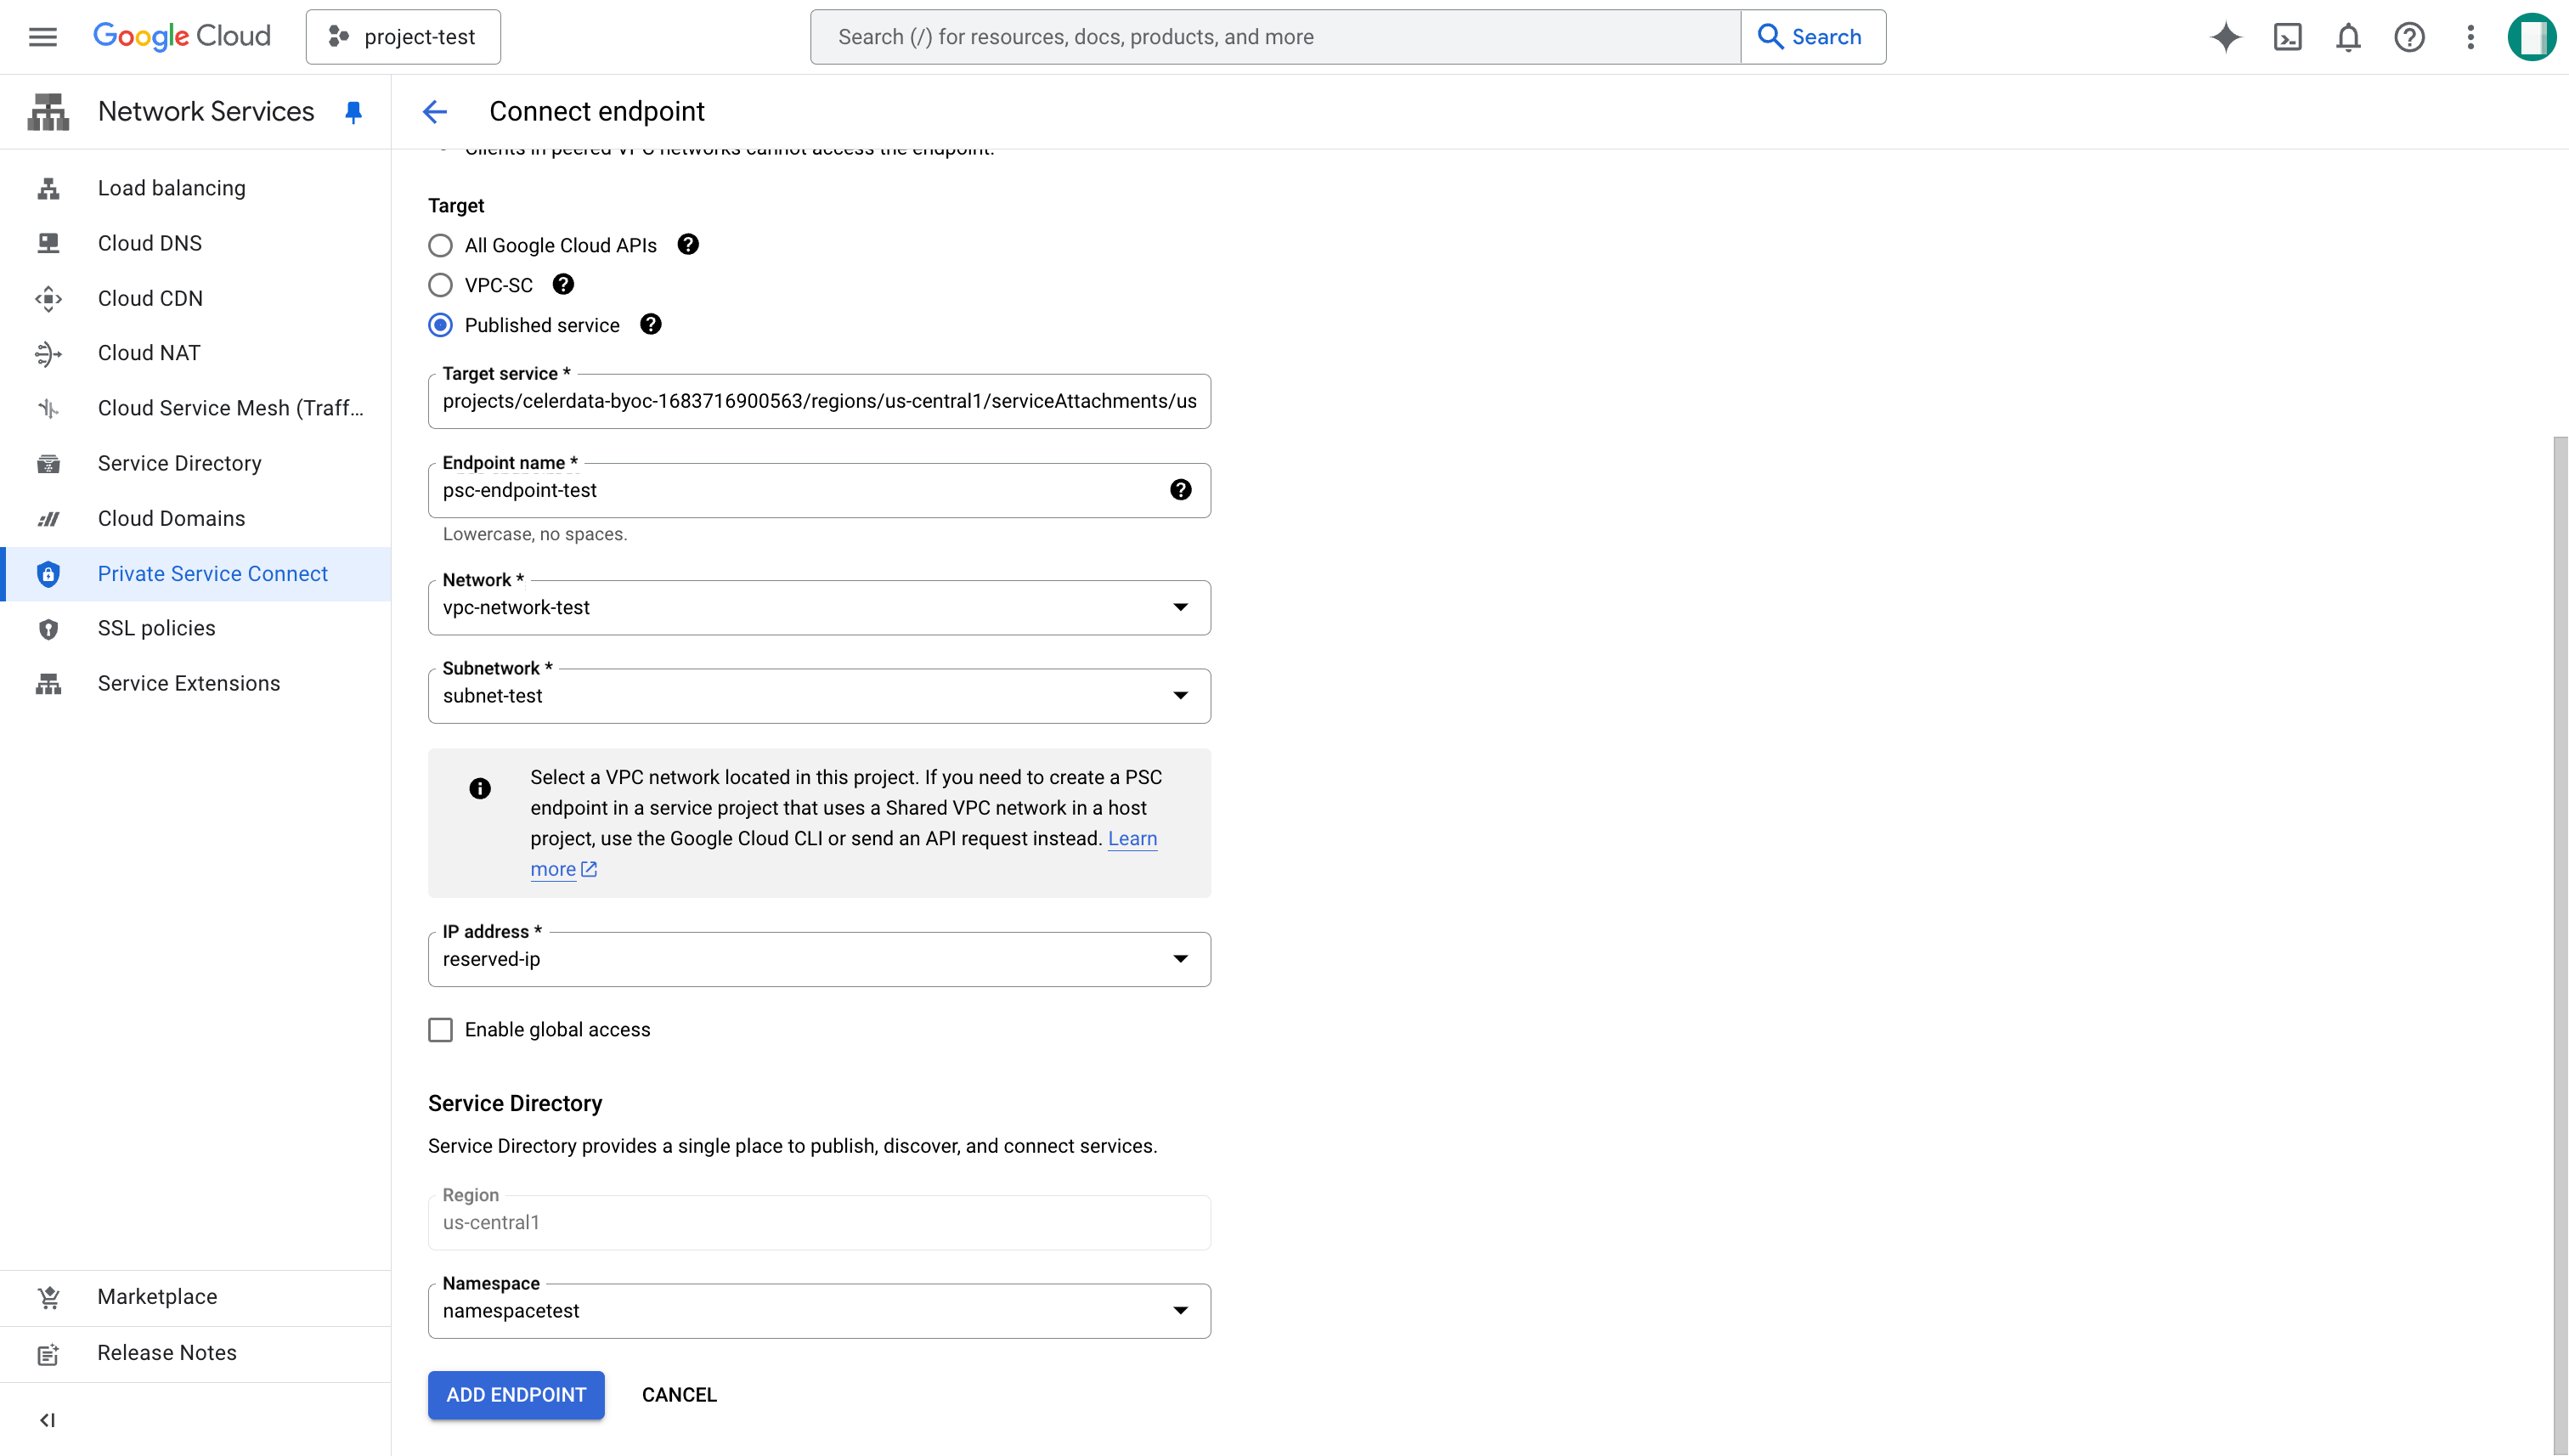
- Target: Select Published service.
- Target service: Enter the service attachment of your selected region as described in Appendix - GCP regions and service attachments.
- Endpoint name: Enter a unique name for the endpoint.
- Network: Select the VPC network for your cluster.
- Subnetwork: Select the subnet for your cluster.
- IP address: Click Create IP Address. On the dialog box that appears, enter a name for the IP address, click RESERVE to reserve a static internal IP for the endpoint. Then, select the IP address you created.
- Namespace: Click Create Namespace. On the dialog box that appears, enter a Namespace name to create a namespace. Then, select the namespace you created.
tipIf you cannot find the Namespace field, you must enable the API for Namespace first.
-
Click ADD ENDPOINT.
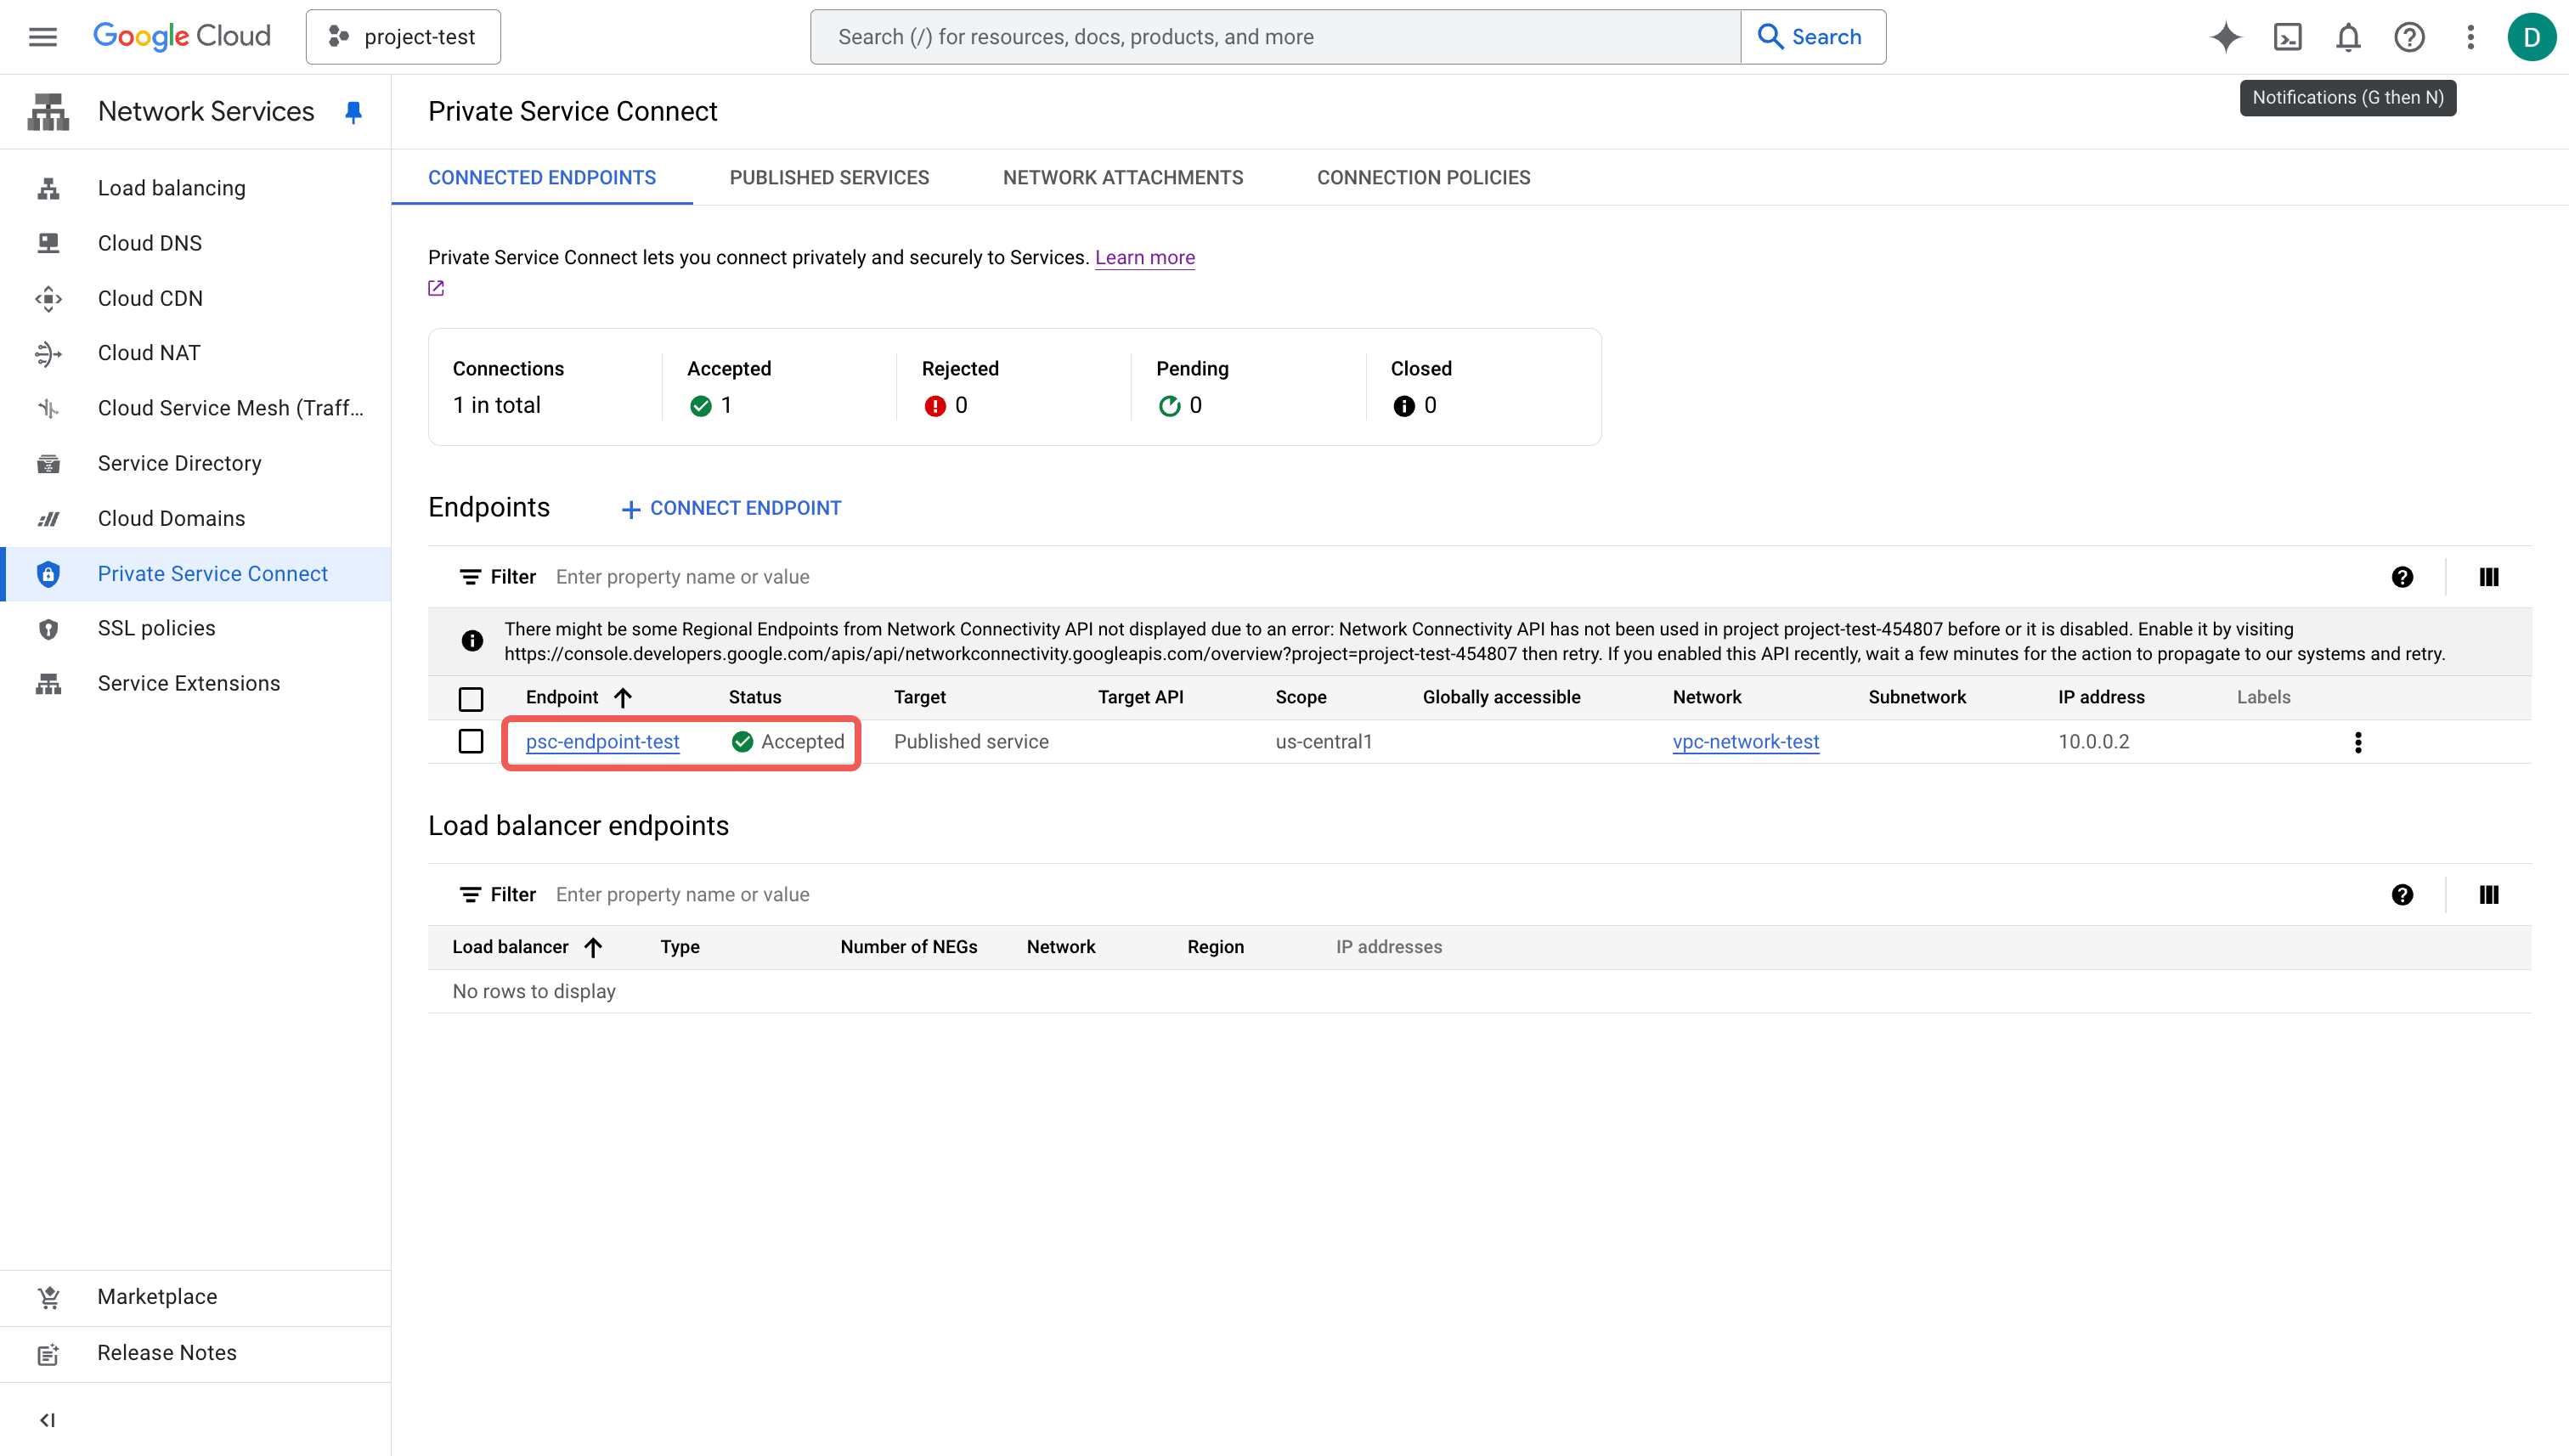
Wait until the endpoint is created. The Status should be Accepted.
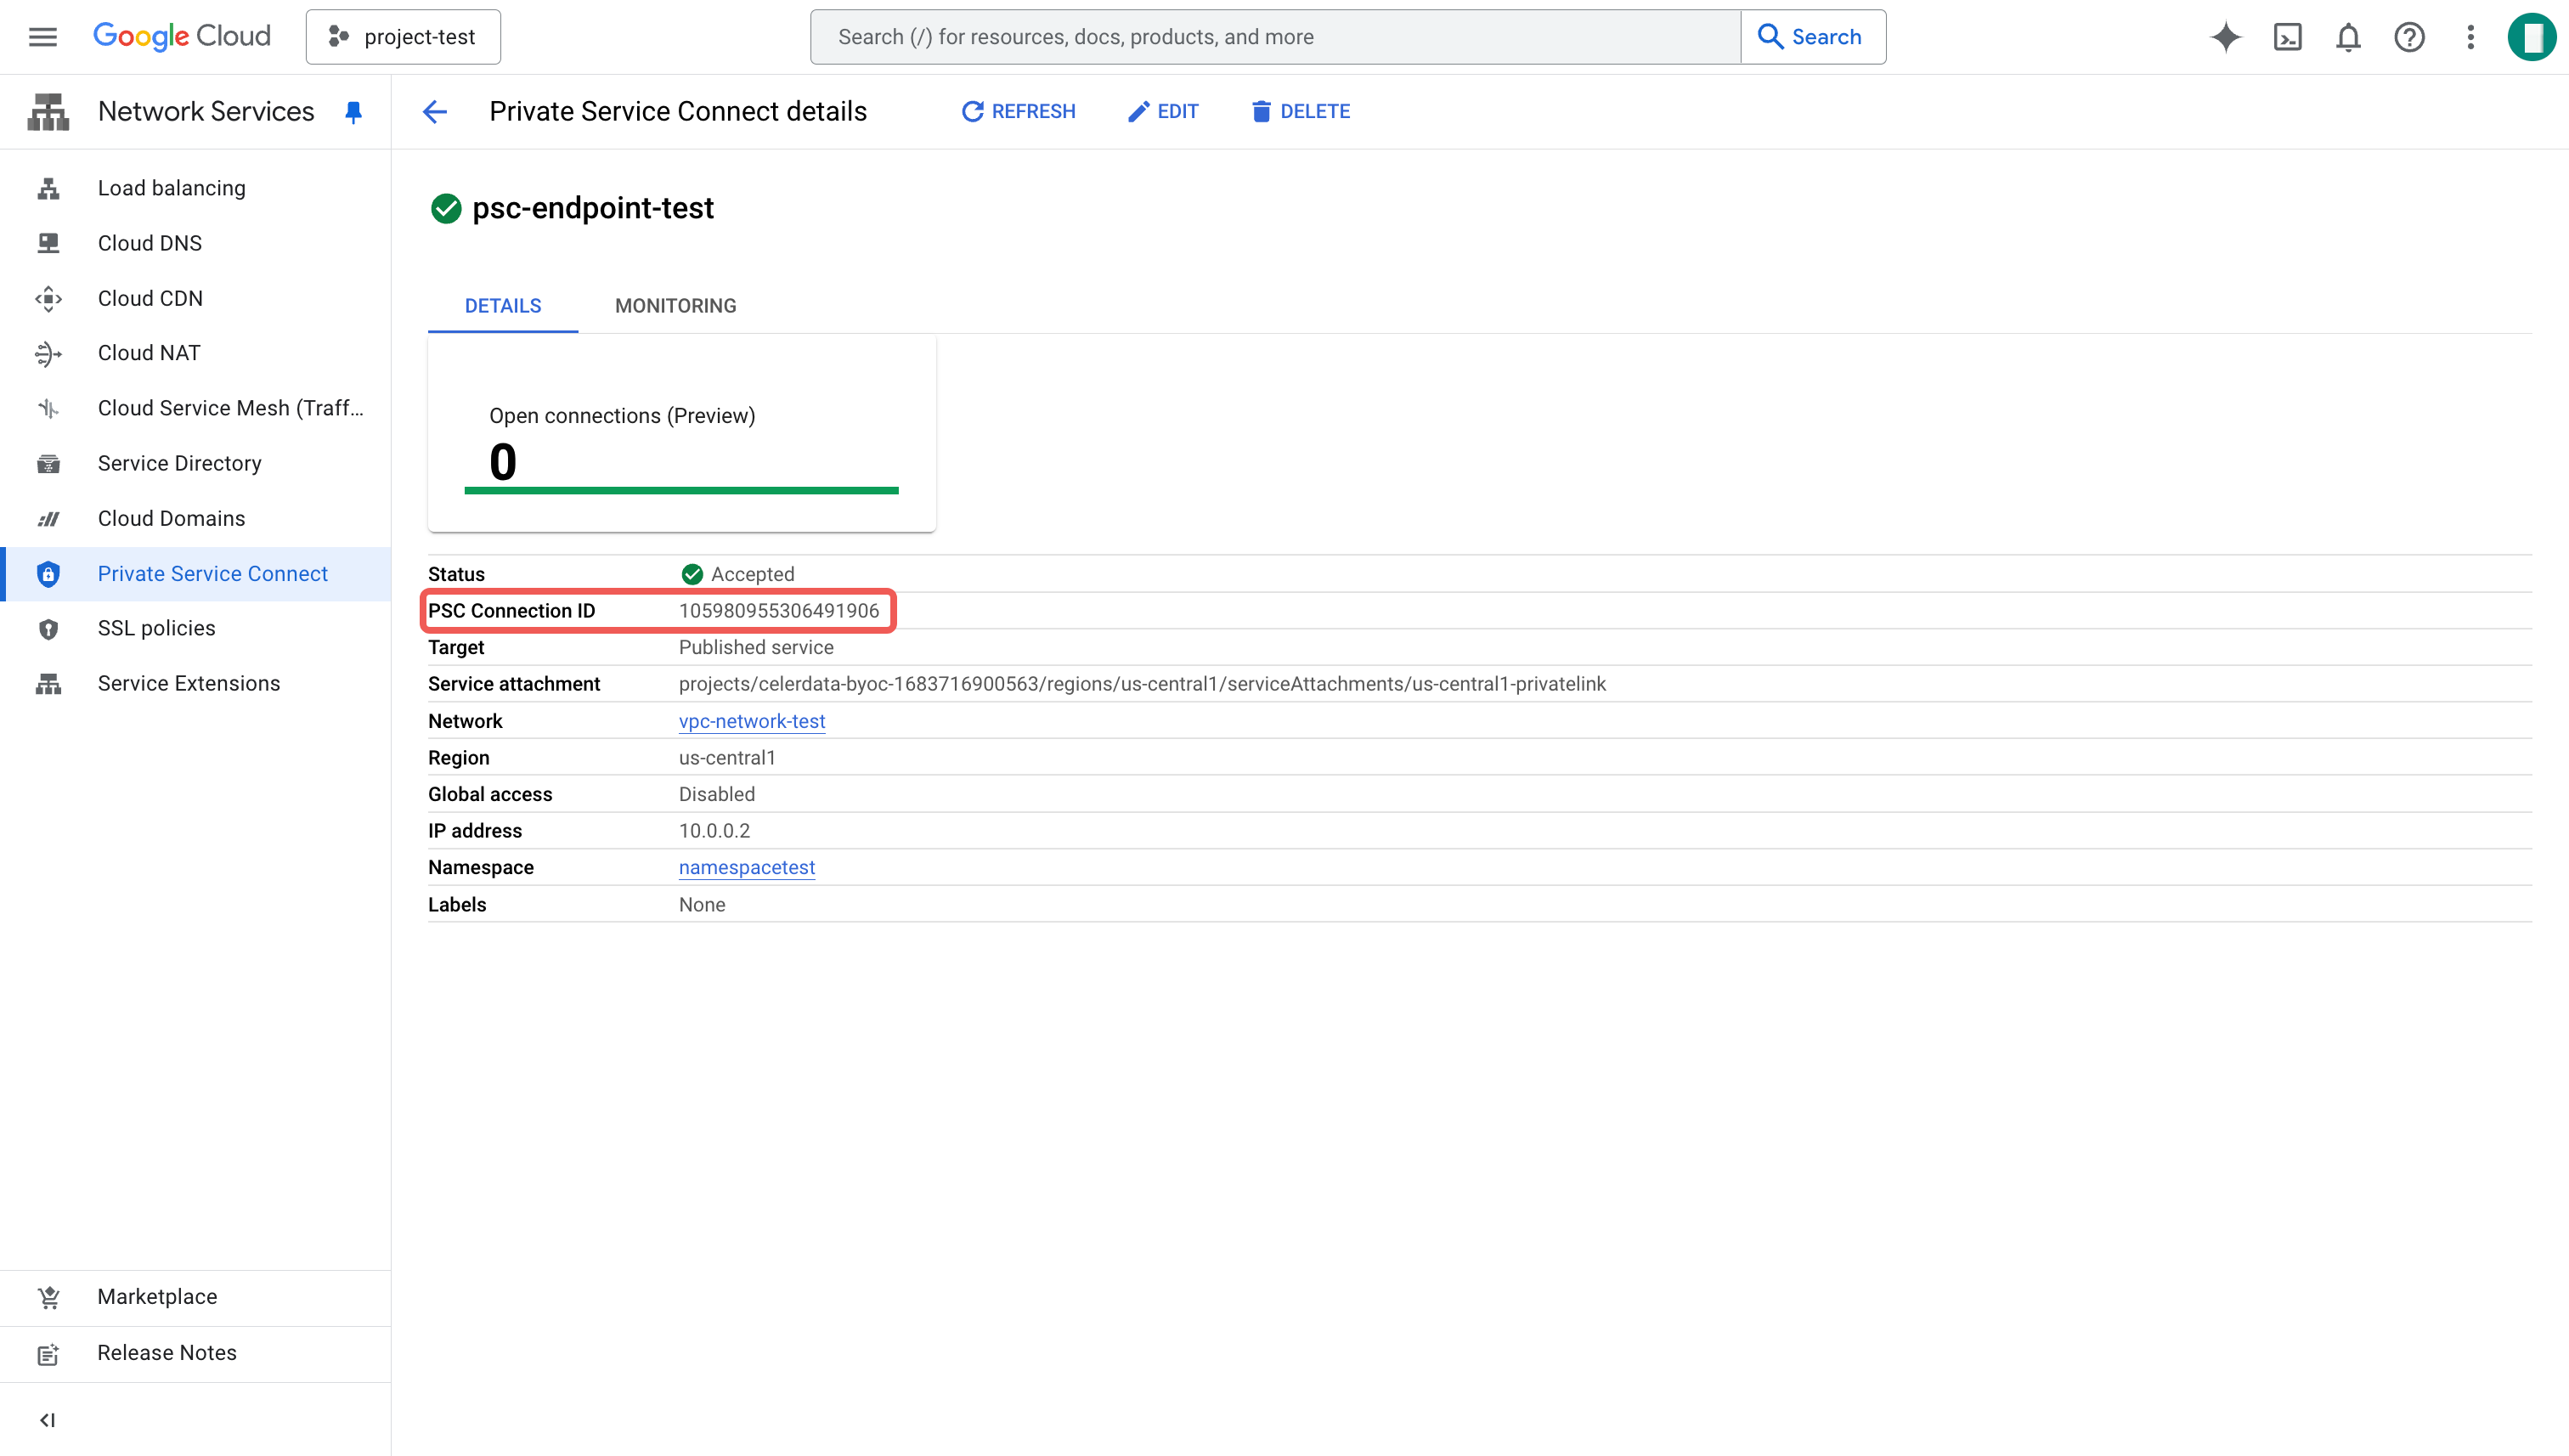
Click the newly created endpoint and copy the PSC connection ID. You will need this in STEP3 of the Deployment Wizard.
Verify Service Directory and Cloud DNS
After creating a PSC endpoint, GCP automatically generates a Service Directory entry and a Cloud DNS zone. Verify them to ensure proper configuration.
Check the Service Directory
- Sign in to your project in the Google Cloud console.
- Expand the left-side navigation menu, and choose Network Services > Service Directory.
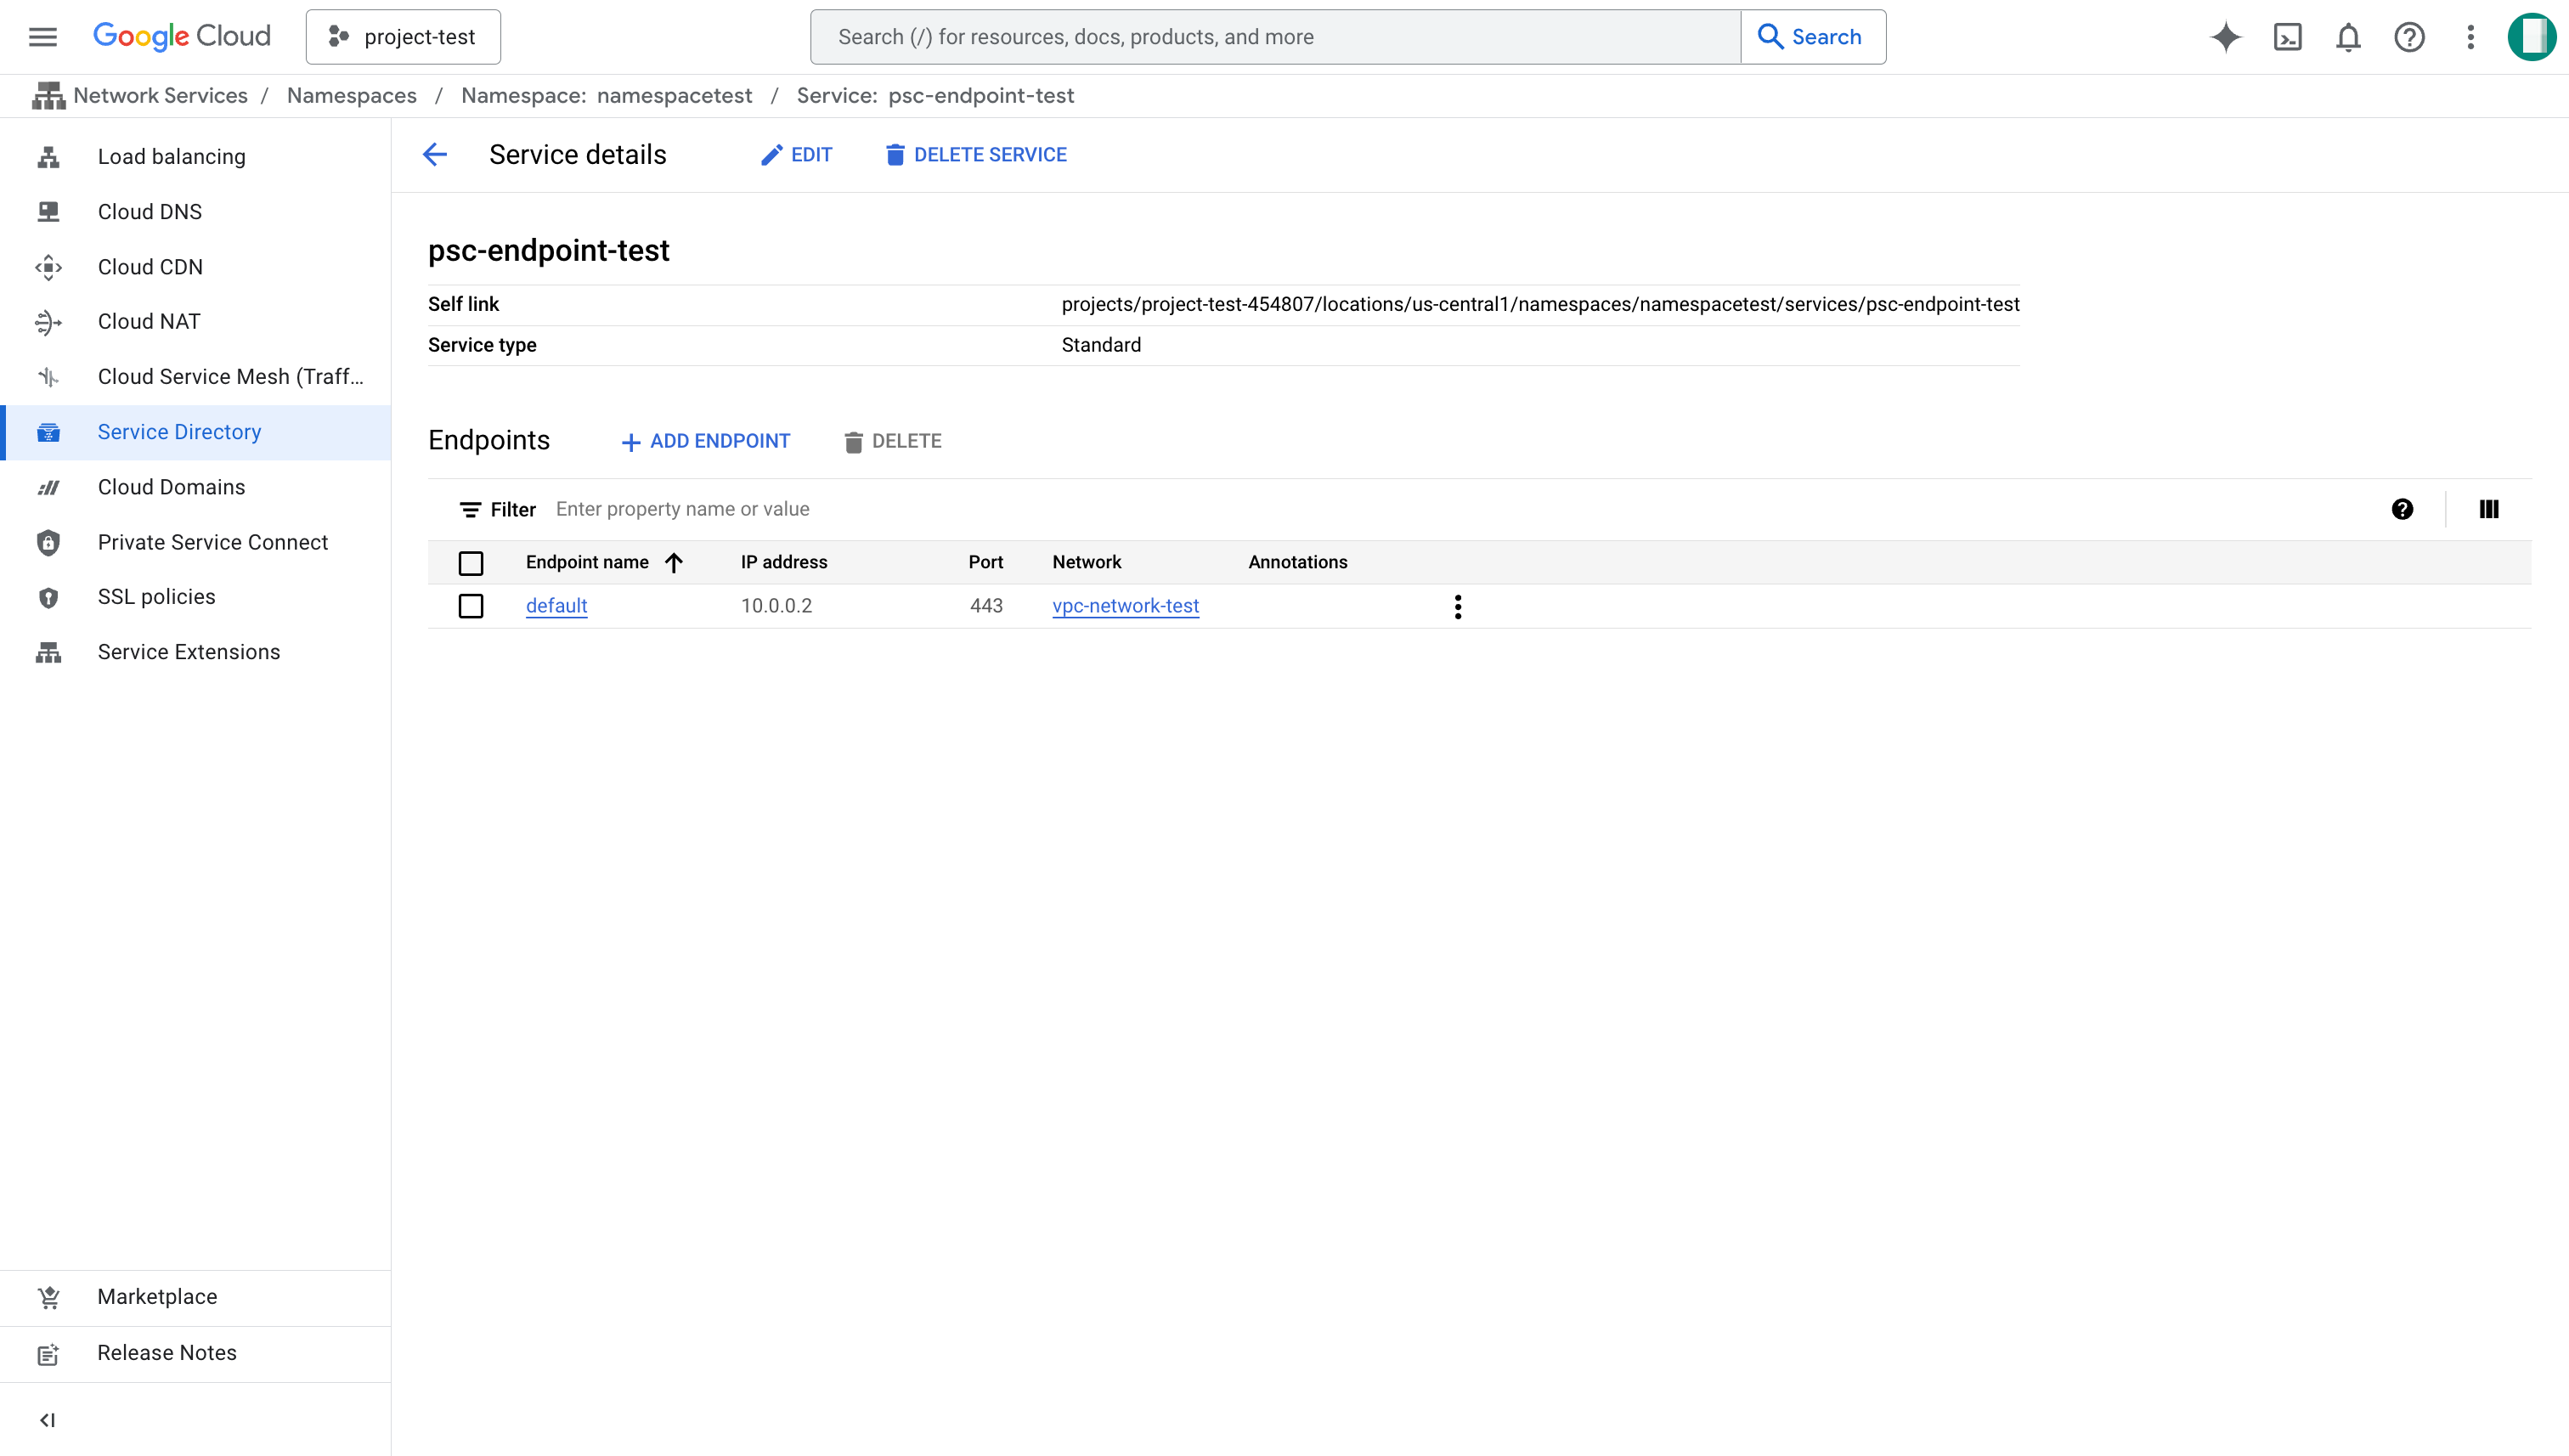
- Find the service name which has the same name as your PSC endpoint and click it to view details.
- Ensure the Self link is correct.
Check the Cloud DNS Record
- Sign in to your project in the Google Cloud console.
- Expand the left-side navigation menu, and choose Network Services > Cloud DNS.
- Find the DNS zone with DNS name as
{region}.p.celerdata.com.
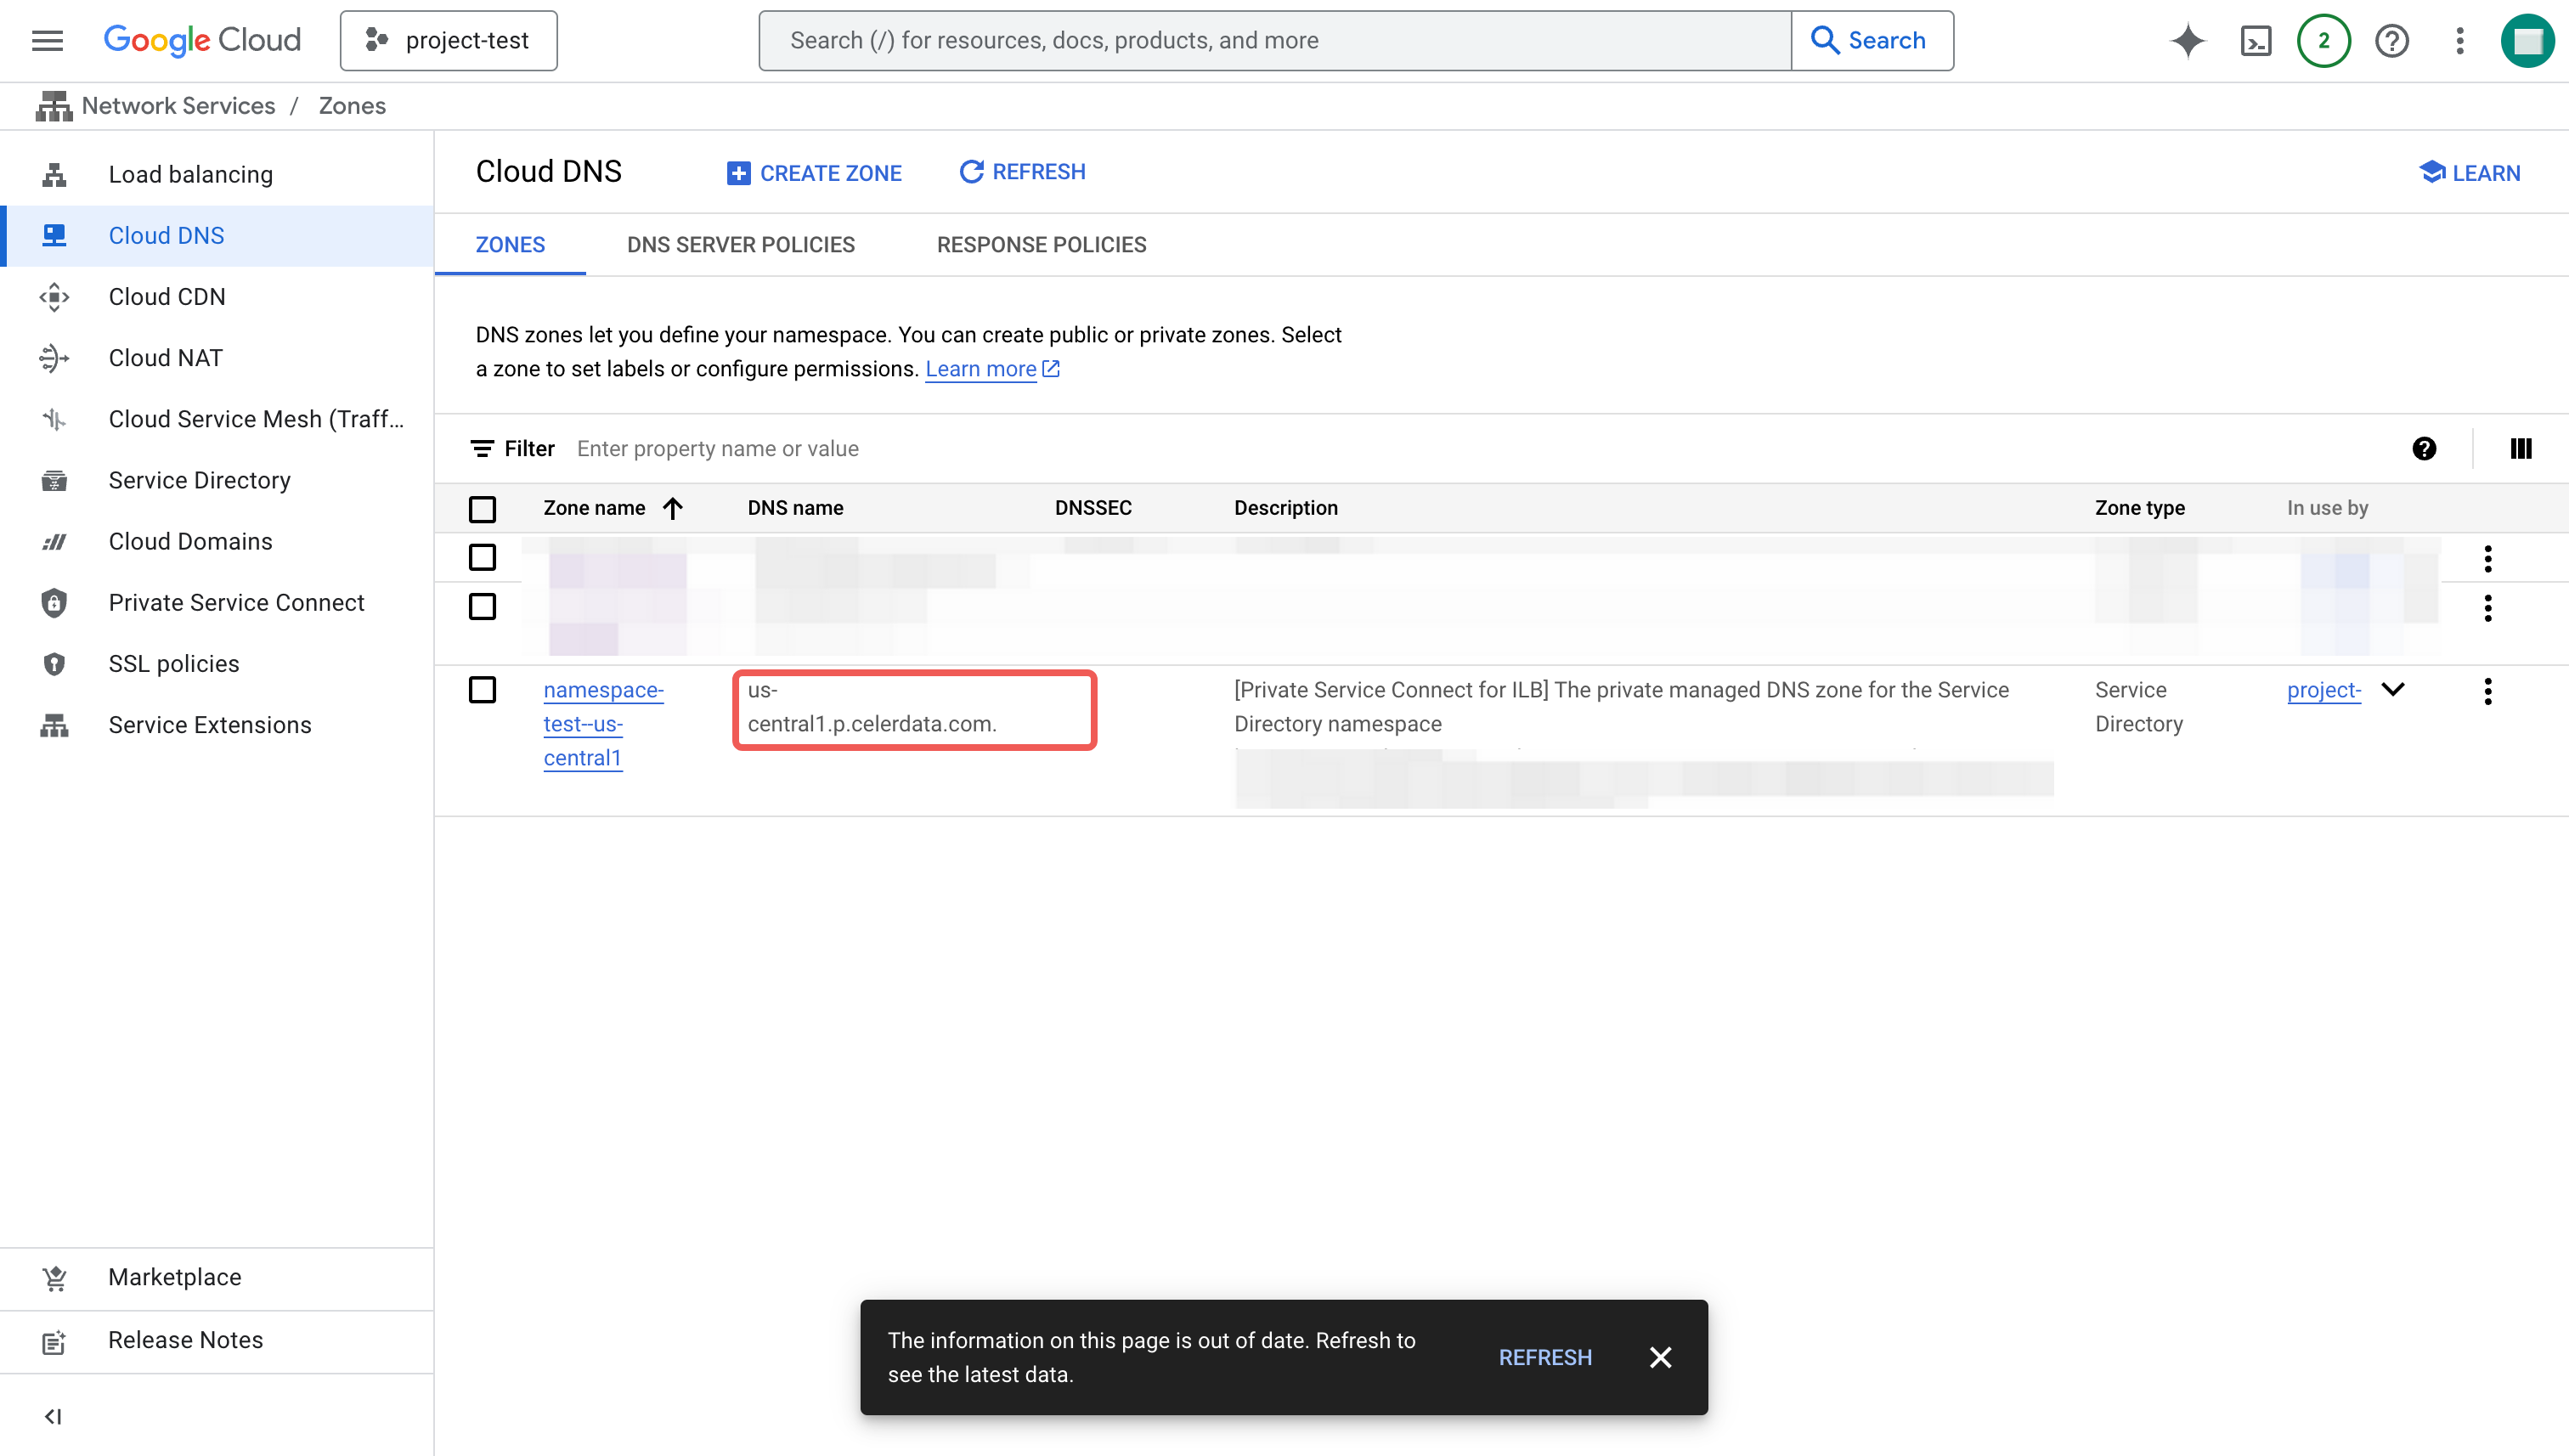
For example, if your cluster is to be deployed in us-central1, the DNS name will be us-central1.p.celerdata.com.
If you use the End-to-End Private Link solution for secure traffic, all VM instances in the deployment subnet must have a DNS record with {endpoint_name}.{region}.p.celerdata.com domain resolved to the PSC endpoint's private IP. This ensures that all traffic accessing {endpoint_name}.{region}.p.celerdata.com in the subnet will be directed to the PSC endpoint. Otherwise, you will not be able to access the CelerData cluster console.
Additional Considerations
Enable Private Access to Google Cloud Storage
After creating a PSC endpoint, your cluster may lose access to Google Cloud Storage which is required for cluster deployment and operation. Follow the instructions provided in Configure Network for Private Access to enable the private access.
Enable End-to-End Private Link
In most scenarios, if you have created a PSC Endpoint for deploying your CelerData cluster, you can further enable End-to-End Private Link for a better secure solution. With the private link, you can restrict all traffic between your CelerData cluster and CelerData console over Private Service Connect.
In this case, you need to unselect Enable public access to the Cluster console in STEP3 of Deployment Wizard or disable it after deployment on the Security tab in the cluster detail page. You also need to create a DNS record to resolve the private link domain. See Configure Network for Private Link for detailed instructions.
Appendix
GCP regions and service attachments
| GCP region | Region ID | Service attachment |
|---|---|---|
| US Central (Iowa) | us-central1 | projects/celerdata-byoc-1683716900563/regions/us-central1/serviceAttachments/us-central1-privatelink |
| US West (Salt Lake City) | us-west3 | projects/celerdata-byoc-1683716900563/regions/us-west3/serviceAttachments/us-west3-privatelink |