Configure Network for Private Link
When you deployed a CelerData cluster using Private Service Connect (PSC) but disabled the public access to the Cluster console during or after the deployment, cluster users can only access the CelerData Cluster console via a URL in the format *.privatelink.celerdata.com. All traffic to the CelerData Cluster console is routed to the *.privatelink.celerdata.com-formatted domain and then the PSC endpoint, which is automatically mapped by a Cloud DNS. The Cloud DNS configuration creates a mapping of {endpoint_name}.{region}.p.celerdata.com to the private IP of the PSC endpoint.
The complete routing flow is as follows:
Cluster users
  -> *.privatelink.celerdata.com
  -> {endpoint_name}.{region}.p.celerdata.com
  -> PSC Endpoint IP
  -> CelerData Cluster console
- Cluster users communicate with the CelerData Cluster console through the
*.privatelink.celerdata.com-formatted domain. - The domain
*.privatelink.celerdata.commust be resolved to{endpoint_name}.{region}.p.celerdata.com, which requires setting up a Cloud DNS zone as described in the following section. - The domain
{endpoint_name}.{region}.p.celerdata.comis mapped to the PSC Endpoint's private IP by the Cloud DNS zone which is automatically created when you create the PSC endpoint.
To enable private network access, you must create a private Cloud DNS zone with a CNAME record that maps *.privatelink.celerdata.com to {endpoint_name}.{region}.p.celerdata.com.
If you want to enable Shared VPC for the cluster, you need to follow the instructions provided in Set up Shared VPC to set up a Shared VPC. The VPC network, subnet, firewall rules, Routes, and Public Cloud NAT (or reserved internal static IPv4 address) you used for deployment must belong to the host project of the Shared VPC.
Create a Private Cloud DNS Zone
Follow these steps to create a private Cloud DNS zone:
- Sign in to your project in the Google Cloud console.
- Expand the left-side navigation menu, and choose Network Services > Cloud DNS.
- Click CREATE ZONE.

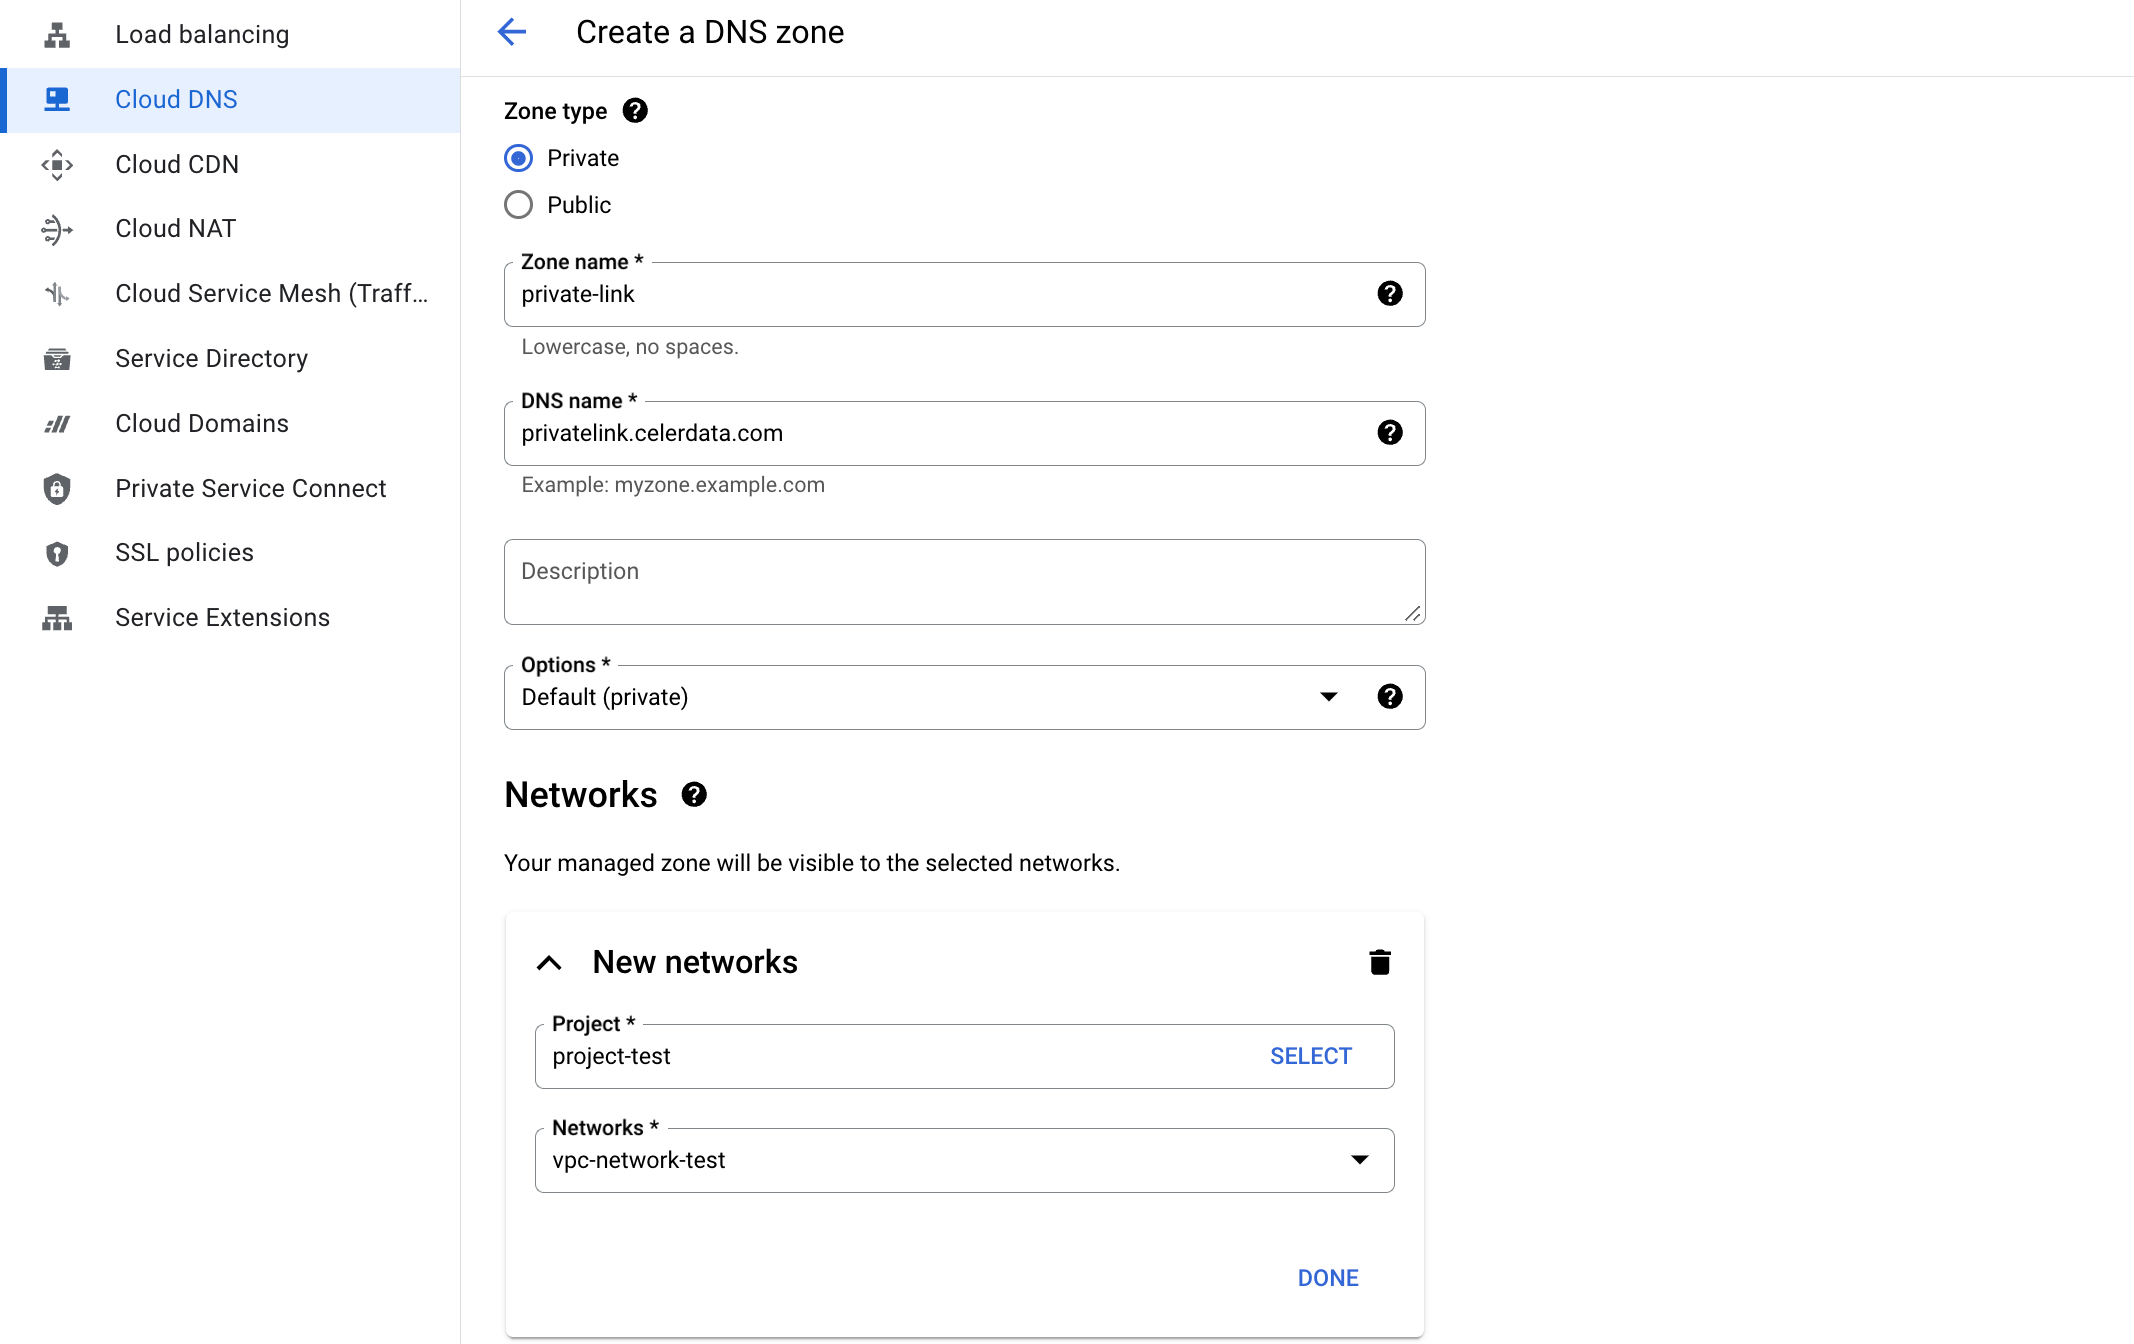
- On the Create a DNS zone page, follow these steps:
- For Zone type, select Private.
- Enter a Zone name, for example,
private-link. - For DNS name, enter
privatelink.celerdata.com. - In the Network section, click ADD NETWORKS. In the New networks box, select your Project and choose the VPC Network for cluster deployment, and click DONE.
- Click CREATE.
Add a CNAME record
Follow these steps to add a CNAME record to the private Cloud DNS zone:
- Sign in to your project in the Google Cloud console.
- Expand the left-side navigation menu, and choose Network Services > Cloud DNS.
- Select the DNS zone you created.
- Click ADD STANDARD to create a CNAME record.

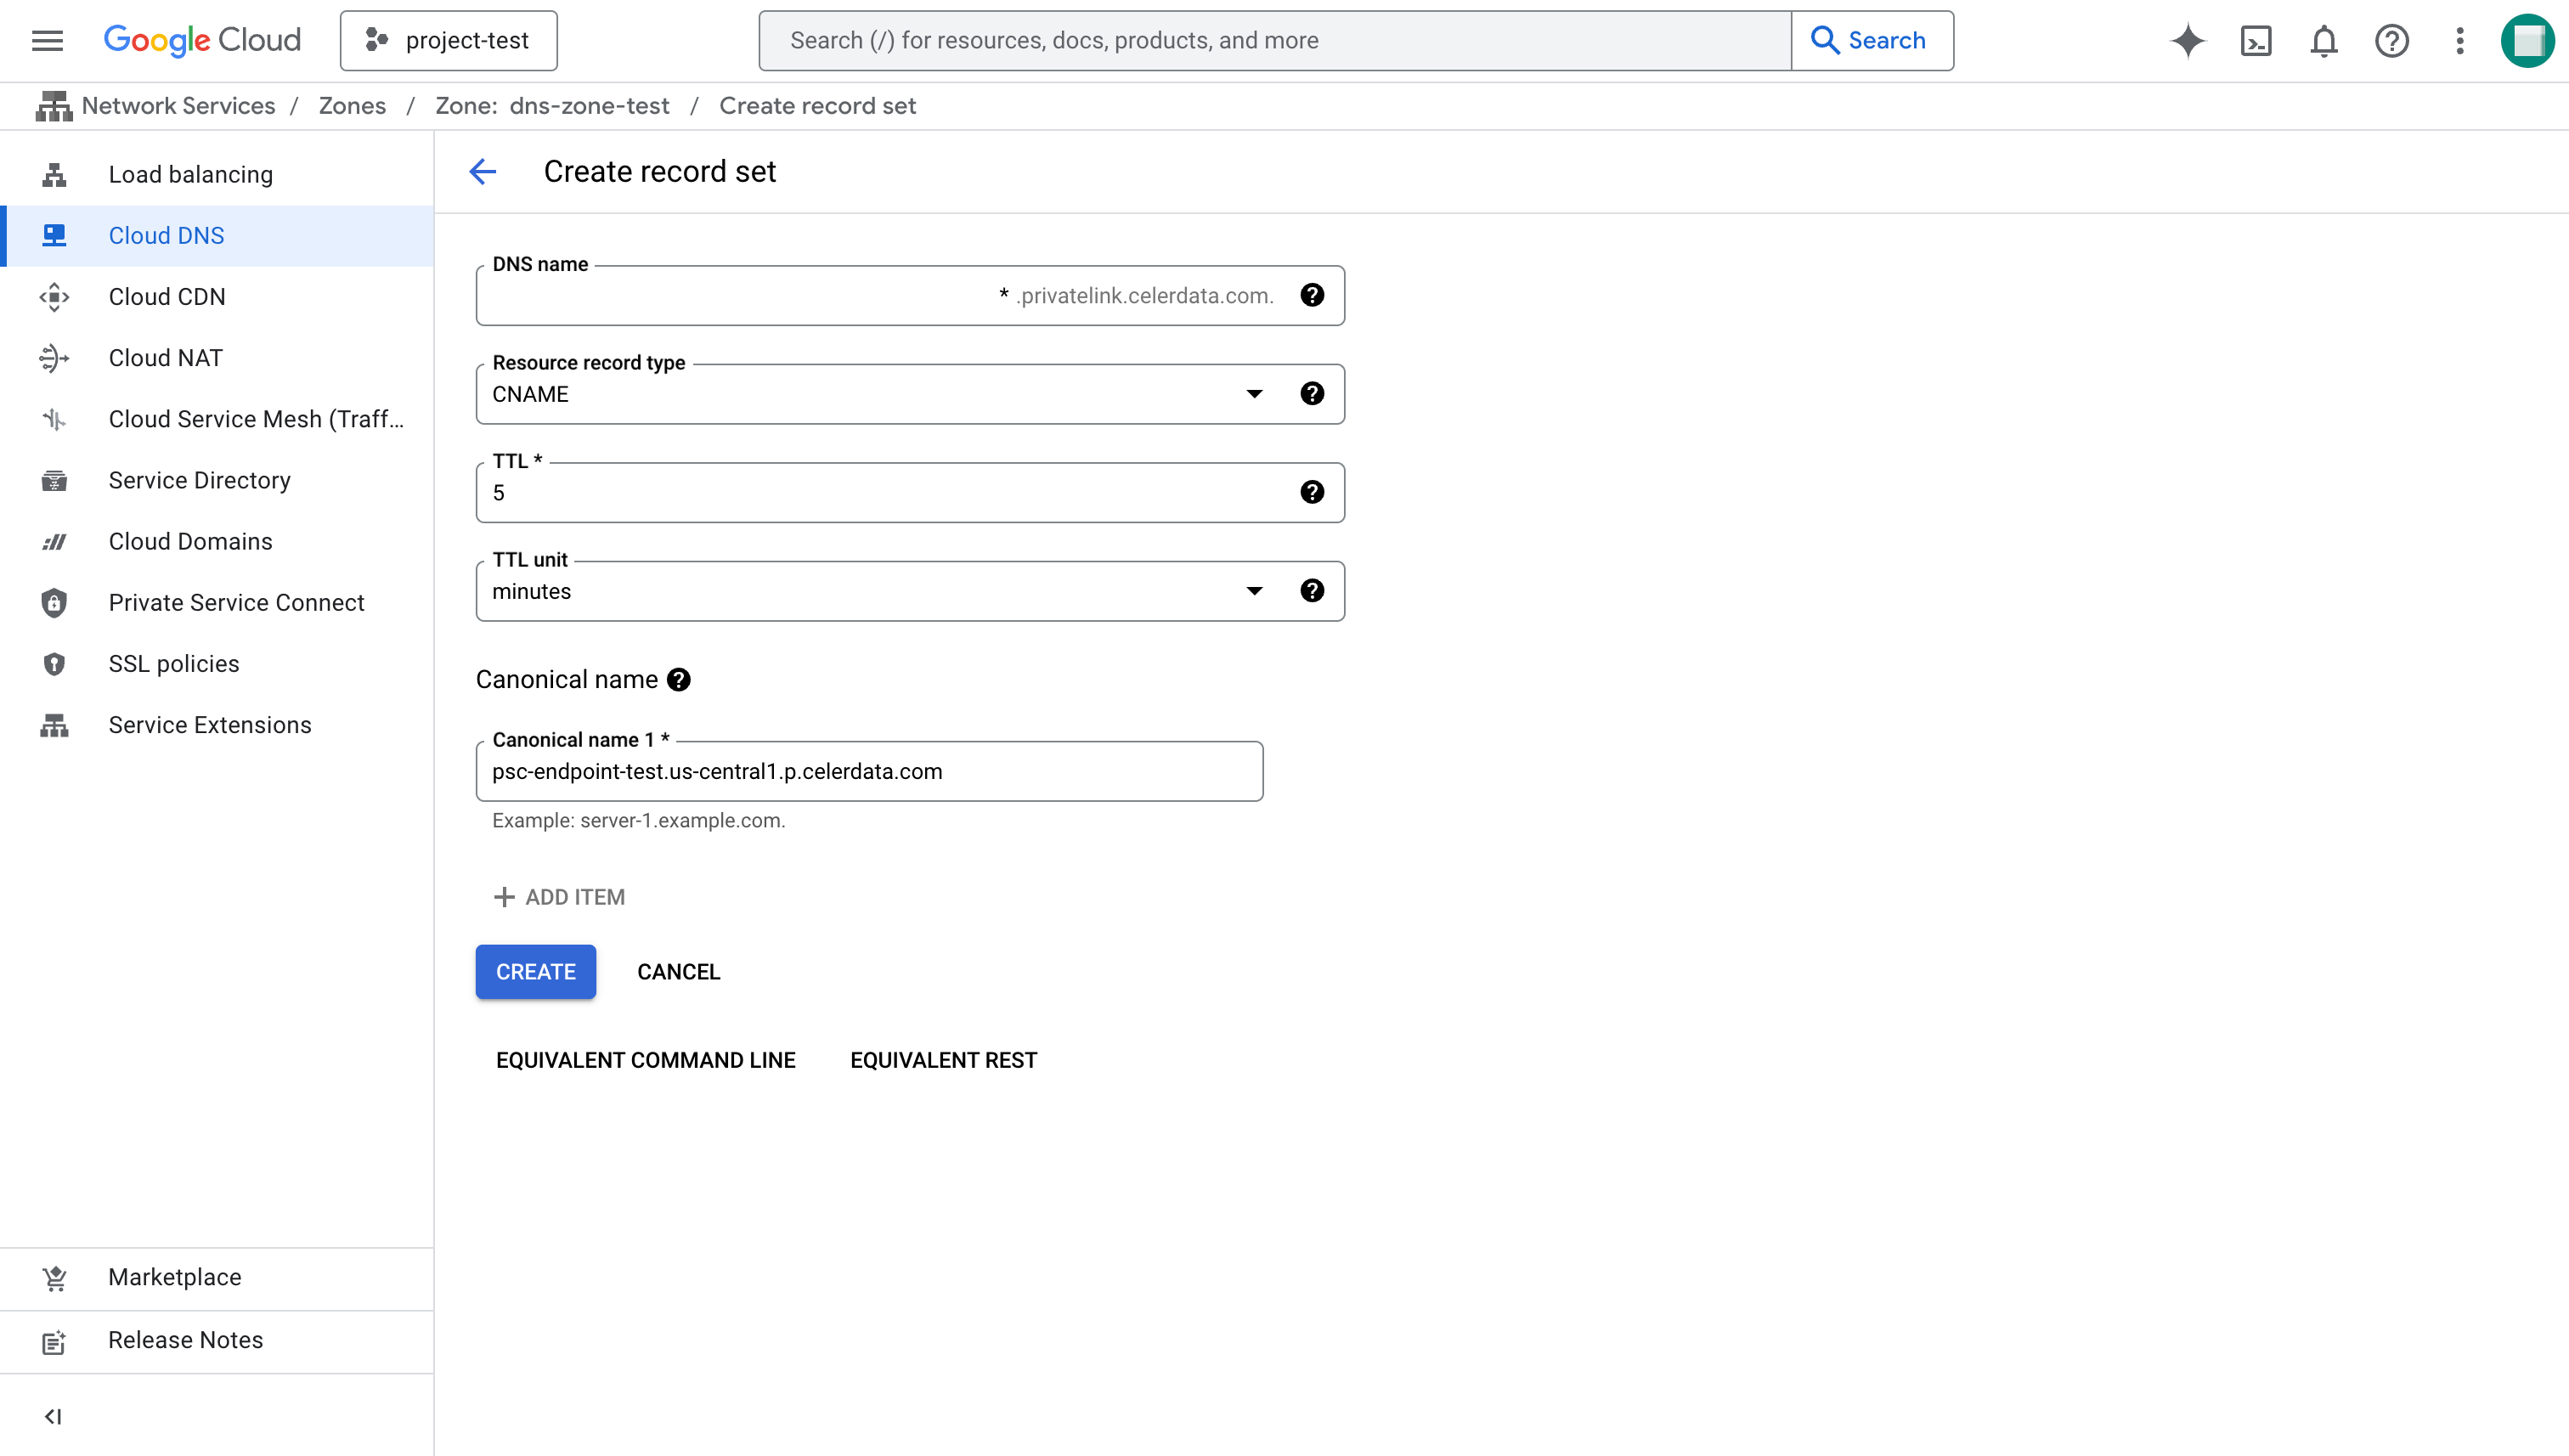
- On the Create record set page, follow these steps:
- For DNS name, enter
*. - For Resource record type, select CNAME.
- For Canonical name, enter
{endpoint_name}.us-central1.p.celerdata.com. For example:psc-endpoint-test.us-central1.p.celerdata.com.
- For DNS name, enter
- Click CREATE.