Create a storage account and a container for CelerData in Azure
To deploy a CelerData cluster on Azure, you must assign a storage account and a container to store your data.
You can use existing storage accounts and containers, or create new ones by following these steps.
Step 1: Create a storage account
Follow these steps to create a storage account for CelerData in Azure:
-
Sign in to the Microsoft Azure portal.
-
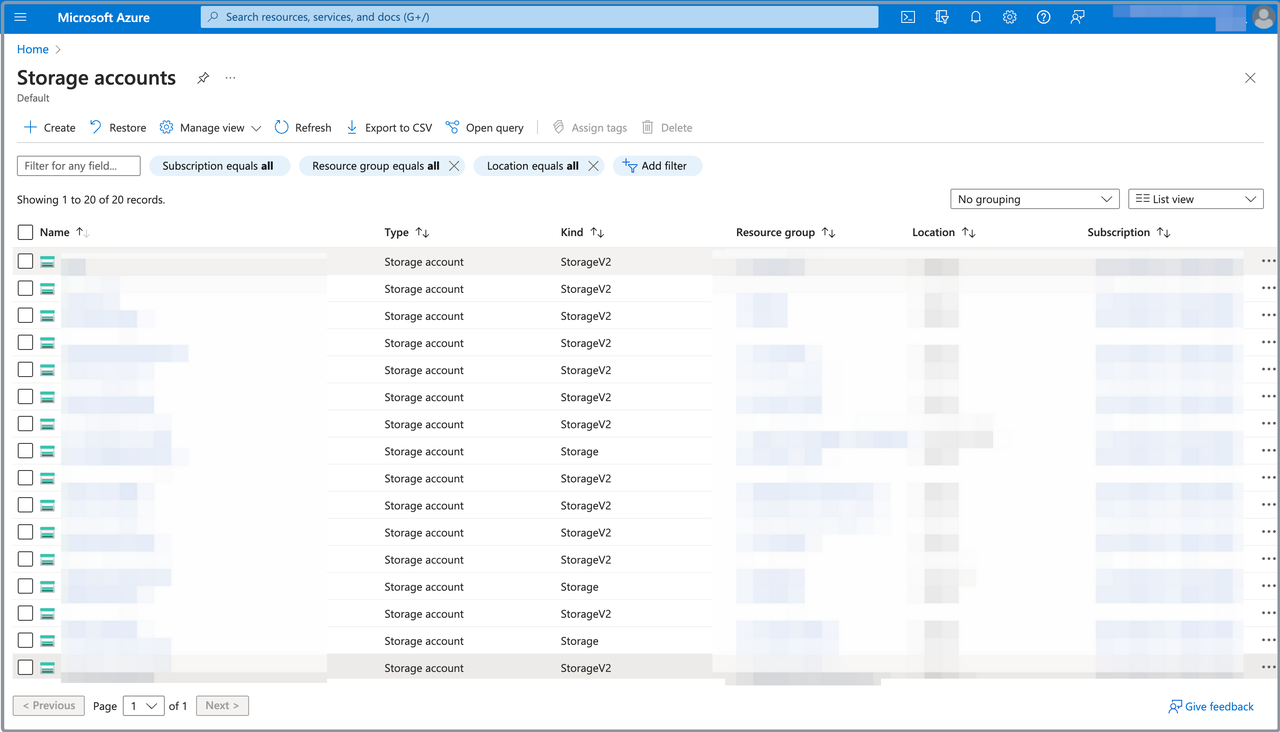
Navigate to the Storage accounts service page, and click Create.

-
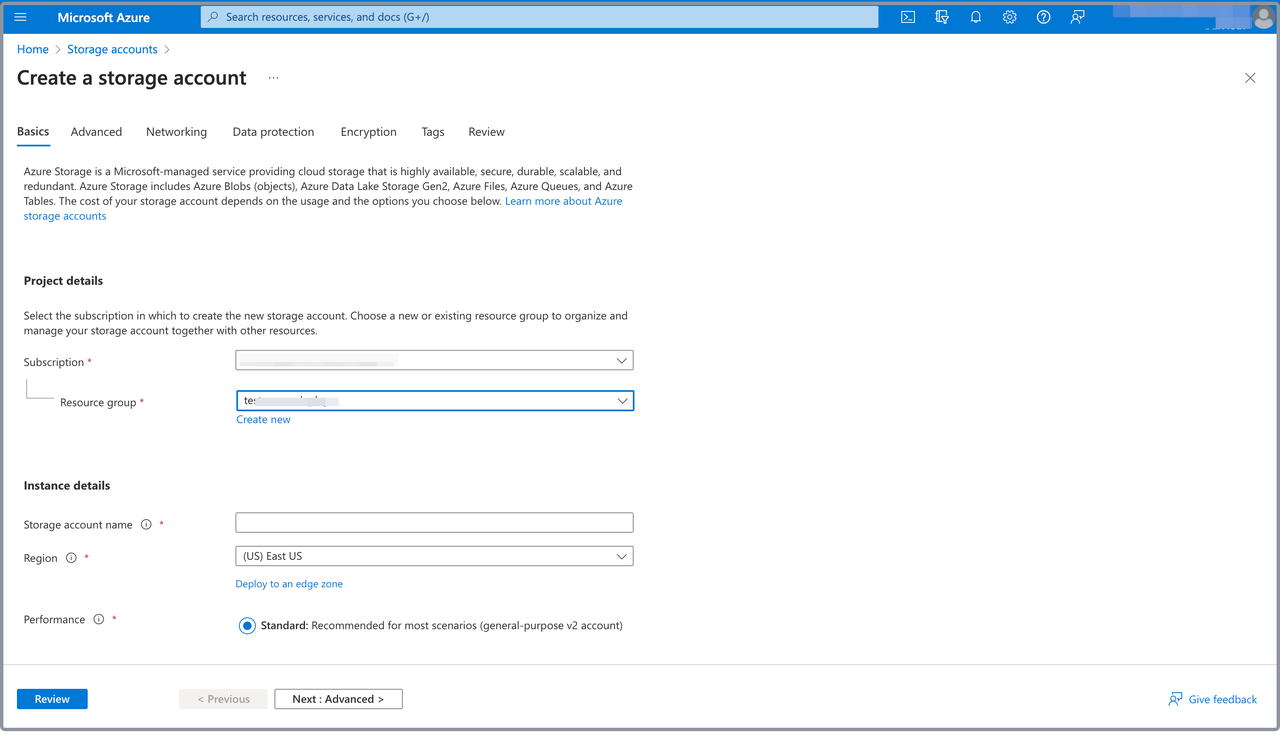
On the Basics tab of the Create a storage account page:
-
Select your Microsoft subscription from the Subscription drop-down list.
-
Select your resource group from the Resource group drop-down list.
NOTE
We recommend that you select the resource group you created for the CelerData cluster deployment.
-
Enter a name for the storage account in the Storage account name field.
-
Select the region of the storage account from the Region drop-down list.
NOTE
Your storage account must be in the same Azure region as the other resources you created for the CelerData cluster deployment.
-
For the Performance section, you can choose Standard, which can perfectly suit the needs of your CelerData cluster. For other sections, you can use the default settings.

-
-
Click Review, and on the Review tab, review the information you have filled. Then, click Create to create the storage account.
Step 2: Create a storage container
Follow these steps to create a storage container to store the metadata of your CelerData cluster:
-
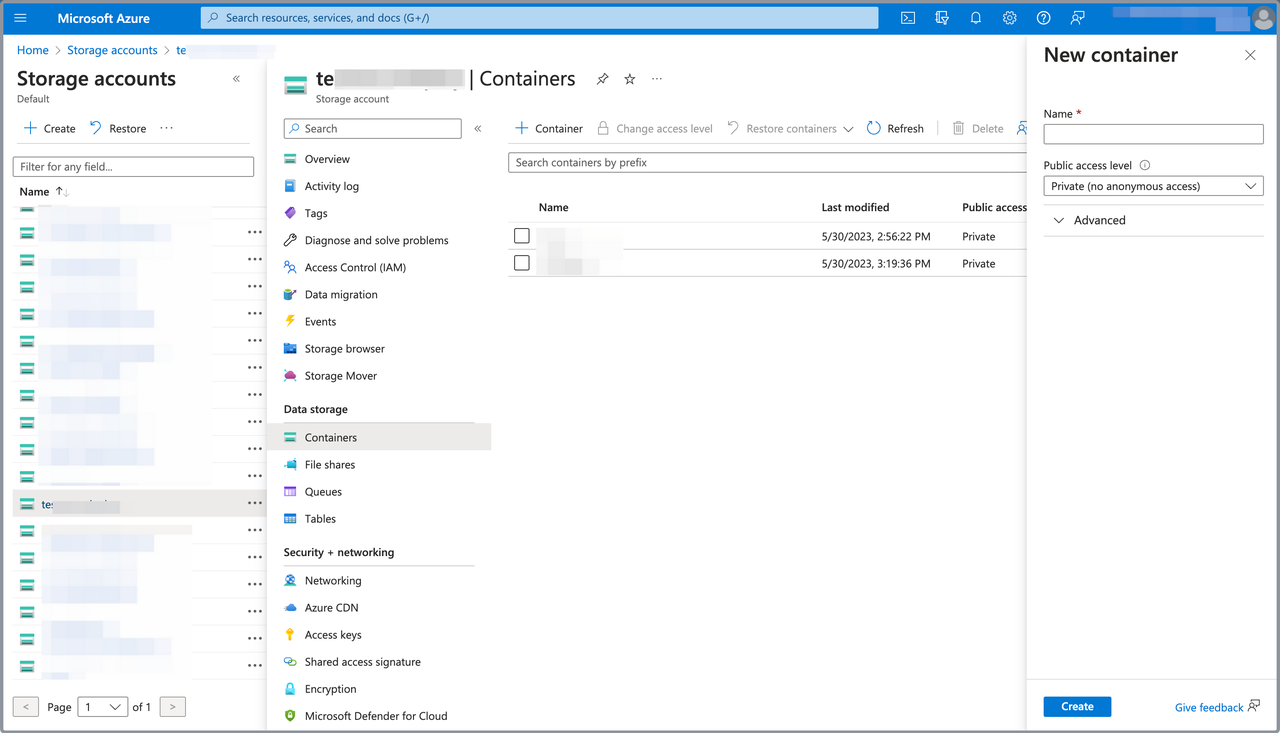
Navigate to the Storage accounts service page, click the storage account you want to use, choose Containers in the left-side pane, and click Container.

-
In the right-side pane that appears:
- Enter a name for the storage container in the Name field.
- Select Private (no anonymous access) from the Public access level drop-down list.
- Click Create.