Create Private Endpoint and Private DNS Zone for Private Link to Azure
To enable CelerData's End-to-End Private Link service for your Azure deployments, you need to create a private endpoint and a private DNS zone, link the DNS zone to your virtual network, and add a DNS record pointing to the private IP of the endpoint. If your cluster runs in a private subnet without internet access, you also need to create a private endpoint for your Azure storage account; otherwise the cluster will be unable to read/write Azure Storage.
For clusters with End-to-End Private Link enabled, all clusters within the same resource group must share the same private endpoint and private DNS zone.
Create a private endpoint for virtual machines
Follow these steps to create an Azure private endpoint for accessing virtual machines via CelerData's End-to-End Private Link service:
-
Sign in to the Microsoft Azure portal.
-
Navigate to the Private Link service page, choose Private Link -> Private endpoints in the left-side pane, and click Create.
-
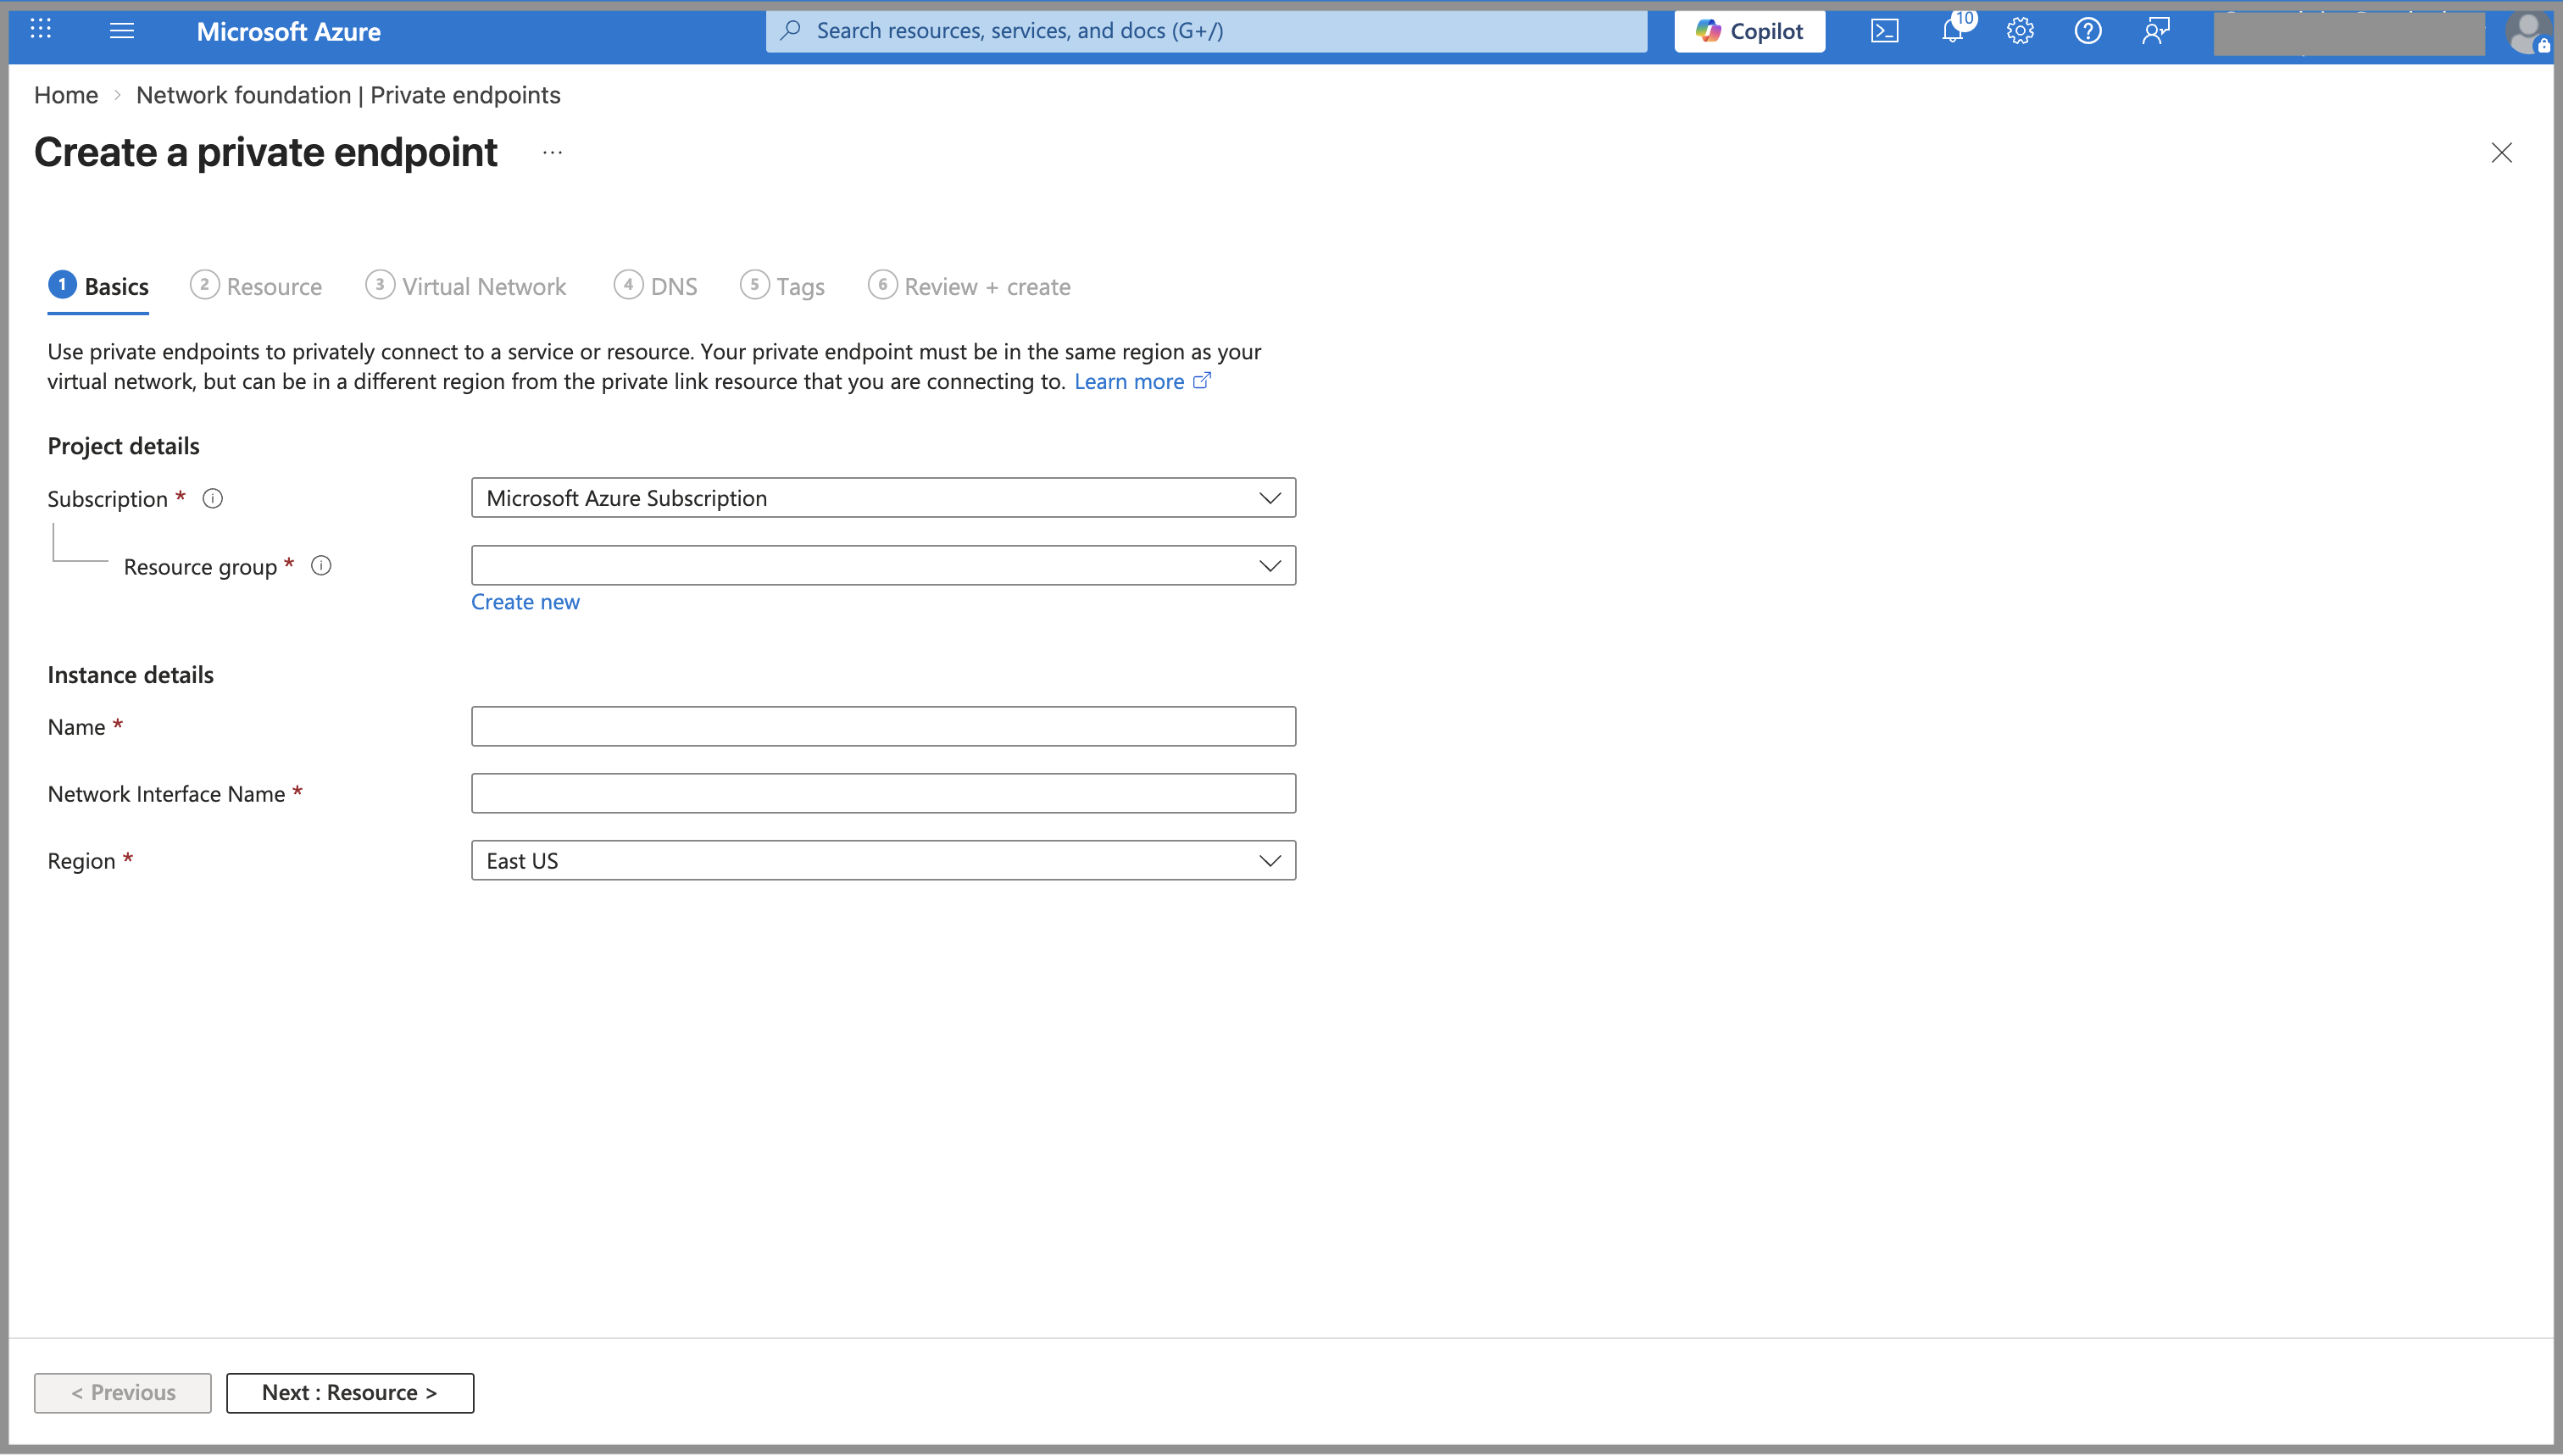
On the Basics tab of the Create a private endpoint page, configure as follows, and click Next: Resource.
a. Select your Microsoft subscription from the Subscription drop-down list.
b. Select the resource group you created for the CelerData cluster deployment from the Resource group drop-down list.
c. Enter a name for the private endpoint in the Name field.
d. Select a region for the private endpoint from the Region drop-down list.
-
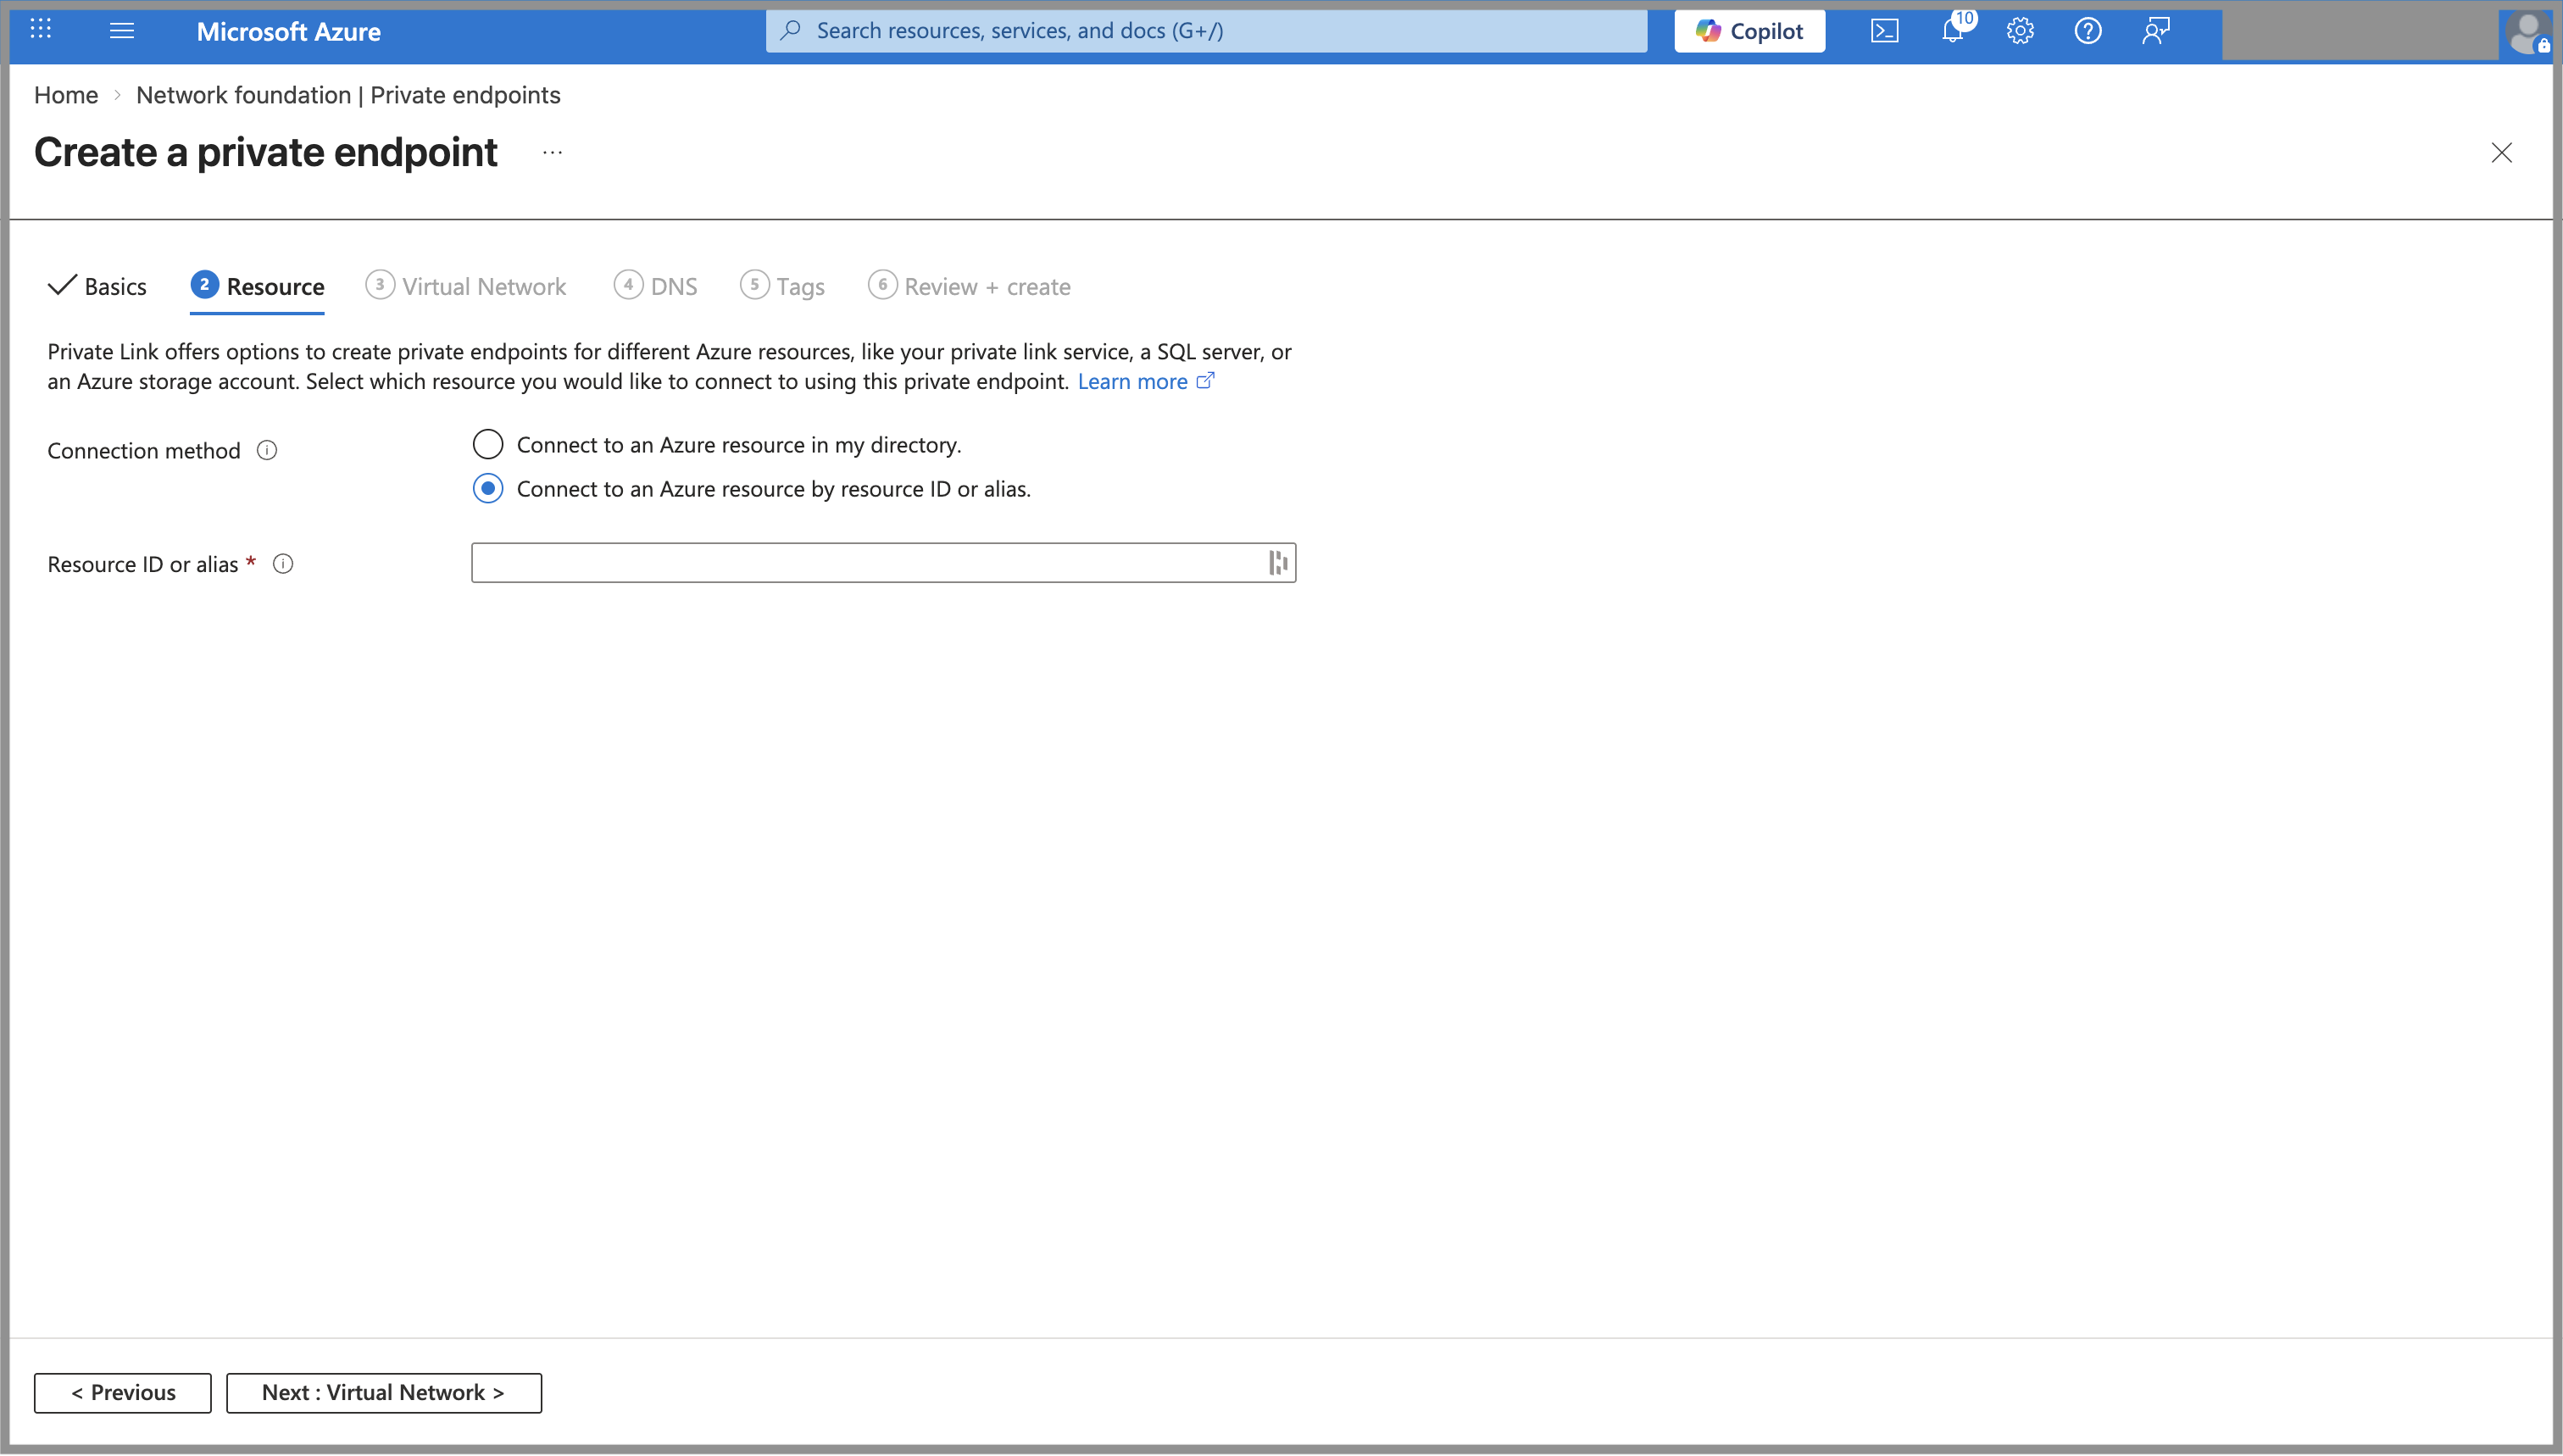
On the Resource tab of the Create a private endpoint page, choose Connect to an Azure resource by resource ID or alias. for Connection method, and enter the Private Link Service ID of your selected region as described in Appendix - Azure regions and Private Link Service ID in the Resource ID or alias field. Then, click Next: Virtual Network.
-
On the Virtual Network tab of the Create a private endpoint page, select the virtual network and the subnet you created for the cluster in the Virtual network and Subnet fields.
-
Click Next: DNS, Next: Tags, and then Next: Review + Create to skip these steps and review the information of the private endpoint you want to create. Then, click Create to confirm.
After the private endpoint is created, copy the following information of the private endpoint:
-
Private IP
a. Navigate to the Private Link service page, and choose Private Link -> Private endpoints in the left-side pane.
b. Find the private endpoint you created, and copy and save its private IP from the Private IP field.
-
Private Endpoint ID
a. Navigate to the Private Link service page, and choose Private Link -> Private endpoints in the left-side pane.
b. Click the private endpoint you created. On the tab that appears, choose Settings -> Properties in the left-side pane, and click the Copy button next to the Resource ID field to save it.
Create a private DNS zone
Follow these steps to create an Azure private DNS zone named privatelink.celerdata.com:
-
Navigate to the Private DNS zones service page, and click Create.
-
On the Basics tab of the Create Private DNS Zone page, configure as follows, and click Review + create.
a. Select your Microsoft subscription from the Subscription drop-down list.
b. Select the resource group you created for the CelerData cluster deployment from the Resource group drop-down list.
c. In the Name field, enter
privatelink.celerdata.comas the name of the private DNS zone.noteYou must specify the private DNS zone name as
privatelink.celerdata.com. Other names are not allowed.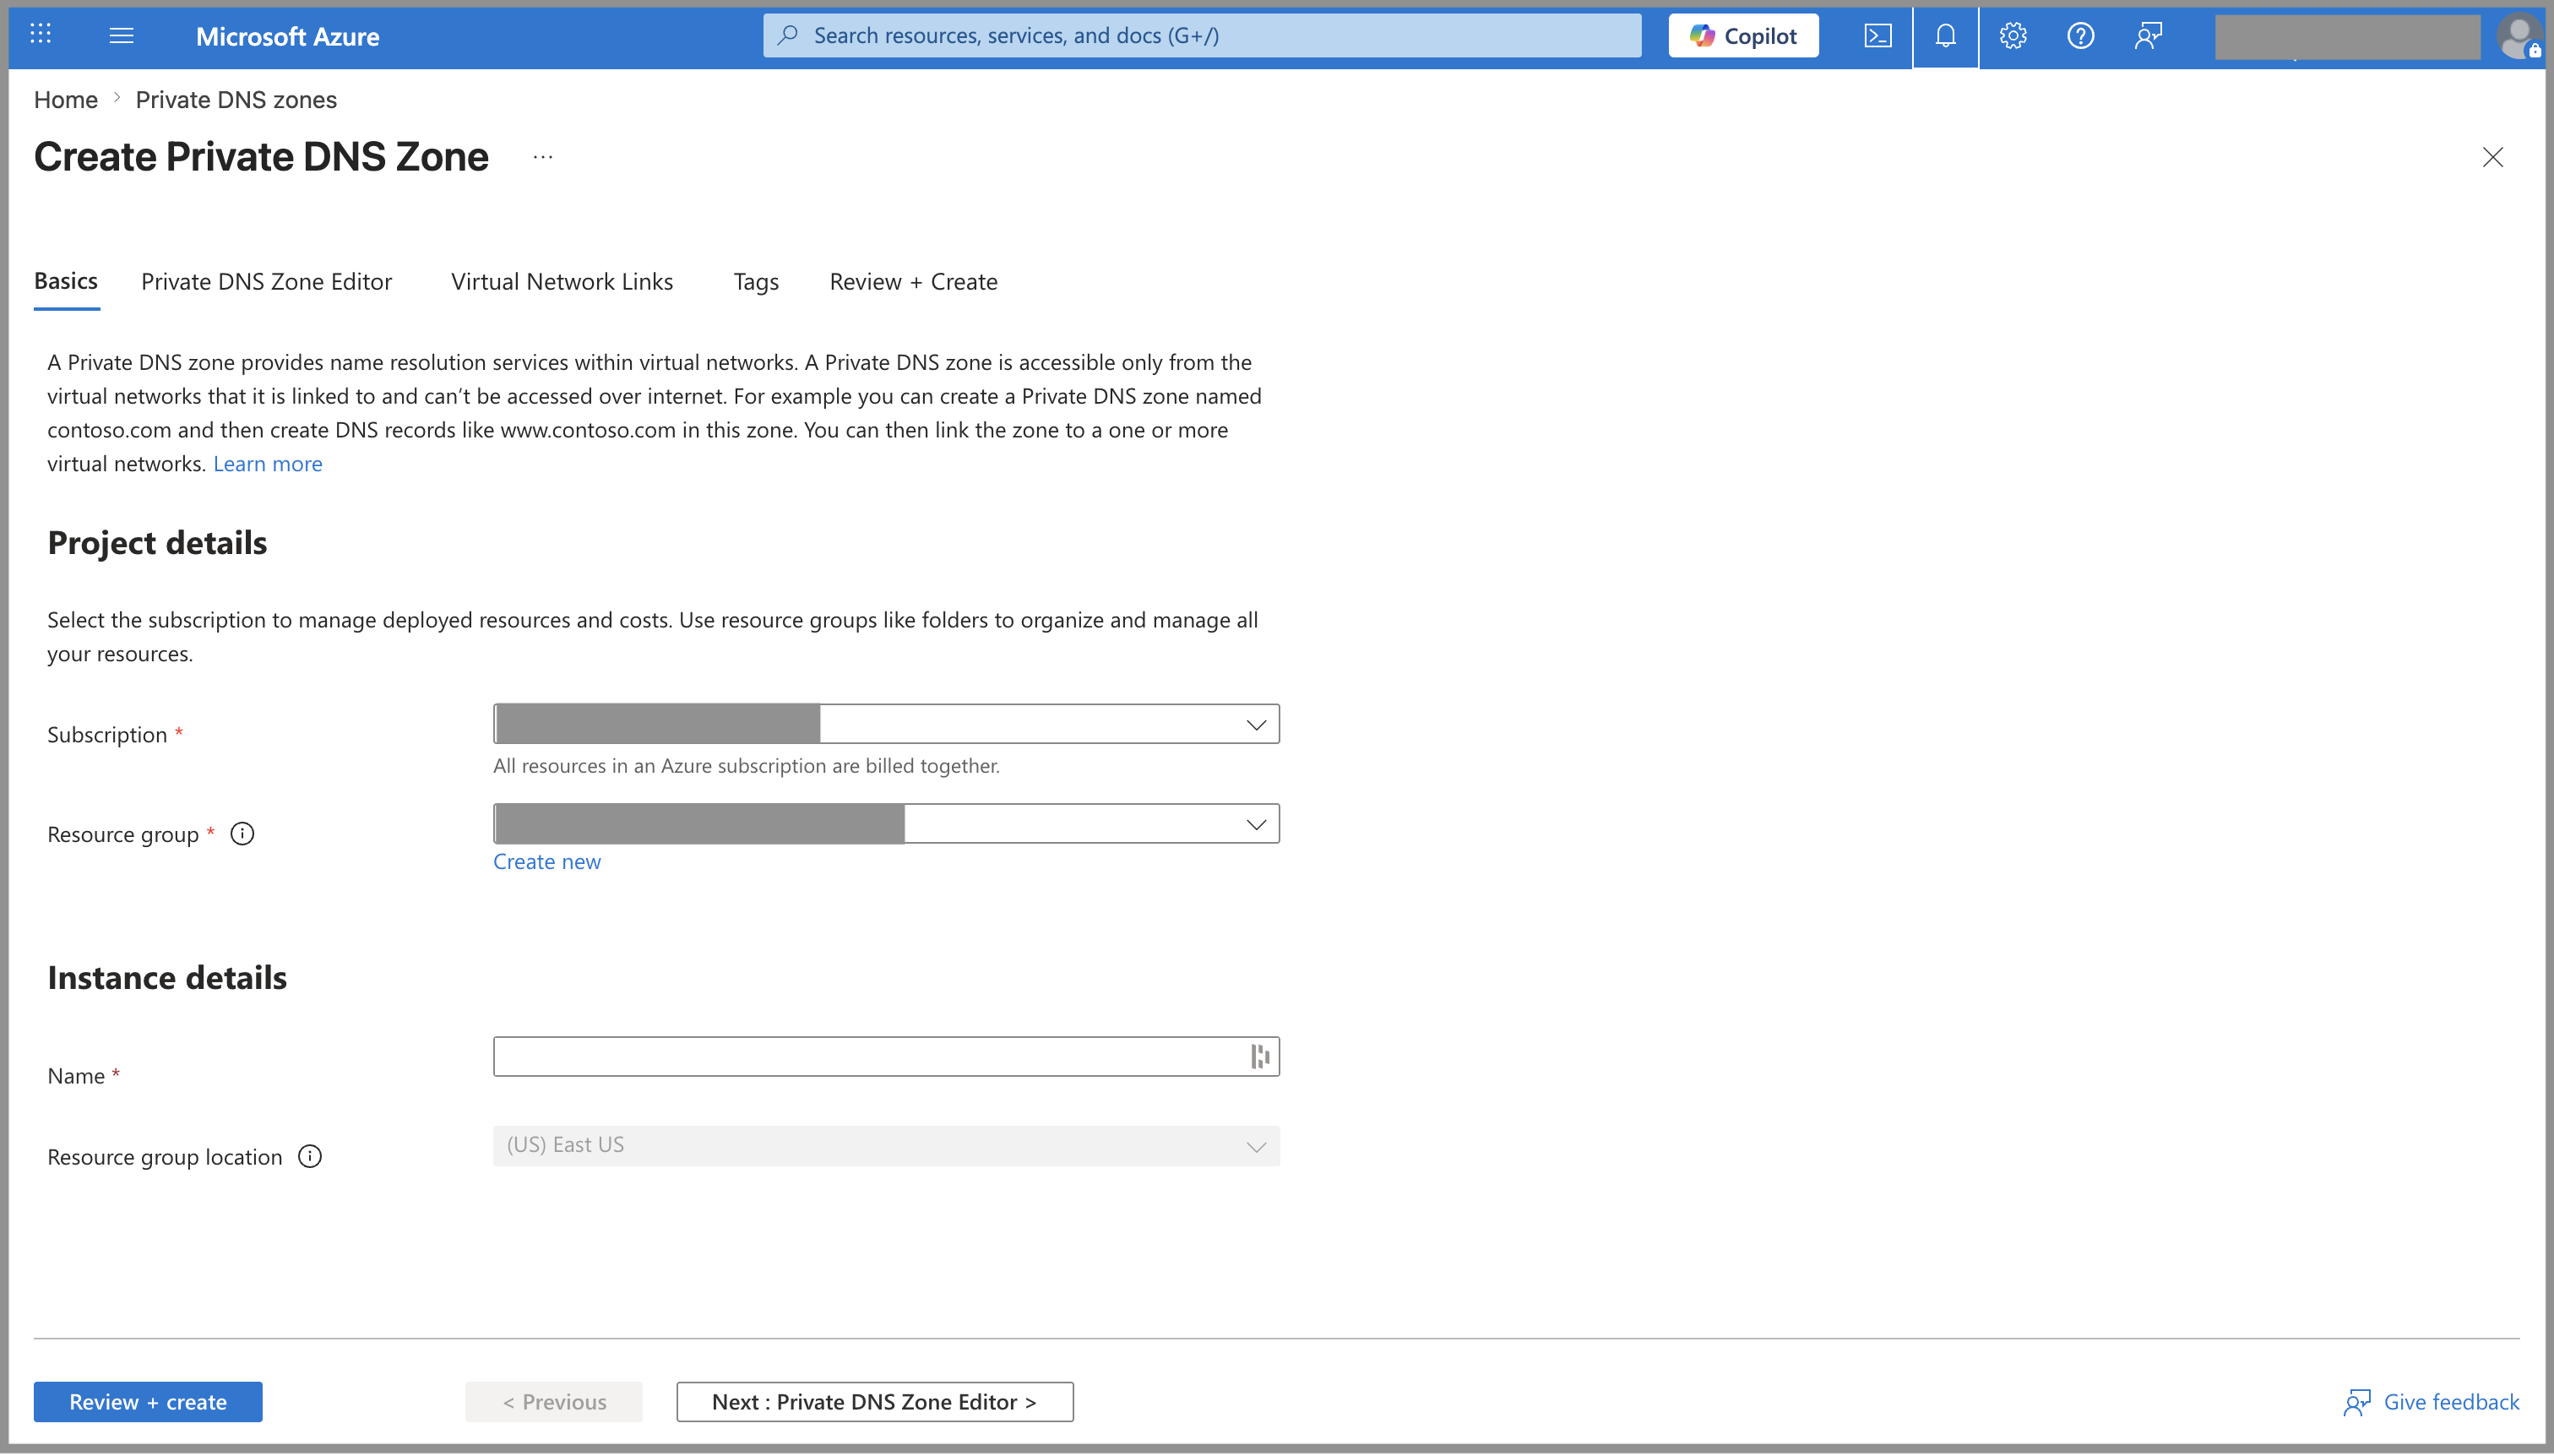
-
On the Review + create tab, review the information you have filled. Then, click Create to create the private DNS zone.
Link private DNS zone to virtual network
Follow these steps to link the private DNS zone to the virtual network you created for the CelerData cluster deployment to allow virtual machines to resolve traffics from and to *.privatelink.celerdata.com:
-
Navigate to the Private DNS zones service page, and click the private DNS zone you created for CelerData's End-to-End Private Link service.
-
On the tab that appears, choose DNS Management -> Virtual Network Links in the left-side pane, and click Add.
-
On the Add Virtual Network Link page, configure as follows, and click Create:
a. Enter a name for the virtual network link in the Name field.
b. Select I know the resource ID of virtual network, and paste the resource ID of your Azure virtual network to the Resource ID field.
c. Leave the items that are not mentioned here unchanged.

Add wildcard DNS record
Follow these steps to add a wildcard * Type-A DNS record pointing to the private IP of the private endpoint:
This * DNS record covers all CelerData service domains, that is, all subdomains under privatelink.celerdata.com.
-
Navigate to the Private DNS zones service page, and click the private DNS zone you created for for CelerData's End-to-End Private Link service.
-
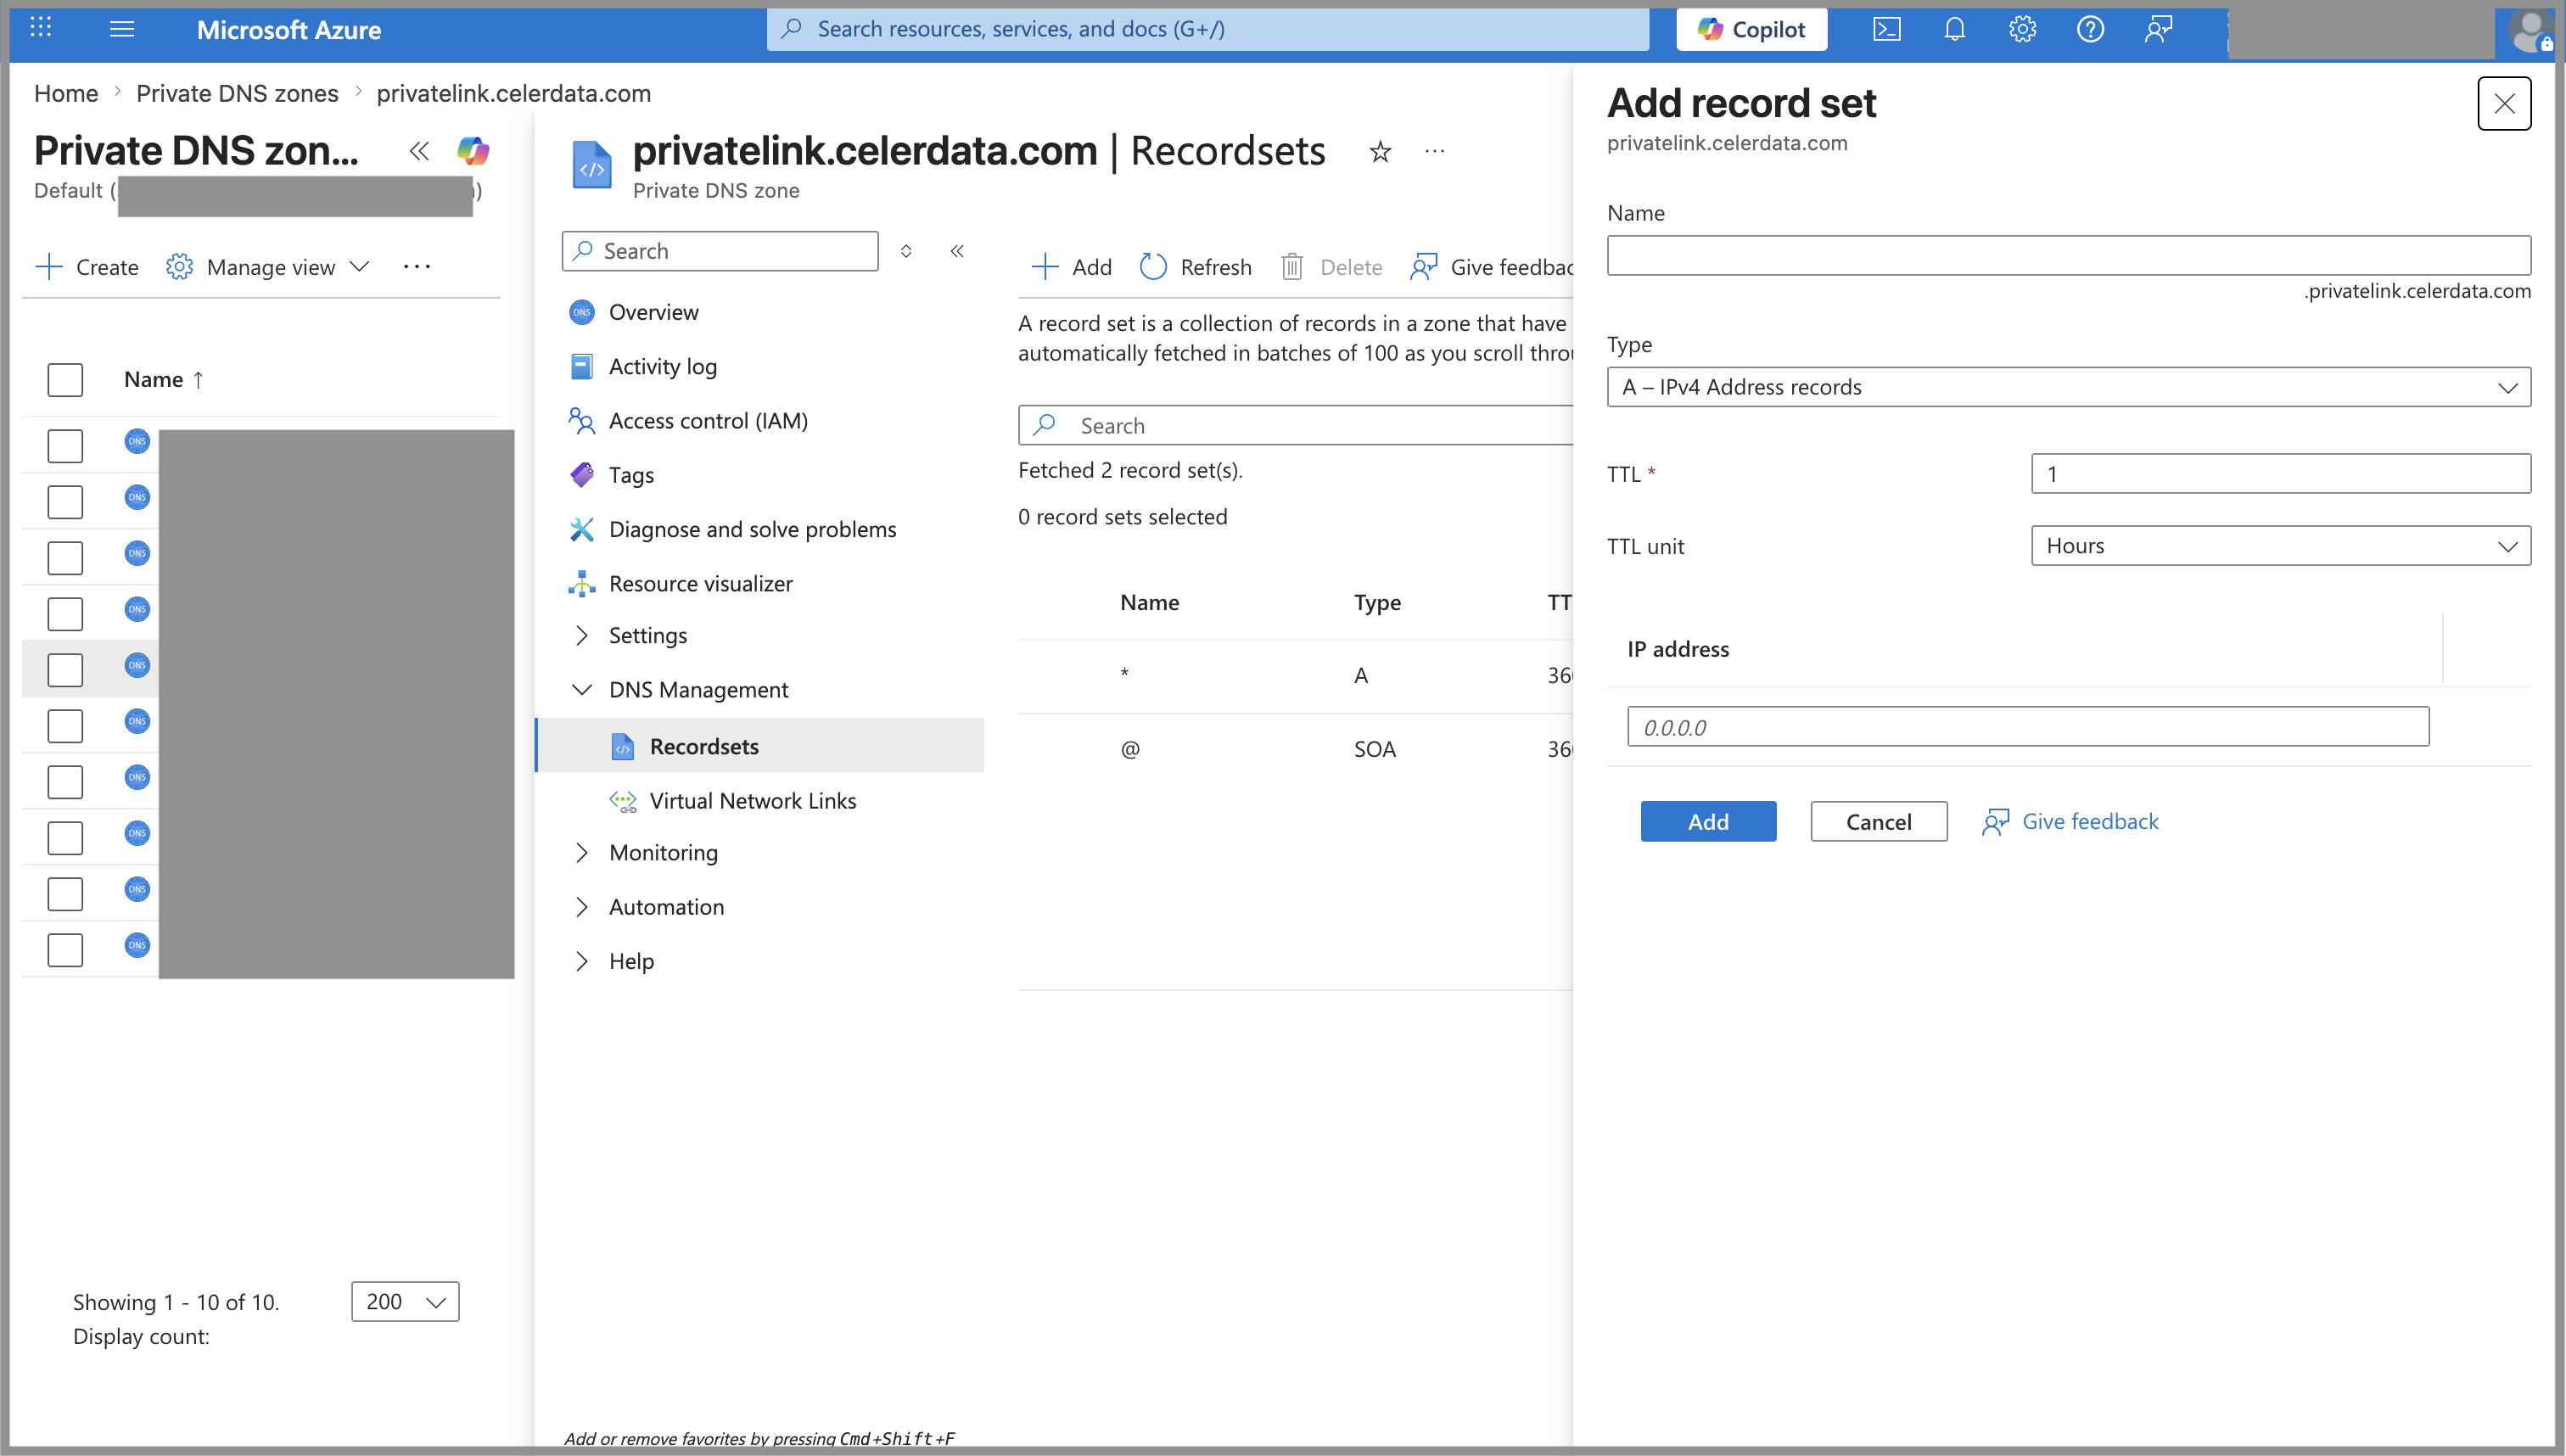
On the tab that appears, choose DNS Management -> Recordsets in the left-side pane, and click Add.
-
On the Add record set tab, configure as follows, and click Add:
a. In the Name field, enter
*as the name of the record.b. Select A - IPv4 Address Records from the Type drop-down list.
c. Paste the Private IP of the private endpoint you copied earlier to the IP Address field.
d. Leave the items that are not mentioned here unchanged.
Create a private endpoint for Azure storage account
You can skip this step if the subnet of your cluster can reach Azure Storage over the public endpoint.
Follow these steps to create an Azure private endpoint to allow virtual machines to access Azure storage account via private link:
-
Navigate to the Private Link service page, choose Private Link -> Private endpoints in the left-side pane, and click Create.
-
On the Basics tab of the Create a private endpoint page, configure as follows, and click Next: Resource.
a. Select your Microsoft subscription from the Subscription drop-down list.
b. Select the resource group you created for the CelerData cluster deployment from the Resource group drop-down list.
c. Enter a name for the private endpoint in the Name field.
d. Select a region for the private endpoint from the Region drop-down list.
-
On the Resource tab of the Create a private endpoint page, choose Connect to an Azure resource in my directory. for Connection method, select Microsoft.Storage/storageAccounts for Resource type, select the storage account you created for your Azure deployment for Resource, and select blob if you are using Azure Blob Storage, or dfs if you are using Azure Data Lake Storage Gen2. Then, click Next: Virtual Network.
-
On the Virtual Network tab of the Create a private endpoint page, select the virtual network and the subnet you created for the cluster in the Virtual network and Subnet fields, and choose Dynamically allocate IP address for Private IP configuration. Then, click Next: DNS.
-
On the DNS tab of the Create a private endpoint page, choose Yes for Integrate with private DNS zone.
-
Click Next: Tags, and then Next: Review + Create to skip these steps and review the information of the private endpoint you want to create. Then, click Create to confirm.
Appendix - Azure regions and Private Link Service ID
| Azure Region | Region ID | Private Link Service ID |
|---|---|---|
| West Europe (Netherlands) | westeurope | /subscriptions/ecbba6cc-ae29-4141-bc1a-d2464e682b90/resourceGroups/saas-prod-westeu/providers/Microsoft.Network/privateLinkServices/region-prod-westeurope-pls |
| Central US (Iowa) | centralus | /subscriptions/ecbba6cc-ae29-4141-bc1a-d2464e682b90/resourceGroups/saas-prod-centralus/providers/Microsoft.Network/privateLinkServices/region-prod-centralus-pls |
| UAE North (Dubai) | uaenorth | /subscriptions/ecbba6cc-ae29-4141-bc1a-d2464e682b90/resourceGroups/saas-prod-uaenorth/providers/Microsoft.Network/privateLinkServices/region-prod-uaenorth-pls |
| West US 2 (Washington) | westus2 | /subscriptions/ecbba6cc-ae29-4141-bc1a-d2464e682b90/resourceGroups/saas-prod-westus2/providers/Microsoft.Network/privateLinkServices/region-prod-westus2-pls |