Connect to an EC2 instance using SSH
You can connect via SSH to the Amazon EC2 instance that hosts your CelerData cluster.
Prerequisites
- Make sure that you can request port
22of the EC2 instance you want to connect to. You need to edit the inbound rule of the security group to allow access to port22and guarantee the network connection across the EC2 instance and the bastion host used to connect to the EC2 instance. - If you want to connect to the EC2 instance using EC2 Instance Connect, you must first install EC2 Instance Connect on the EC2 instance. Note that EC2 Instance Connect is installed by default on the EC2 instances launched with the Cloud AMI.
- If you want to connect to the EC2 instance using EC2 Instance Connect or an SSH client, you must select the key pair you created when you launched the EC2 instance.
Use EC2 Instance Connect
NOTE
This method only supports connecting to an EC2 instance that resides in a public subnet and has a public IP address.
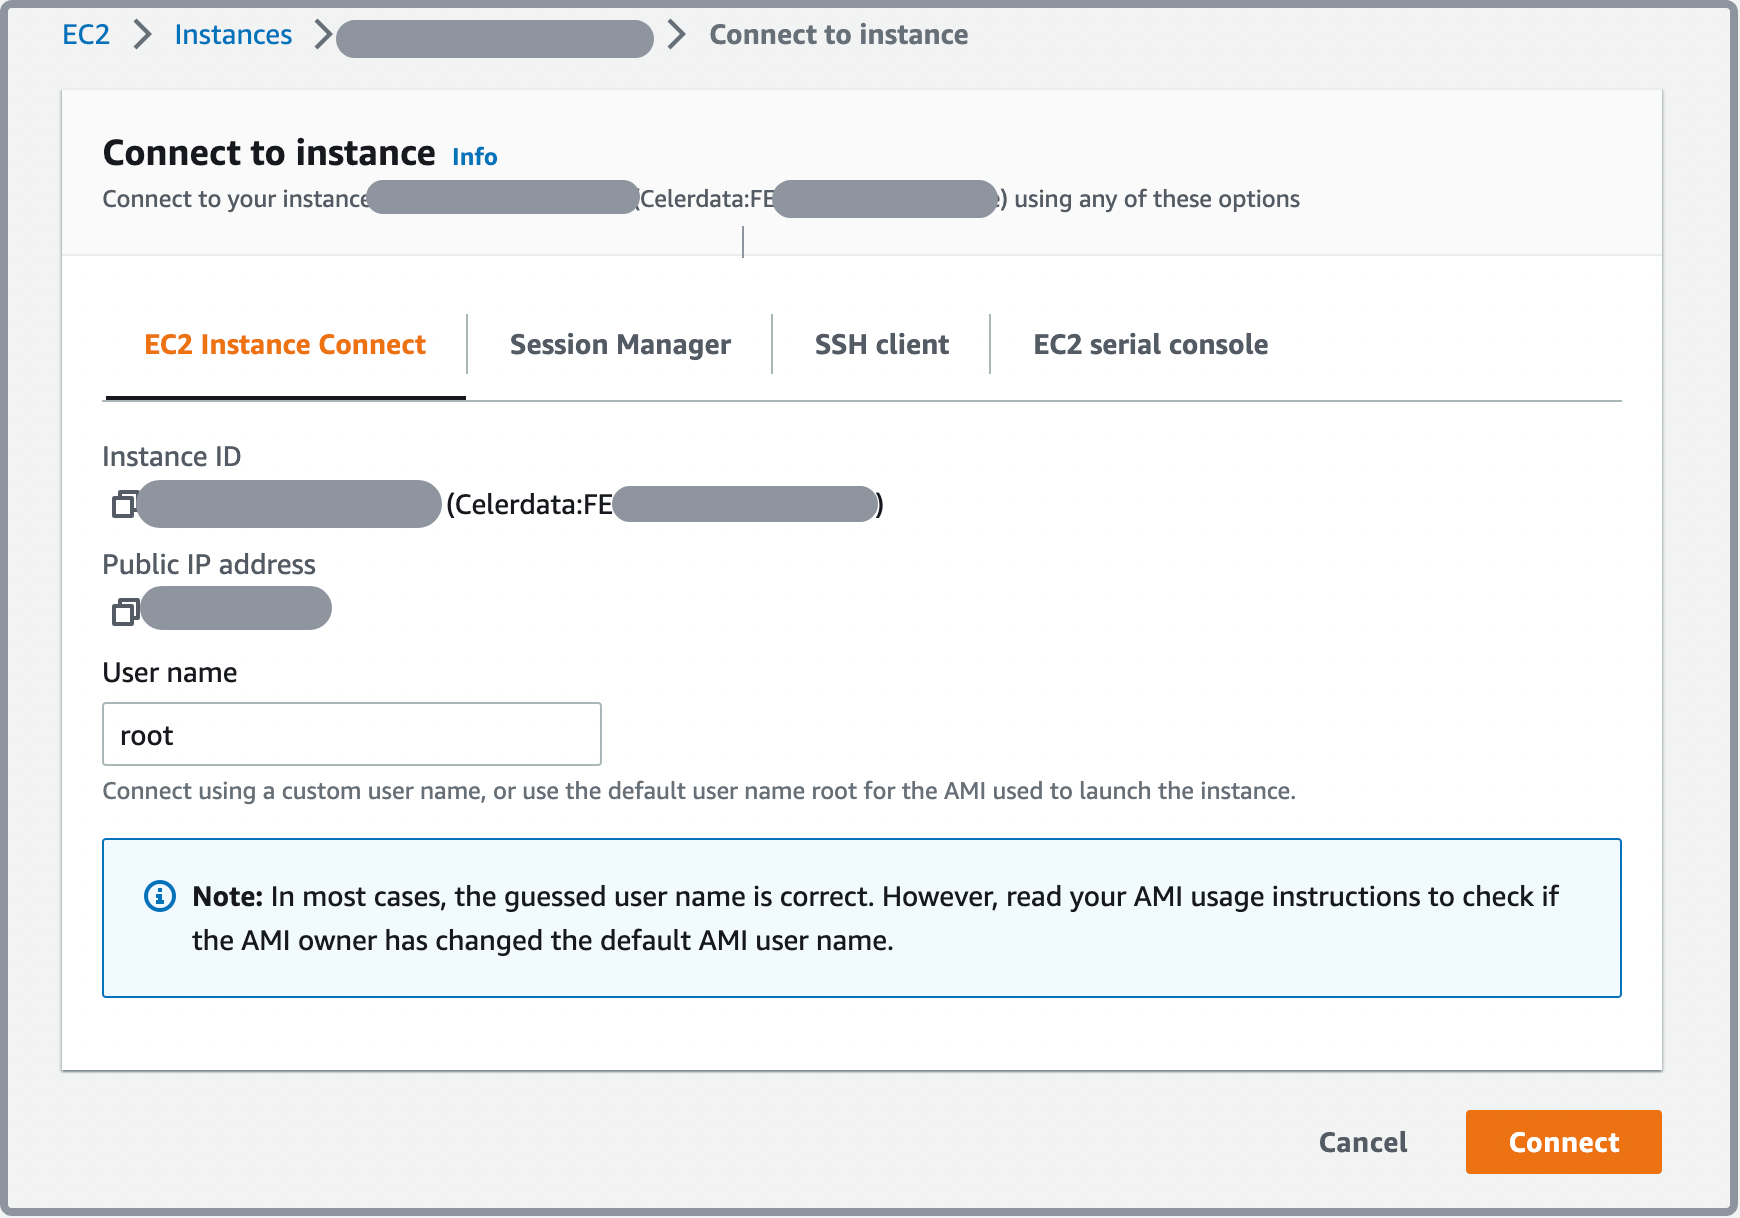
Follow these steps to connect to the EC2 instance using EC2 Instance Connect:
- Sign in to the AWS EC2 console as a user with administrator privileges.
- In the upper-right corner of the page, select your AWS region.
- In the left-side navigation pane, choose Instances > Instances.
- Click the Instance ID of the EC2 instance to which you want to connect.
- In the upper-right corner of the instance summary page, click Connect.
- On the EC2 Instance Connect tab, click Connect.

Use EC2 Instance Connect CLI
Follow these steps to connect to the EC2 instance using the EC2 Instance Connect CLI:
-
Create an IAM role for Amazon EC2 with the following template:
{
   "Version":"2012-10-17",
   "Statement":[
      {
         "Effect":"Allow",
         "Action":"ec2-instance-connect:SendSSHPublicKey",

         // Replace the <aws_region>, <aws_account-id>, and <ec2_instance_id> with the actual AWS region, account ID, and Instance ID.
         "Resource": "arn:aws:ec2:<aws_region>:<aws_account_id>:instance/<ec2_instance_id>",

         // You can optionally add a tag to limit the VPCs used to connect to the EC2 instance. You can also delete the `Condition` section if you do not need it.
         "Condition":{
            "StringEquals":{
               "aws:ResourceTag/tag-key":"<tag-value>"
            }
         }
      },
      {
        "Effect": "Allow",
        "Action": "ec2:DescribeInstances",
        "Resource": "*"
      }
   ]
}
See Create a service IAM role for EC2 for detailed instructions.
-
Build a bastion host and use the above IAM role as its role.
-
Install the EC2 Instance Connect CLI on the bastion host.
-
To install the EC2 Instance Connect CLI using Pip, run the following command:
pip install ec2instanceconnectcli -
To install the EC2 Instance Connect CLI using Pip3, run the following command:
pip3 install ec2instanceconnectcli
-
-
Run the following command to connect to the EC2 instance:
mssh <user_name>@<ec2_instance_id>This command consists of the following procedures:
- Generates an SSH public key for single use.
- Pushes the key to the EC2 instance (the key is reserved for 60 seconds).
- Connects to the EC2 instance via SSH.
Use an AWS client
Follow these steps to connect to the EC2 instance using an AWS client:
-
Create an IAM role for Amazon EC2 with the following template:
{
   "Version":"2012-10-17",
   "Statement":[
      {
         "Effect":"Allow",
         "Action":"ec2-instance-connect:SendSSHPublicKey",

         // Replace the <aws_region>, <aws_account-id>, and <ec2_instance_id> with the actual AWS region, account ID, and Instance ID.
         "Resource": "arn:aws:ec2:<aws_region>:<aws_account_id>:instance/<ec2_instance_id>",

         // You can optionally add a tag to limit the VPCs used to connect to the EC2 instance. You can also delete the `Condition` section if you do not need it.
         "Condition":{
            "StringEquals":{
               "aws:ResourceTag/tag-key":"<tag-value>"
            }
         }
      },
      {
        "Effect": "Allow",
        "Action": "ec2:DescribeInstances",
        "Resource": "*"
      }
   ]
}
See Create a service IAM role to grant access to an S3 bucket for detailed instructions.
-
Build a bastion host and use the above IAM role as its role.
-
Generate a public key on the bastion host and push the public key to the EC2 instance.
-
Run the following command to generate a public key:
ssh-keygen -t rsa -f my_key -
Run the following command to push the public key to the EC2 instance:
aws ec2-instance-connect send-ssh-public-key \
    --instance-id <ec2_instance_id> \
    --availability-zone <aws_region> \
    --instance-os-user <user_name> \
    --ssh-public-key file://my_key.pub
-
-
Run the following command to connect to the EC2 instance with the SSH private key:
ssh -i my_key <user_name>@<ec2_instance_ip>
Use an SSH client
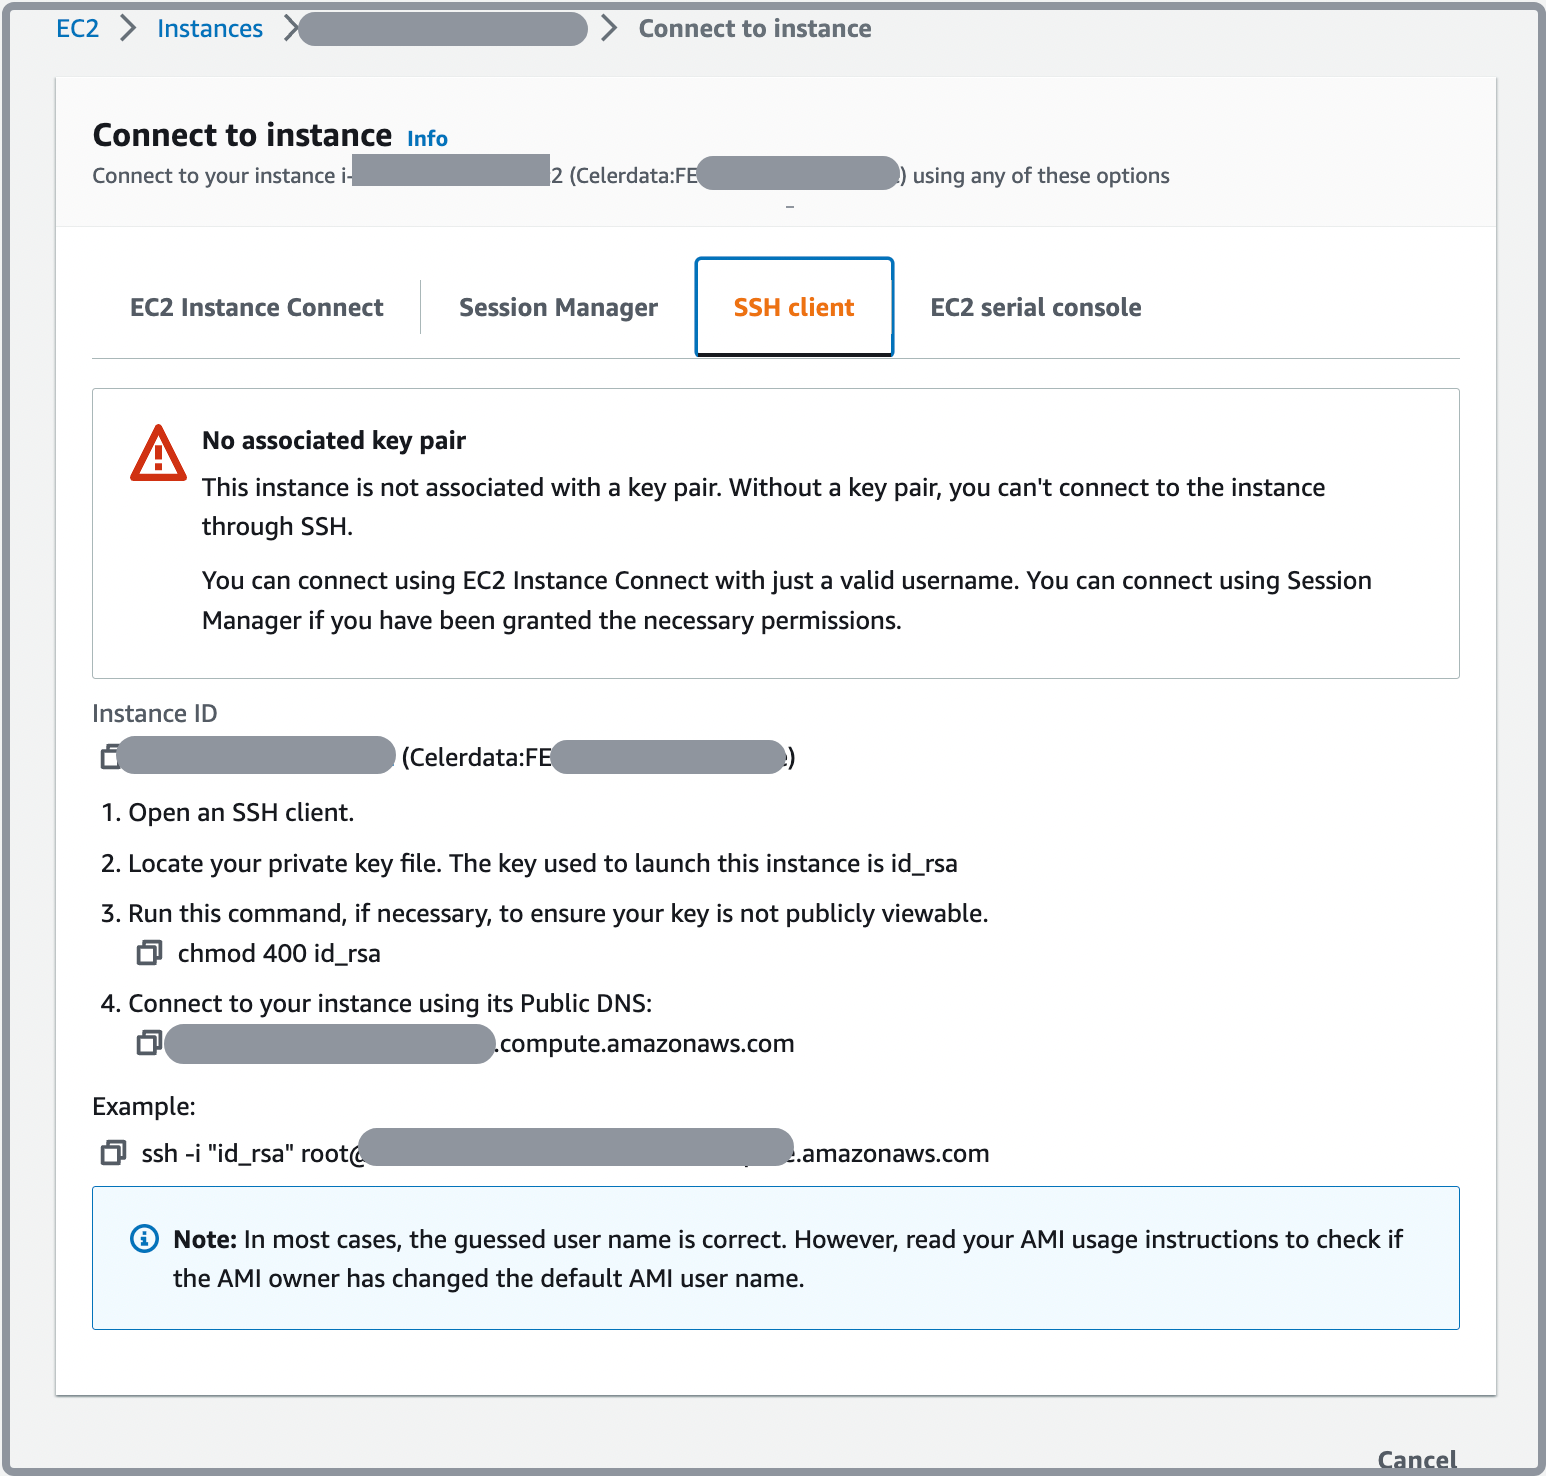
Follow these steps to connect to the EC2 instance using an SSH client:
- Sign in to the AWS EC2 console as a user with administrator privileges.
- In the upper-right corner of the page, select your AWS region.
- In the left-side navigation pane, choose Instances > Instances.
- Click the Instance ID of the EC2 instance to which you want to connect.
- In the upper-right corner of the instance summary page, click Connect.
- On the SSH client tab, follow the instructions that are displayed to connect to the EC2 instance.

Use SSM Agent
If you want to connect to an EC2 instance that resides in a private subnet, you can connect to it via AWS Systems Manager Agent (SSM Agent).
To connect via SSM Agent, you must first attach the necessary policy for SSM Agent to the IAM role which is used to deploy your CelerData cluster. For instructions on how to attach the policy, refer to Attach a policy for SSM Agent to the IAM role for EC2.
NOTE
If you have attached the policy to the IAM role of an existing CelerData cluster, you must first suspend and then resume the cluster to allow the policy to take effect on the instances that host your cluster.
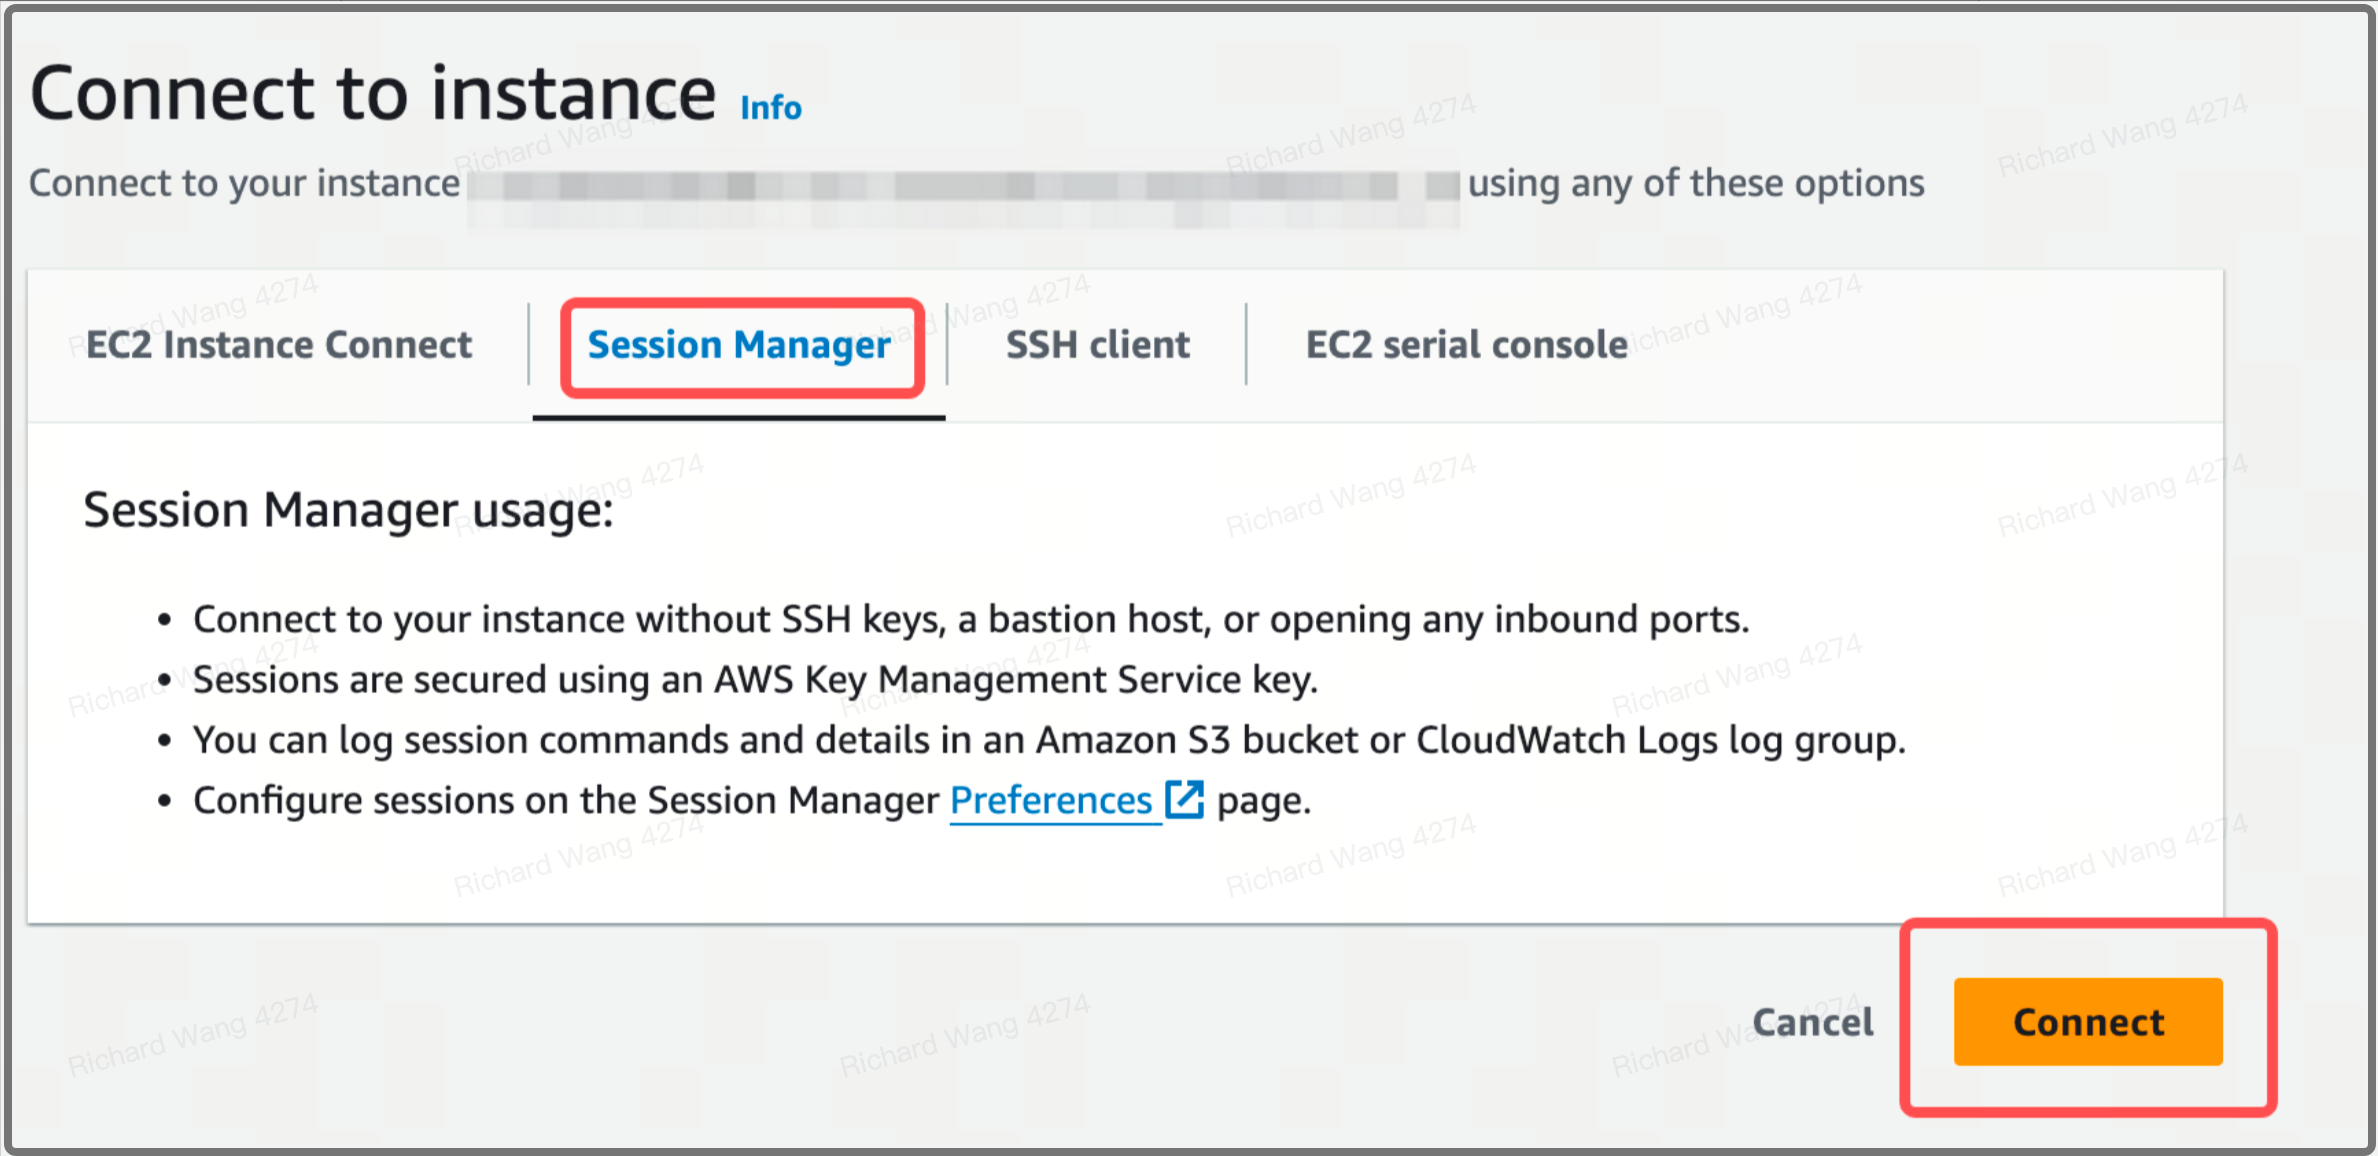
Follow these steps to connect to the instance using SSM Agent:
- Sign in to the AWS EC2 console as a user with administrator privileges.
- In the upper-right corner of the page, select your AWS region.
- In the left-side navigation pane, choose Instances > Instances.
- Click the Instance ID of the EC2 instance to which you want to connect.
- In the upper-right corner of the instance summary page, click Connect.
- On the Session Manager tab, click Connect.
