Create a VPC endpoint for connection
You can optionally create your own service powered by AWS PrivateLink, known as an endpoint service, to enable direct, secure connectivity between CelerData's VPC and your own VPC.
If you use a private subnet to create a new cluster, you must set the correct VPC Endpoint for connection.
To create a VPC endpoint, follow these steps:
-
Sign in to the Amazon VPC console as a user with administrator privileges.
-
In the upper-right corner of the page, select your AWS region.
-
In the left-side navigation pane, choose Endpoints.
-
On the Endpoints page, click Create endpoint.
-
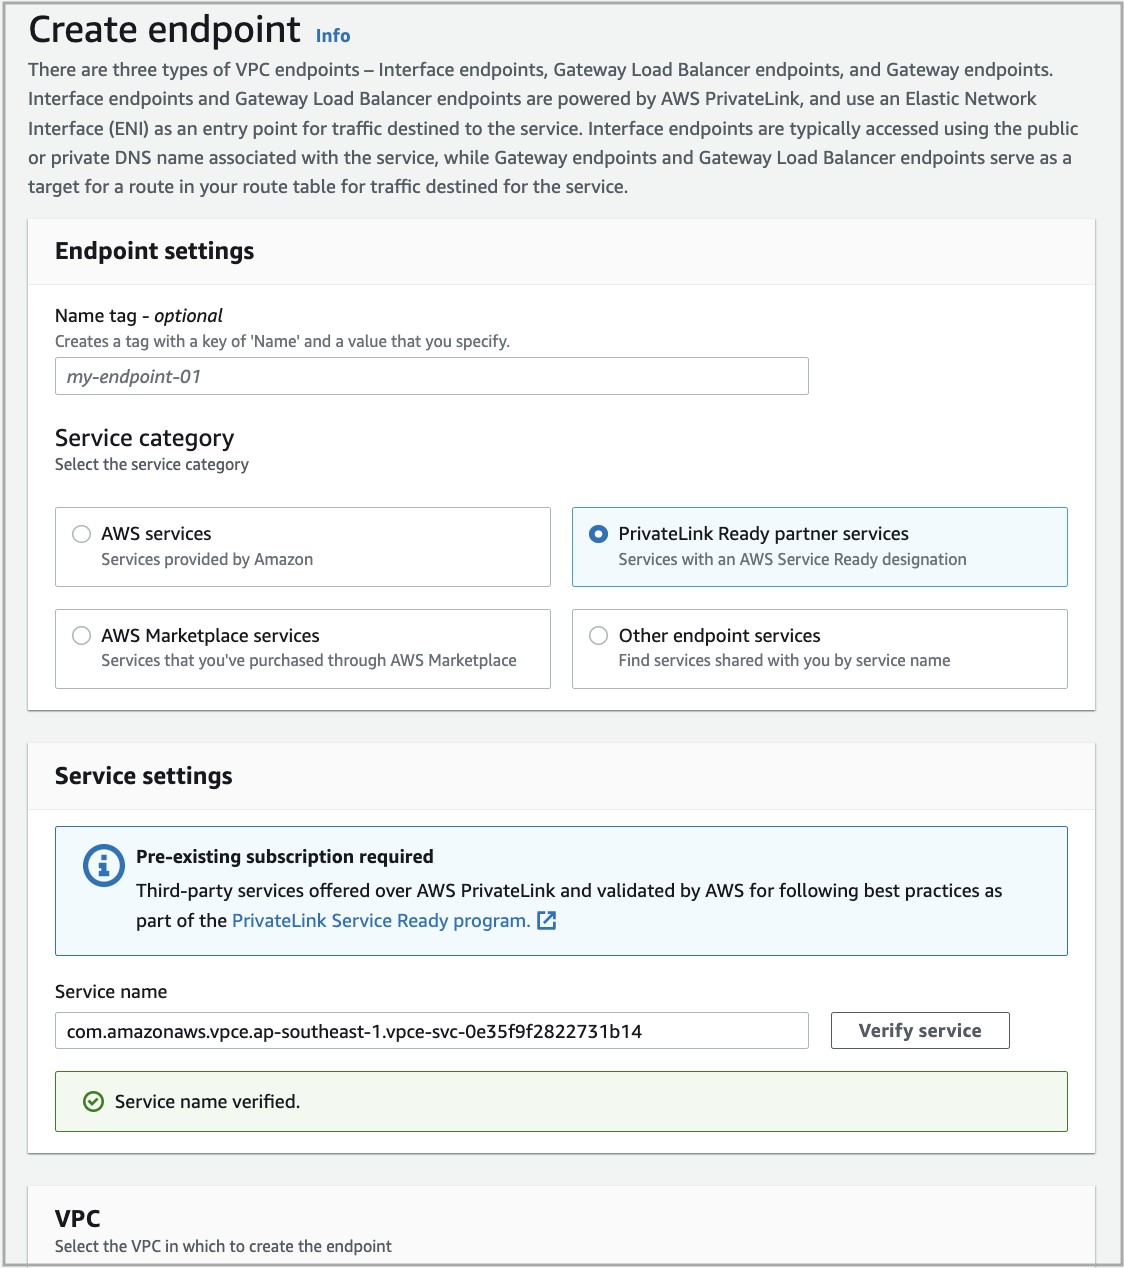
On the Create endpoint page, configure parameters as follows:
a. For Service category, select PrivateLink Ready partner services.
b. For Service name, enter the name of the service and click Verify service.
If the service passes the verification, a message "Service name verified." appears below the Service name field.
The service name varies depending on your selected AWS region. The following table lists the mapping between the supported AWS regions and service names.
AWS region Service name Asia Pacific (Hong Kong) com.amazonaws.vpce.ap-east-1.vpce-svc-01d5ad364fa26f671 Asia Pacific (Tokyo) com.amazonaws.vpce.ap-northeast-1.vpce-svc-000c581e54d978933 Asia Pacific (Singapore) com.amazonaws.vpce.ap-southeast-1.vpce-svc-02073213663648027 Asia Pacific (Sydney) com.amazonaws.vpce.ap-southeast-2.vpce-svc-0fef0660803733abc Canada (Central) com.amazonaws.vpce.ca-central-1.vpce-svc-0886e2360e7bd96cd Europe (Frankfurt) com.amazonaws.vpce.eu-central-1.vpce-svc-0801f72f69ecce8f6 Europe (Ireland) com.amazonaws.vpce.eu-west-1.vpce-svc-0f9762378a10cb070 Middle East (UAE) com.amazonaws.vpce.me-central-1.vpce-svc-0cbd1a818634fb66b South America (São Paulo) com.amazonaws.vpce.sa-east-1.vpce-svc-05c6512b39739c9fd US East (N. Virginia) com.amazonaws.vpce.us-east-1.vpce-svc-0d1c58972a96cb283 US East (Ohio) com.amazonaws.vpce.us-east-2.vpce-svc-055e7728a2dc01894 US West (N. California) com.amazonaws.vpce.us-west-1.vpce-svc-0d9b036f5a57d4644 US West (Oregon) com.amazonaws.vpce.us-west-2.vpce-svc-0ebb0a9d5920299ad 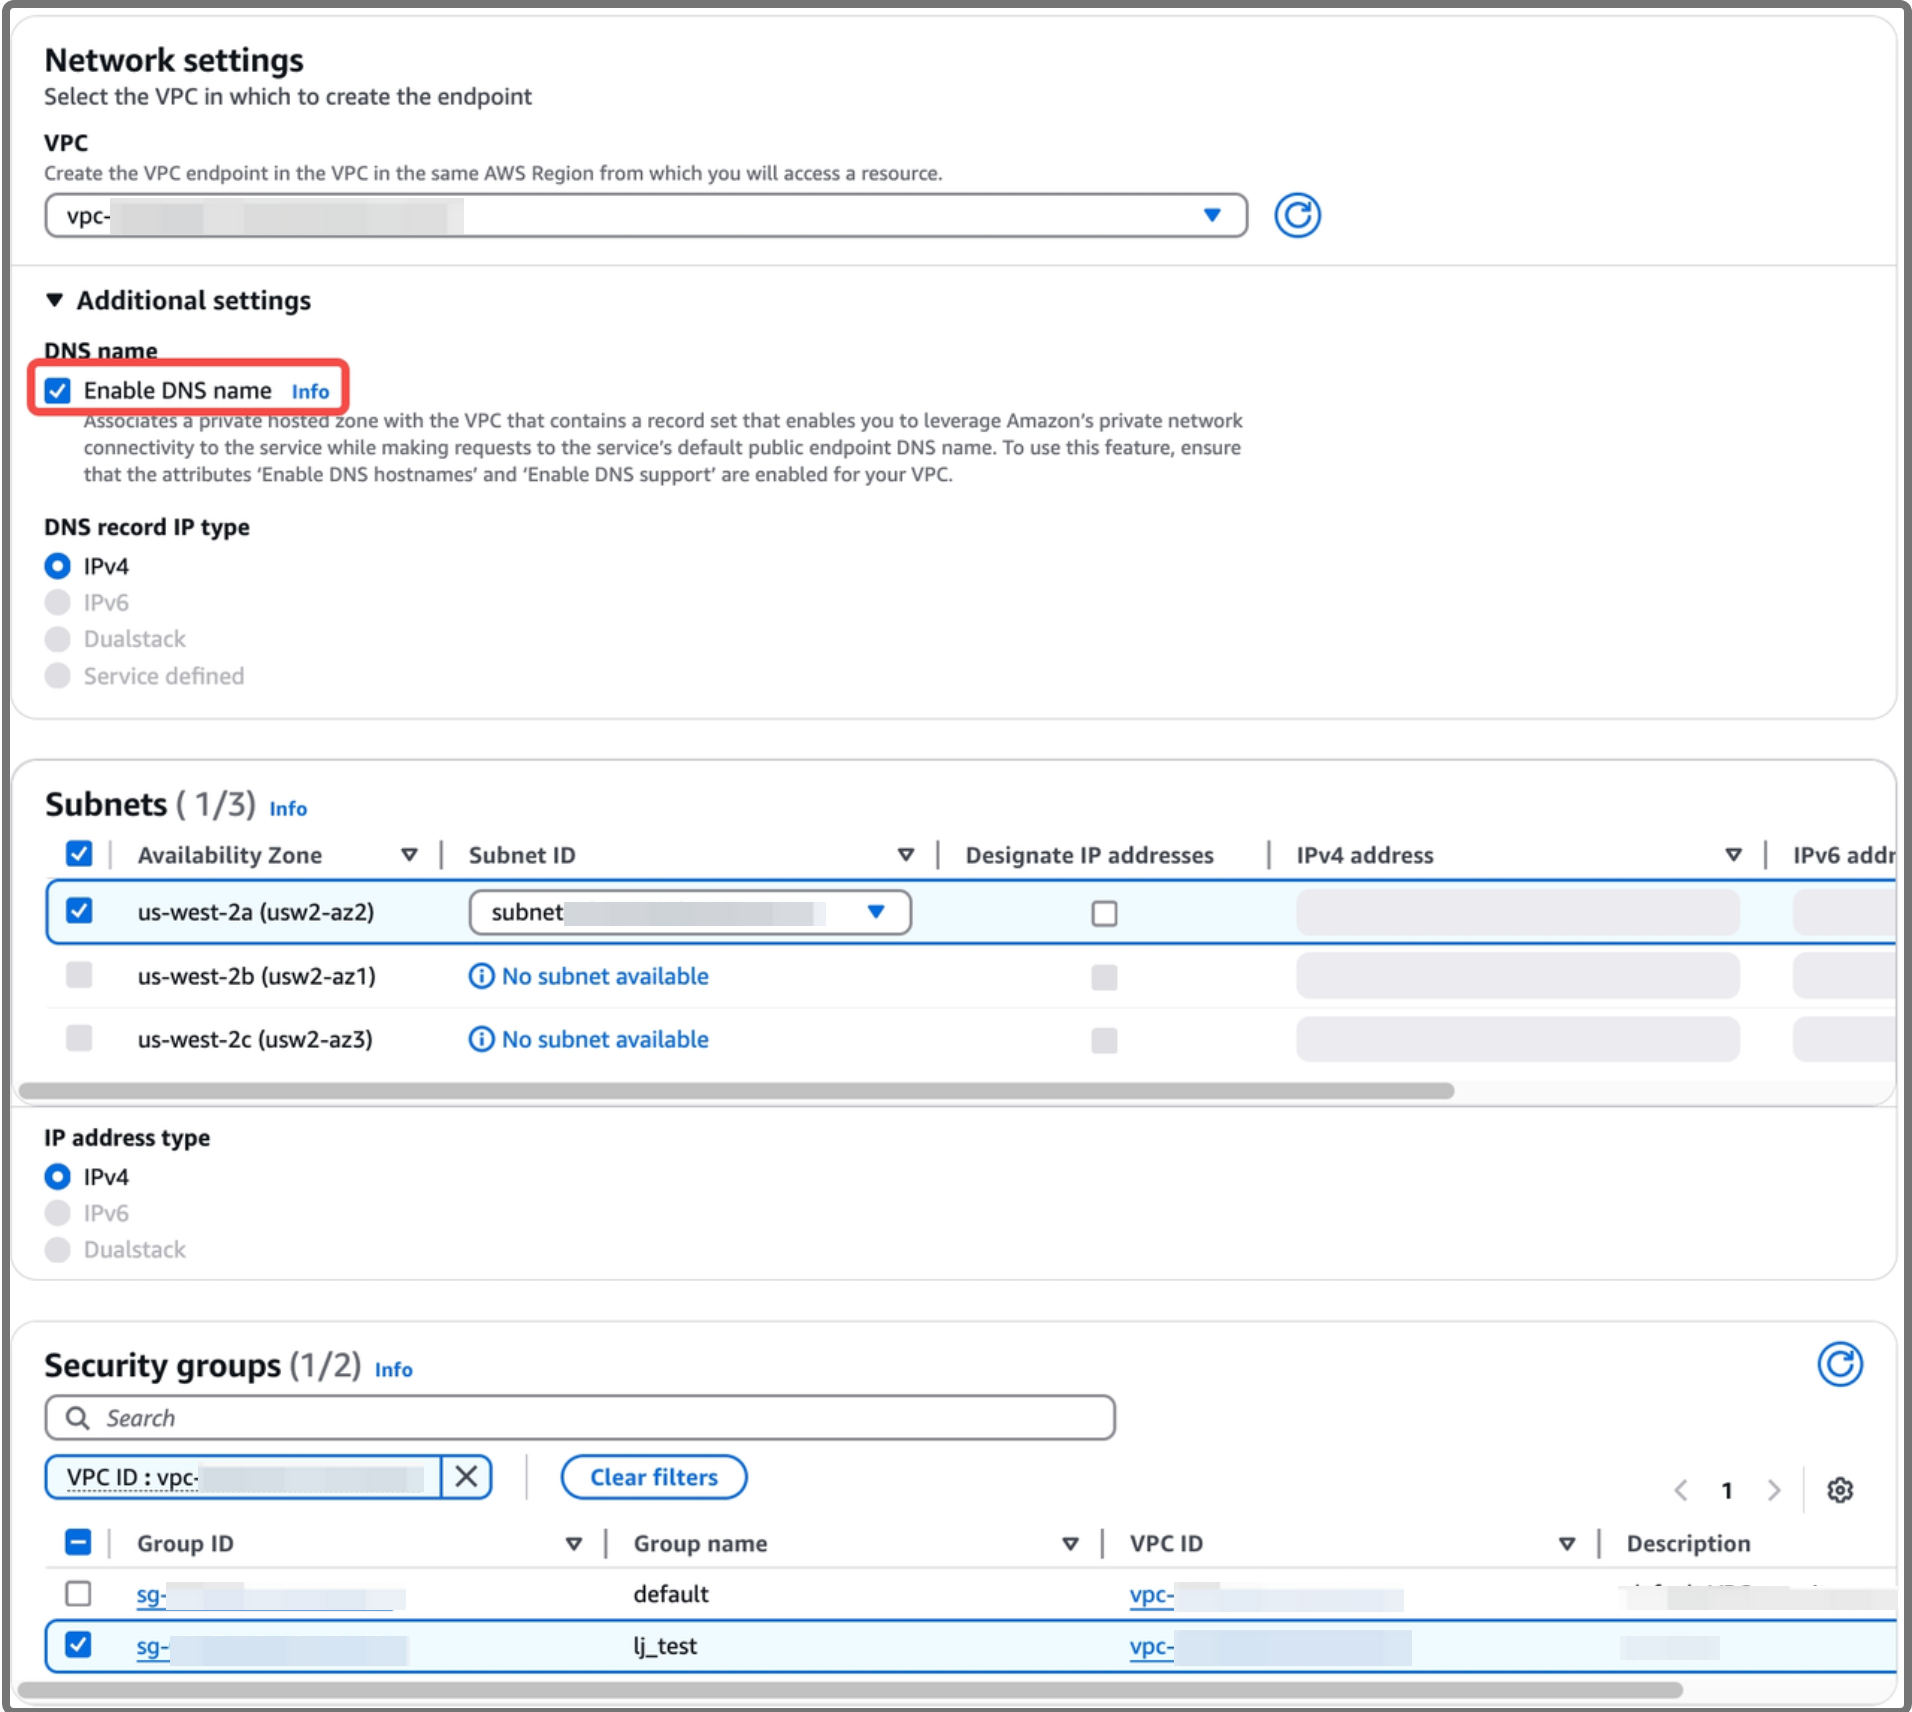
c. For VPC, select the VPC that you have selected in the previous steps. In Additional settings, select Enable DNS name in the DNS name section.
After you select a VPC, Subnets and Security groups appear.
d. For Subnets, select the availability zone, and then select the private subnet that you have selected from your selected VPC.
If you have enabled the Multiple Availability Zone deployment for your cluster, please select the availability zones and subnets for the VPC Endpoint as you set for your CelerData cluster.
e. For Security groups, select the security group that you have created in your selected VPC.
You can also select a different security group with that for you CelerData cluster for fine-granular security. However, you must make sure the inbound and outbound rules are correctly set for both security groups of the VPC Endpoint and your CelerData cluster. See Create a security group for VPC Endpoint for detailed instructions on creating a security group for VPC Endpoint, and see Security groups and inbound and outbound rules for AWS deployment for the detailed design of security groups and inbound & outbound rules.
-
After all the preceding parameters are configured, click Create endpoint.
You are directed to the Endpoints page, which displays the VPC endpoint you just created.
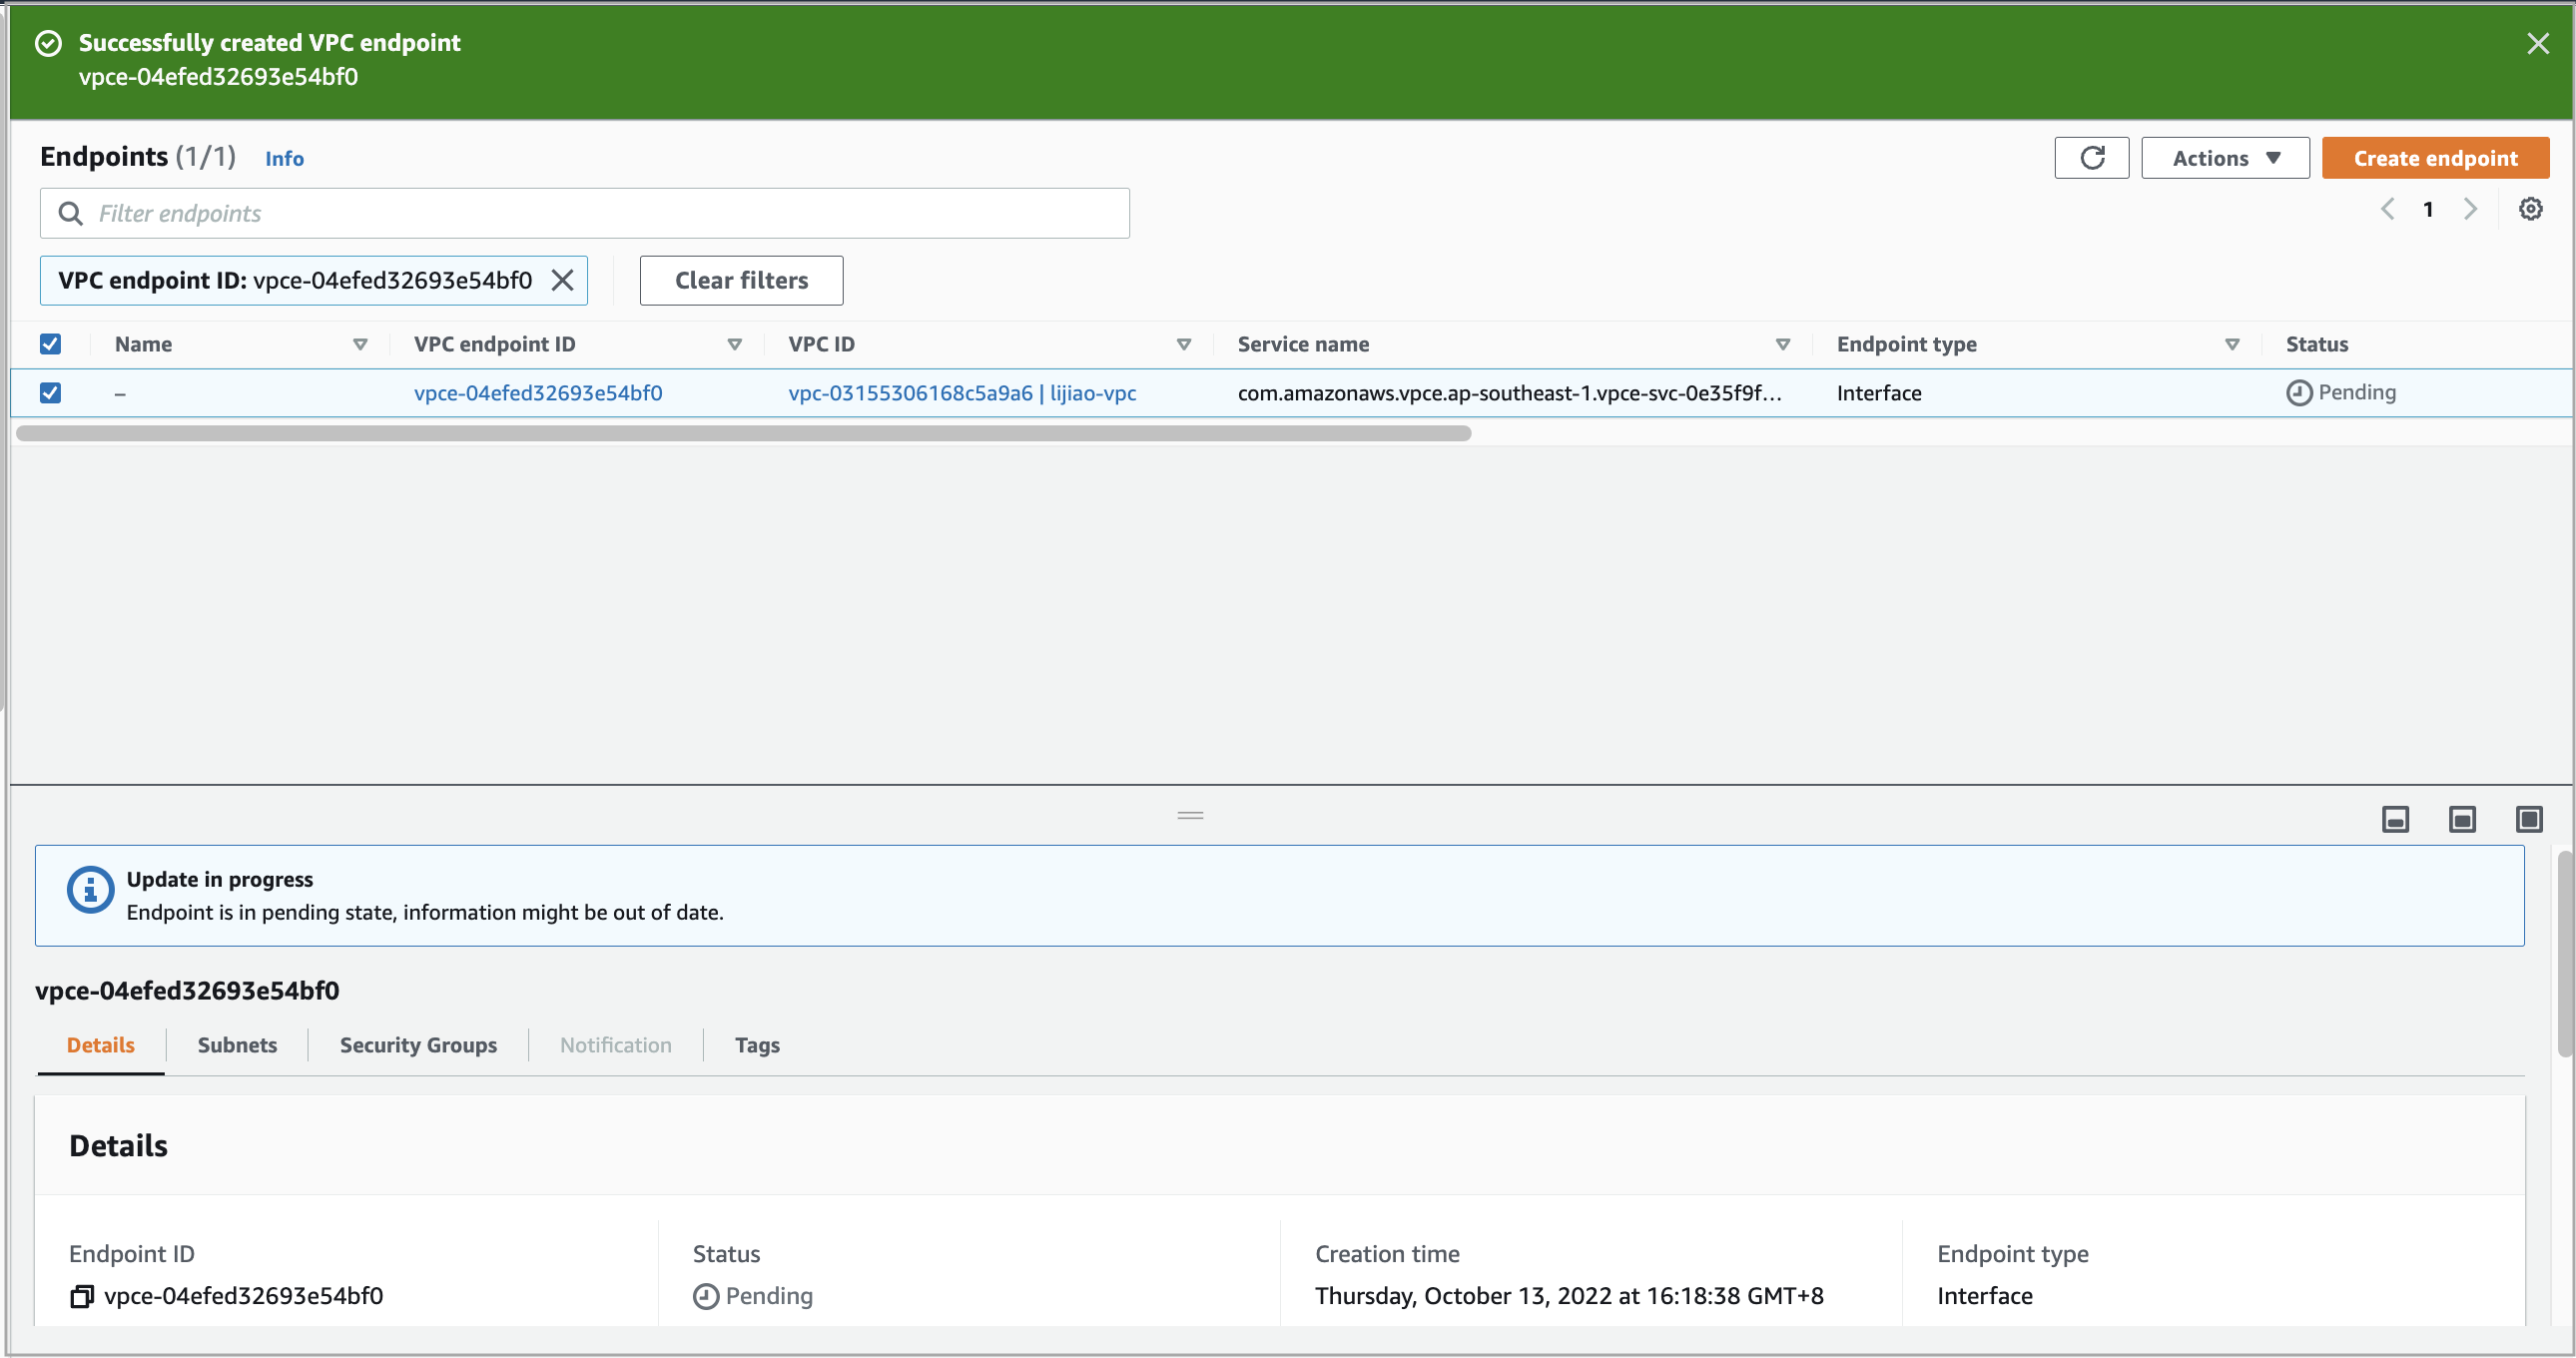
Wait until the Status of the VPC endpoint changes to Available.
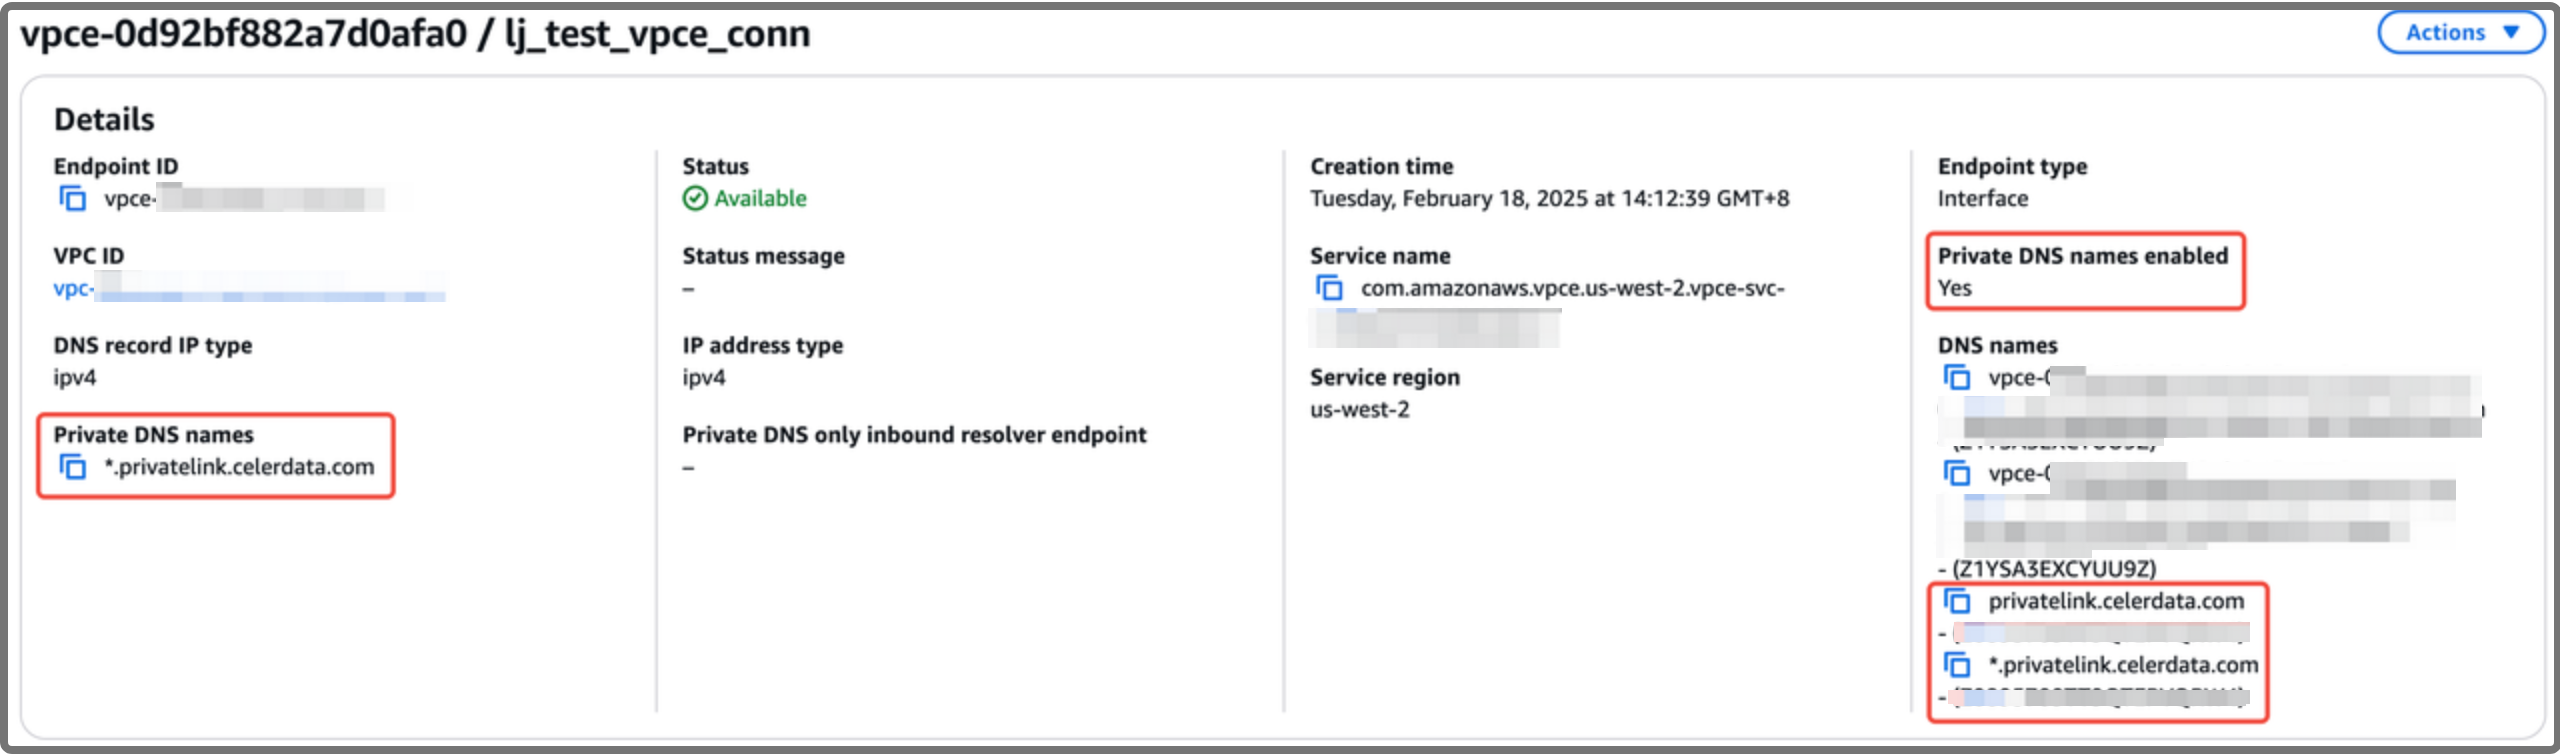
Because you have enabled DNS name, you will see that Private DNS names enabled is Yes, and there are DNS names prefixed by
privatelink.celerdata.comin the DNS names section.